Quantcast
Channel: o365info
Viewing all 370 articles
Browse latest View live

How to use the export mailbox migration information and troubleshooting PowerShell script | Part 5#5 5/5 (4)

$
0
0
In the following article, we review how to use the “Export mailbox migration information and troubleshooting” PowerShell script.

The PowerShell script structure

The menu PowerShell script is dived to couple of sections that we will review later in the article.

The PowerShell script was designed to work in two different environments: Office 365 (Exchange Online) and on-Premises environment that include On-Premise Active Directory and Exchange on-Premises.

  • The part that marked as “A” in the screenshot, include the menu options that relates to the Exchange Online infrastructure.
  • The part that marked as “B” in the screenshot, include the menu options that relates to the On-Premise environment.

Export mailbox migration information and troubleshooting PowerShell script – structure -01

Menu 1 – Login to Exchange Online using Remote PowerShell

This menu option will start a remote PowerShell session with Exchange Online.

Login to Exchange Online using Remote PowerShell -01

You will need to provide your Office 365 Global Administrator credentials.

Login to Exchange Online using Remote PowerShell -02

SECTION A: Export mail migration information

The PowerShell menu options in this section, will export information about the various mailbox migration “entities” in a bulk mode.

For example, in case that you run multiple mail migration batches, the below menu options, will export information about ALL the existing migration batched, all migration users, all move requests and so on.

Exported file information

  • The information will be exported to the following file formats: TXT, CSV, HTML and XML.
  • The PowerShell script will automatically create the following folder structure C:\INFO\Mail migration Logs\A-BULK which will contain the exported files.

Menu 2 – Export information about – ALL Migration batches + EndPoints (Bulk Mode)

This menu option, export information about all existing Migration batches + All existing + EndPoints.

The PowerShell commands that are executed by the menu option are:

  • Get-MigrationBatch -IncludeReport -Diagnostic
  • Get-MigrationBatch

Menu 3 – Export information about – ALL Move requests (Bulk Mode)

To demonstrate the process of exporting information to various file type, we use “menu 3” as an example (all the rest of the menu option that export data to file operate in the same manner).

This menu option, export information about all existing move requests + move request statistics.

The PowerShell commands that are executed by the menu option are:

  • Get-MoveRequest
  • Get-MoveRequestStatistics

Menu 3 - Export information about - ALL Move requests -Bulk Mode -01

When we type “3” and “ENTER”, the menu option will automatically start to collect the required information and export the information to various file type.

In the following screenshot, we can see the different information “parts” that appear on the PowerShell console.

  • Part 1 – this part is use for, providing a short explanation about what is the specific PowerShell menu option “do”.
  • Part 2 – this part is use for providing information about – the folder hierarchy that will be created by the PowerShell command. This folder will use for storing the exported files.
  • Part 3 – this part is use for providing information about – the PowerShell command that are executed by the menu option.
  • Part 4 – this part is use for displaying information about the folders that are created by the PowerShell menu option.

Menu 3 - Export information about - ALL Move requests -Bulk Mode -02

In the following screenshot, we can see the folder structure that was created. In our scenario, the information about the move requests is stored in two different
folders: “3. MoveRequest” and “4. MigrationStatistics“.

Menu 3 - Export information about - ALL Move requests -Bulk Mode -03

The information about the Move Requests was exported to three different file formats: TXT, CSV, and HTML.

Menu 3 - Export information about - ALL Move requests -Bulk Mode -04

In the following screenshot, we can see an example of the HTML report that includes information about all existing Move Requests.

Menu 3 - Export information about - ALL Move requests -Bulk Mode -05

In the following screenshot, we can see an example of the HTML report that is stored in the second Directory – “4. MigrationStatistics“, that include information about all existing Move Requests Statistics.

Menu 3 - Export information about - ALL Move requests -Bulk Mode -06

In the following screenshot, we can see an example of the CSV file that includes information about all existing Move Requests.

Menu 3 - Export information about - ALL Move requests -Bulk Mode -07

Menu 4 – Export information about – ALL Migration users (Bulk Mode)

This menu option, export information about all existing migration users + existing migration user’s statistics.

The PowerShell commands that are executed by the menu option are:

  • Get-MigrationUser
  • Get-MigrationUserStatistics -IncludeReport -Diagnostic -IncludeSkippedItems

SECTION B: Export mail migration information – Specific USER

Menu 5 – Export mail migration information for a Specific Migrated USER

The purpose of this menu option is, to get a detailed report about specific “migrated user account”.

The PowerShell commands that are executed by the menu option are:

  • Get-MigrationUser <User>
  • Get-MigrationUserStatistics -IncludeReport -Diagnostic -IncludeSkippedItems <User>
  • Get-MoveRequest <User>
  • Get-MoveRequestStatistics <User>

Exported file information

  • The information will be exported to the following file formats: TXT, XML and HTML
  • The files will be saved in the following path: C:\INFO\Mail migration Logs\B- Migration Users\<User Name>

SECTION C: Export mail migration information Specific migration batch

Menu 6 – Export mail migration information Specific migration batch

The purpose of this menu option is, to get a detailed report about specific “migration batch”.

The PowerShell commands that are executed by the menu option are:

  • Get-MigrationBatch <Migration BATCH name> -IncludeReport -Diagnostic
  • Get-MigrationUser

Exported file information

  • The information will be exported to the following file formats: TXT, XML and HTML
  • The files will be saved in the following path: C:\INFO\Mail migration Logs\C- Migration Batch Information – <Migration BATCH name>

SECTION D: On-Premise Environment

This menu section is dedicated to the on-Premises environment.

In some scenario of troubleshooting mail migration from on-Premises infrastructure, we need to get information about “on-Premises objects” such as On-Premise Active Directory user accounts and Exchange on-Premises mailboxes.

Menu 7 – Export information about On-Premise Active Directory Specific user account

The PowerShell command that are executed by the menu option IS:

Get-Aduser <On-Premise Active Directory user name> -Properties *

Exported file information

  • The information will be exported to the following file formats: TXT, XML and HTML
  • The files will be saved in the following path: C:\INFO\D. On-Premise information\1.On-Premise Active Directory
Note – the following PowerShell command, should be executed from the On-Premise environment, using a Domain controller server or a server that include Active Directory PowerShell cmdlets.

Menu 8 – Export information about Exchange on-Premises mailboxes

The PowerShell commands that are executed by the menu option are:

  • Get-Mailbox <Recipient name>
  • Get-MailboxStatistics <Recipient name>

Exported file information

  • The information will be exported to the following file formats: TXT, XML and HTML
  • The files will be saved in the following path: C:\INFO\D. On-Premise information\2.Exchange on-Premises
Note – the following PowerShell command, should be executed from the On-Premise environment, using an Exchange on-Premises PowerShell.

SECTION E: Exchange on-Premises tasks

The following section is dedicated to “troubleshooting procedure” that relate to the Exchange on-Premises infrastructure

Menu 9 – Test the Exchange on-Premises MRS Proxy service

Get-WebServicesVirtualDirectory <Exchange on-Premises server name>\*” | Format-List Identity,MRSProxyEnabled ,InternalAuthenticationMethods,ExternalAuthenticationMethods,InternalUrl,ExternalUrl

Test-MRSHealth <Exchange on-Premises server name>

Menu 10 – Run mailbox repair

This menu option will run MailboxRepairRequest for a specific mailbox

New-MailboxRepairRequest -Mailbox <Exchange on-Premises mailbox> -CorruptionType ProvisionedFolder,SearchFolder,AggregateCounts,Folderview

Menu 11 – Copy IIS log files

Exported file information

  • The information will be exported to the following file formats: TXT,
  • The files will be saved in the following path: C:\INFO\Exchange on-Premises information\IIS Log files


For your convenience, I have “Wrapped” all the PowerShell commands that were reviewed in the article,
in a “Menu Based” PowerShell Script.

You are welcome to download the PowerShell script and use it.
Download -o365info PowerShell Script

Using PowerShell for view and export information about mailbox migration to Office 365 5/5 (4)
In case you want to get more detailed information about how to use the o365info menu PowerShell script, you can read the following article

Now it’s Your Turn!
It is important for us to know your opinion on this article

Restore Exchange Online mailbox | Article series index

Please rate this

The post How to use the export mailbox migration information and troubleshooting PowerShell script | Part 5#5 5/5 (4) appeared first on o365info.com.


Using PowerShell for view and export information about mailbox migration to Office 365 | Part 3#5 5/5 (2)

$
0
0

In the current article and the next article, we review the various PowerShell cmdlets that we can use for viewing and export information about the process of Exchange mailbox migration process.

The “mailbox migration” PowerShell commands that we review in this article are:

  • Get-MigrationBatch
  • Get-MoveRequest
  • Get-MoveRequestStatistics

1. Migration batches | Get-MigrationBatch

The term – “Migration Batch”, define an entity that serve as a “logical container”, that contain the mailboxes (and their associated users), that we migrate from the source Exchange server to the destination Exchange server (Exchange Online in our scenario).

Get information about specific migration batch

PowerShell command syntax

Get-MigrationBatch -Identity <Migration BATCH name>

PowerShell console output example

PS C:\> Get-MigrationBatch "Eyal Migration batch -001" |fl 


RunspaceId                 : 2771b392-d73b-4639-b63d-f4646c49c0af
Identity                   : Eyal Migration batch -001
Status                     : Completed
State                      : Completed
Flags                      : None
WorkflowStage              : Processing
TriggeredAction            : None
BatchGuid                  : fb2529fe-b9bf-446a-accd-3819e6bef03c
TotalCount                 : 2
ActiveCount                : 0
StoppedCount               : 0
SyncedCount                : 0
FinalizedCount             : 2
FailedCount                : 0
FailedInitialSyncCount     : 0
FailedIncrementalSyncCount : 0
CompletedWithWarningCount  : 0
PendingCount               : 0
ProvisionedCount           : 0
ValidationWarningCount     : 0
ValidationWarnings         : {}
Message                    : 
CreationDateTime           : 2/23/2017 10:41:09 AM
CreationDateTimeUTC        : 2/23/2017 8:41:09 AM
StartDateTime              : 2/23/2017 10:41:09 AM
StartDateTimeUTC           : 2/23/2017 8:41:09 AM
InitialSyncDateTime        : 
InitialSyncDateTimeUTC     : 
InitialSyncDuration        : 
LastSyncedDateTime         : 2/23/2017 10:47:28 AM
LastSyncedDateTimeUTC      : 2/23/2017 8:47:28 AM
FinalizedDateTime          : 
FinalizedDateTimeUTC       : 
SubmittedByUser            : Eyal@o365info.com
OwnerId                    : EURPR05A001.prod.outlook.com/Microsoft Exchange Hosted Organizations/o365info2.onmicrosoft.com/Eyal
OwnerExchangeObjectId      : 7646f17d-bf1f-4e07-8698-4e71ab4dad80
NotificationEmails         : {Eyal@o365info.com}
ExcludedFolders            : {}
MigrationType              : ExchangeRemoteMove
BatchDirection             : Onboarding
Locale                     : en-US
Reports                    : {When migration report was created:2/23/2017 9:19:17 AM; Migration report URL:https://outlook.office365.com/ecp/Migration/DownloadReport.aspx?HandlerClass=
                             MigrationReportHandler&Name=MigrationReport.csv&DelegatedOrg=o365info2.onmicrosoft.com&realm=o365info2.onmicrosoft.com&exsvurl=1&Identity=RgAAAAAKqOiME1CMQ
                             LkjirbMEluxBwCuLv0wEUQXTp3grhMeQsz8AAAh0Mi_AACuLv0wEUQXTp3grhMeQsz8AAN-JngxAAAJ; Error report URL:}
IsProvisioning             : False
BatchFlags                 : ReportInitial
WorkflowControlFlags       : None
AutoRetryCount             : 0
CurrentRetryCount          : 0
AllowUnknownColumnsInCsv   : False
DiagnosticInfo             : 
SupportedActions           : Remove
SourceEndpoint             : mail.o365info.com
TargetEndpoint             : 
SourcePublicFolderDatabase : 
TargetDatabases            : {}
TargetArchiveDatabases     : {}
TargetDAGs                 : {}
BadItemLimit               : 10
LargeItemLimit             : 0
MoveOptions                : {}
SkipMoving                 : {}
SkipMerging                : {}
InternalFlags              : {}
PrimaryOnly                : False
ArchiveOnly                : False
TargetDeliveryDomain       : o365info2.mail.onmicrosoft.com
SkipSteps                  : None
Workflow                   : Steps: [(Injection), (Processing)]
WorkflowTemplate           : 
Report                     : 
StartAfter                 : 
StartAfterUTC              : 
CompleteAfter              : 
CompleteAfterUTC           : 
IsValid                    : True
ObjectState                : Unchanged

Export detailed information about specific migration batch | TXT file

Get-MigrationBatch -Identity migration-003 -IncludeReport -Diagnostic | Format-List | Out-File c:\temp\"Get-MigrationBatch-IncludeReport-Diagnostic.txt" -Encoding UTF8

Export detailed information about ALL migration batches

Export information to TXT file

Get-MigrationBatch -IncludeReport -Diagnostic | Format-List | Out-File c:\temp\"ALL Migration -Get-MigrationBatch-IncludeReport-Diagnostic.txt" -Encoding UTF8

Export information to XML file

Get-MigrationBatch -IncludeReport -Diagnostic | Export-Clixml
c:\temp\"ALL Migration Get-MigrationBatch-IncludeReport-Diagnostic.xml" -Encoding UTF8

Migration batch status

Using the “Status” parameter, we can get information about existing migration batch that has a specific “Status”.

The migration batch type of “Statuses” value could be as follow:

  • Completed
  • CompletedWithErrors
  • Completing
  • Corrupted
  • Created
  • Failed
  • IncrementalSyncing
  • Removing
  • Starting
  • Stopped
  • Syncing
  • Stopping
  • Synced
  • SyncedwithErrors
  • Waiting

To view a migration batch with a specific status, we can use the following PowerShell syntax

Display all migration batch with status such as “Completed”

PowerShell command example

Get-MigrationBatch -Status Completed

PowerShell console output example

PS C:\> Get-MigrationBatch -Status Completed 

Identity                  Status    Type               TotalCount
--------                  ------    ----               ----------
Eyal Migration batch -001 Completed ExchangeRemoteMove 2         
Eyal Migration batch -002 Completed ExchangeRemoteMove 2

Export information about all migration batch with the status “Not Completed” | TXT file

PowerShell command example

Get-MigrationBatch | Where {$_.status -ne ”Completed”} | Get-MoveRequestStatistics | Format-List | Out-File c:\temp\"Get-MigrationBatch Not Completed.txt" -Encoding UTF8

3. Move requests

The term – “Move request”, define the Exchange mailbox that we migrate from the “source Exchange server” to the “destination Exchange server”.

The two PowerShell cmdlets that we use for getting information about the move requests of the “mailbox entity” are:

  • Get-MoveRequest
  • Get-MoveRequestStatistics

2. Using the Get-MoveRequest command

The PowerShell command Get-MoveRequest, get a basic information about a property of a specific mailbox that we migrate.

Get information about specific Move Request

PowerShell command syntax

Get-MoveRequest < Move Request name>

PowerShell console output example

PS C:\> Get-MoveRequest onpremmbx-01@o365info.com | Format-List


RunspaceId                 : 2771b392-d73b-4639-b63d-f4646c49c0af
ExchangeGuid               : e3254cfe-81c0-496e-84db-80e9190342e5
SourceDatabase             : 
TargetDatabase             : EURPR05DG136-db018
SourceArchiveDatabase      : 
TargetArchiveDatabase      : 
Flags                      : CrossOrg, Pull
RemoteHostName             : mail.o365info.com
BatchName                  : MigrationService:Eyal Migration batch -001
Status                     : Completed
RequestStyle               : CrossOrg
Direction                  : Pull
IsOffline                  : False
Protect                    : False
Suspend                    : False
SuspendWhenReadyToComplete : False
AdministrativeUnits        : {}
Alias                      : onpremmbx-01
ExtensionCustomAttribute1  : {}
ExtensionCustomAttribute2  : {}
ExtensionCustomAttribute3  : {}
ExtensionCustomAttribute4  : {}
ExtensionCustomAttribute5  : {}
DisplayName                : onpremmbx-01
ExternalDirectoryObjectId  : c4d8af0e-69f2-4534-b79c-04ddaea7d074
LastExchangeChangedTime    : 
RecipientType              : UserMailbox
RecipientTypeDetails       : UserMailbox
Identity                   : onpremmbx-01
IsValid                    : True
ExchangeVersion            : 0.20 (15.0.0.0)
Name                       : onpremmbx-01
DistinguishedName          : CN=onpremmbx-01,OU=o365info2.onmicrosoft.com,OU=Microsoft Exchange Hosted Organizations,DC=EURPR05A001,DC=prod,DC=outlook,DC=com
Guid                       : 1e697c91-3a05-490d-a1d2-4434471cd1d9
OrganizationId             : EURPR05A001.prod.outlook.com/Microsoft Exchange Hosted Organizations/o365info2.onmicrosoft.com - EURPR05A001.prod.outlook.com/ConfigurationUnits/o365info2.onmicrosoft.com/Configuration
Id                         : onpremmbx-01
OriginatingServer          : DB3PR05A001DC03.EURPR05A001.prod.outlook.com
ObjectState                : Changed

Export information about specific Move Request | TXT file

Get-MoveRequest onpremmbx-01@o365info.com | Format-List | Out-File c:\temp\"Get-MoveRequest.txt" -Encoding UTF8

Get information about ALL existing Move mailbox requests

When we use the PowerShell, command Get-MoveRequest without relating to a specific move request, meaning, without specifying the identity of a specific move request, the PowerShell command will display information about ALL existing “Move Requests”.

General note – in case that you are performing mailbox migration that include tens or hundreds of mailboxes, the process of exporting information about each of these migrated mailboxes, could take a long time.

Export information about ALL Move Requests | TXT file

PowerShell command example

Get-MoveRequest | Format-List | Out-File c:\temp\"Get-MoveRequest.txt" -Encoding UTF8

Export information about MoveRequest with specific status

Each of the “move requests” could have a specific “status” such as – Completed ,Failed and so on.

The available status codes values are as follow:

  • AutoSuspended
  • Completed
  • CompletedWithWarning
  • CompletionInProgress
  • Failed
  • InProgress
  • None
  • Queued

In case that you want to get information only about specific status of “Move requests”, you can use the following PowerShell syntax:

Export information about ALL Move Requests which their status is not “completed” | TXT file

Get-MoveRequest | Where {$_.status -ne ”Completed”} | Get-MoveRequestStatistics | Format-List | Out-File c:\temp\"Get-MoveRequest- status is not completed.txt" -Encoding UTF8

Export information about ALL Move Requests which their status is – “Failed” | TXT file

PowerShell command example

Get-MoveRequest | Where {$_.status -eq ”Failed”} | Get-MoveRequestStatistics | Format-List | Out-File c:\temp\"Get-MoveRequest- status is Failed.txt" -Encoding UTF8

3. Using the MoveRequestStatistics command

The purpose of the PowerShell command Get-MoveRequestStatistics, is to get detailed information about the “migrated mailbox content”.

For example,

ItemsTransferred – information about the number of mail items, that was already transferred.

PercentComplete – as the name implies, information about the “Complete percentage” of the mailbox migration process.

Get move requests Statistics information for specific Move Request

PowerShell command syntax

Get-MoveRequestStatistics <Migrated mailbox>

PowerShell console output example

PS C:\> Get-MoveRequestStatistics onpremmbx-01@o365info.com

DisplayName  StatusDetail TotalMailboxSize           TotalArchiveSize PercentComplete
-----------  ------------ ----------------           ---------------- ---------------
onpremmbx-01 Completed    7.148 MB (7,495,583 bytes)                  100

Export information about specific move requests Statistics | TXT file

Get-MoveRequestStatistics onpremmbx-01@o365info.com | Format-List | Out-File c:\temp\"Get-MoveRequestStatistics.txt" -Encoding UTF8

If we want to eliminate unmercenary data and get a “clear view” of the mailbox migration Statistics, we can ask from PowerShell to display only specific data fields.

PowerShell command example

Get-MoveRequestStatistics onpremmbx-01@o365info.com | Select MailboxIdentity,Status,WorkloadType,RecipientTypeDetails,SourceServer ,BatchName,TotalMailboxSize,TotalMailboxItemCount,TotalArchiveSize,BytesTransferred,BytesTransferredPerMinute,ItemsTransferred,PercentComplete  | Format-List | Out-File c:\temp\"Get-MoveRequestStatistics.txt" -Encoding UTF8

Combine the Get-MoveRequest + Get-Moverequeststatistics commands

A nice option that we can use when using PowerShell is a “combination” of two or more PowerShell command. The formal term for this method is “pipeline”.

In the following scenario, we a combination of two PowerShell commands:

  • Get-MoveRequest
  • Get-MoveRequestStatistics

The first command Get-MoveRequest will “fetch” all the existing “Move Requests”.

The second command Get-MoveRequestStatistics, will use the “move requests list” form the first command, and add the “statistics information” for each mailbox move requests.

Combine the Get-MoveRequest + Get-Moverequeststatistics commands

PowerShell command syntax

Get-MoveRequest| Get-Moverequeststatistics

PowerShell console output example

PS C:\> Get-MoveRequest| Get-Moverequeststatistics 

DisplayName  StatusDetail TotalMailboxSize           TotalArchiveSize PercentComplete
-----------  ------------ ----------------           ---------------- ---------------
onpremmbx-02 Completed    7.148 MB (7,495,429 bytes)                  100            
onpremmbx-03 Completed    7.148 MB (7,495,563 bytes)                  100            
onpremmbx-04 Completed    7.148 MB (7,495,449 bytes)                  100            
onpremmbx-01 Completed    7.148 MB (7,495,583 bytes)                  100

Get + Export information about ALL concurrent move requests Statistics + troubleshooting information

In this scenario, we add the additional parameters- “IncludeReport” and “Diagnostic” for getting more details about the Move Request Statistics.
Most of the times, we will use this additional parameter is a troubleshooting scenario.

In addition, I add an example of- exporting information to XML file because in case that we need to deliver the exported information to Microsoft support for further analysis, this is the “preferred” file format.

Combine the Get-MoveRequest + Get-Moverequeststatistics commands

Export information to TXT file

Get-MoveRequest| Get-Moverequeststatistics -IncludeReport -Diagnostic | Format-List | Out-File c:\temp\"Get-Move-Request-Get-Moverequeststatistics.txt" -Encoding UTF8

Export information to CSV file

Get-MoveRequest| Get-Moverequeststatistics -IncludeReport -Diagnostic | Export-CSV c:\temp\"Get-Move-Request-Get-Moverequeststatistics.CSV" –NoTypeInformation -Encoding utf8

Export information to XML file

Get-MoveRequest| Get-Moverequeststatistics -IncludeReport -Diagnostic | Export-Clixml
c:\temp\"Get-MoveRequestStatistics-IncludeReport-Diagnostic.xml" -Encoding UTF8

Other variation of the PowerShell command syntax that we can use for getting information about move requests with a specific status such as Failed move requests + statistics information about each move requests could be:

PowerShell command example

Get-MoveRequest -movestatus Failed| Get-moverequeststatistics |select DisplayName,SyncStage,Failure*,Message,PercentComplete,largeitemsencountered,baditemsencountered| ft -autosize


For your convenience, I have “Wrapped” all the PowerShell commands that were reviewed in the article,
in a “Menu Based” PowerShell Script.

You are welcome to download the PowerShell script and use it.
Download -o365info PowerShell Script

Using PowerShell for view and export information about mailbox migration to Office 365 5/5 (2)
In case you want to get more detailed information about how to use the o365info menu PowerShell script, you can read the following article

Now it’s Your Turn!
It is important for us to know your opinion on this article

Restore Exchange Online mailbox | Article series index

Please rate this

The post Using PowerShell for view and export information about mailbox migration to Office 365 | Part 3#5 5/5 (2) appeared first on o365info.com.

Using PowerShell for view and export information about mailbox migration to Office 365 | Part 2#5 5/5 (2)

$
0
0

In the following article and the next article, we review the various PowerShell cmdlets, that we can use for view, and export information about the process of Exchange mailbox migration process.

Most of the time, the main use for viewing and export information about the mailbox migration process is, for the purpose of – troubleshooting a problematic migration process.

Using the information that we “collect” about the migration process, can help us to understand better what is the specific problem that is causing mailbox migration failure.

The mailbox migration “concept” in Exchange based environment.

In Exchange environment, the technical term that we use for relating to the process of mailbox
migration is – “Move requests”.

The mailbox migration (the Move request), define the process in which we “move” Exchange mailbox from the “Exchange source server” (the Exchange that hosts the mailbox) to other Exchange database or another Exchange server.

Exchange on-Premises versus Exchange Online

The focus in this article, relate to a scenario in which we implement a process of mailbox migration from Exchange on-Premises server to Office 365 (Exchange Online).

Although the article refers to Office 365 environment, most of the PowerShell commands that we review in this article, are relevant also to Exchange on-Premises environment

Using PowerShell for display and export mailbox migration information

Generally speaking, we can use the web-based Exchange Online admin center interface, for getting information about the mailbox migration process and in addition export information about specific move request.

The notable advantage of using PowerShell is our ability to export the information to various file type such as – TXT, CSV, and XML, that we can use for further analysis in a scenario of “troubleshooting mailbox migration problems”.

After we collect the required data, we can analyze the data by our self or, send the information to the Office 365 support technical team for further analysis.

The article stricture

The information about the various PowerShell commands, divided to section that relates to each of the separated “entities” that are involved in the mail migration process.

Note – you can read more information about the “Migration entities” that are involved in the mailbox migration process in the former article.

Displaying information versus exporting information

The PowerShell commands that we review, belong to the “Get family” meaning, PowerShell commands that we use for getting information.

In this article (and the next article), most of the PowerShell command syntax examples include the PowerShell parameters, that we use for exporting the information that we get to various file formats such as – TXT, CSV and XML files.

There are two main reasons for the “need” to export the information to files:
1. Limitation of the PowerShell console

In a scenario in which we “fetch” information about mailbox migration process, the “amount of data” that we get, can be considered as a large amount of information, and most of the time, the interface of the PowerShell console is not the best option for reading the data.

2. Save data for further analysis

Saving the migration information to files can help us to improve troubleshooting process. For example, looking for specific errors and so on.

The export “path” and file name

In our example, we export the information to drive C: to a folder named TEMP

Regarding the “file name”, the file name syntax that I use in the PowerShell command examples, are just arbitrary file names. You can use any file name that will be suitable for your needs.

PowerShell commands additional parameters

Most of the PowerShell commands syntax examples that we review, include the “basic PowerShell command + additional parameters such as “-Diagnostic” and “-IncludeReport”.

These parameters can help us to get more details about a specific mailbox migration entity.

The IncludeReport parameter

The IncludeReport switch specifies whether to return additional details, which can be used for troubleshooting.

The Diagnostic parameter

The Diagnostic switch specifies whether to return extremely detailed information in the results. Typically, you use this switch only at the request of Microsoft Customer Service and Support to troubleshoot problems.

The use of this “additional parameters” is not mandatory, but in a scenario of troubleshooting, the basic rule is to get as much as we can information about specific objects that are involved in the migration process.

1. Migration Endpoint | Get + Export Information

The term – “Migration EndPoint” define an entity that serve as a “logical container”, that contain the set of configuration settings, that Exchange Online server uses for addressing Exchange on-Premises mail server.

Get information about specific EndPoint

PowerShell command syntax

Get-MigrationEndpoint -Identity <Migration endpoint name> |Format-List | Out-File <Path>

Get + Export information about specific EndPoint | Example

Get-MigrationEndpoint -Identity OnboardingME01 |Format-List | Out-File c:\temp\"Get-MigrationEndpoint-Diagnostic.txt" -Encoding UTF8

Get + Export information about ALL existing EndPoints

PowerShell command example

Get-MigrationEndpoint -Diagnostic |Format-List | Out-File c:\temp\"Get ALL MigrationEndpoint-Diagnostic.txt" -Encoding UTF8

Additional reading


For your convenience, I have “Wrapped” all the PowerShell commands that were reviewed in the article,
in a “Menu Based” PowerShell Script.

You are welcome to download the PowerShell script and use it.
Download -o365info PowerShell Script

Using PowerShell for view and export information about mailbox migration to Office 365 5/5 (2)
In case you want to get more detailed information about how to use the o365info menu PowerShell script, you can read the following article

Now it’s Your Turn!
It is important for us to know your opinion on this article

Restore Exchange Online mailbox | Article series index

Please rate this

The post Using PowerShell for view and export information about mailbox migration to Office 365 | Part 2#5 5/5 (2) appeared first on o365info.com.

Using the Search-Mailbox PowerShell command – Introduction | Part 1#5

$
0
0
The current article series deal with a very useful and powerful PowerShell command named – Search-Mailbox . I relate to the Search-Mailbox PowerShell command as a “Swiss Knife” because we can use the Search-Mailbox PowerShell command for many types of scenarios.

What does the Search-Mailbox PowerShell command do?

The Search-Mailbox PowerShell command as the name suggests, serve as a tool for the Exchange administrator to perform a search in Exchange mailboxes (or multiple mailboxes) for specific mail items.

The term “mail items” relate to any type of mailbox items such as – E-mail message, calendar meeting, contact, task and so on.

The Search-Mailbox PowerShell command has four distinct and special characters.
1. The search result

Associatively, we can assume that the term “Search Results” translates into some kind of index, which lists all the search findings (Log file etc.). The interesting thing about the Search-MailboxSearch Results” is that the “Search Results” realized as a copy of the original mail items that answer our search query.

For example, if we use the Search-Mailbox PowerShell command to look for E-mail message with a specific text string in Bob’s mailbox, the Search-Mailbox PowerShell command enables us to copy the mail items that answer our query (the “Search Results”) to another store (the Target mailbox which will be discussed later).

2. The “action” that can be implemented when using Search-Mailbox

As mentioned in the former section the Search-Mailbox PowerShell command can help us to look (search) for specific mail items stored in Exchange mailbox and copy this mail item to another store (another Exchange mailbox).

An addition “action” that can be implemented by the Search-Mailbox PowerShell command is a very interesting and powerful action – Deletion of mail items (Deletion of the “Search Results”).

Besides of a new Office 365 PowerShell command named – New-ComplianceSearchAction, the Search-Mailbox PowerShell command is the only command that enables Exchange administrator to “remove” (Delete) specific mail items from Exchange mailbox or Multiple Exchange mailboxes.

Note – you can read more information about how to deleted mail items using the PowerShell command
New-ComplianceSearchAction in the article – Search for and delete email messages in your Office 365 organization – Admin Help

3. he Exchange mailbox “space”

The Search-Mailbox PowerShell command enabled us to define specific “location” of the Exchange mailbox in which the search action will be implemented.

For example, we can instruct the Search-Mailbox PowerShell cmdlet to perform a search only in the special hidden mailbox folder named – the Recovery mail folder (the Dumpster) that serves as a dedicated store for Soft Deleted and Hard Deleted mail items.

4. The search query

The Search-Mailbox cmdlet enable us to define almost every possible parameter for defining our search query such as – sender, recipient, date, the type of the mail item, specific Text string and much more.

In addition, we can use a very sophisticated search query that combines many different types of filters such as – show only calendar items from a specific date that have a specific subject.

Search-Mailbox command structure

The Search-Mailbox cmdlet consists of three parts

  • Part A – In this part, we define the “objects” that we want to address. The object is Exchange mailbox
  • Part B – In this part, we define the specific characters of the search query that we need to perform. For example, search for mail items that include a specific text string.
  • Part C – In this part, we define the specific “action” that we want to apply to the Search Results we get from the former parts.

Search-Mailbox command structure -01

Search scope

The term “Search Scope” relates to the Exchange mailboxes that we “address” when we perform the search. The specific mailbox or the mailboxes defined as “Source Mailbox.”

Mailbox Search Scope -02

Scenario 1 – Searching mail items | Single Exchange mailbox

In this scenario, the PowerShell command syntax is implemented as follows:

Search-Mailbox <Source Mailbox> -SearchQuery

Scenario 2 – Searching mail items | Multiple Exchange mailboxes

In this scenario, the PowerShell command syntax is implemented by “declaring” the search scope, meaning the Exchange mailboxes for which the search task will be carried out.

Then we “pipe” the Exchange mailbox group to the Search-Mailbox PowerShell command.

There many options that we can use for defining a specific “group” of Exchange mailboxes.

Example 1 – Perform Multiple mailbox search | All types of Exchange mailboxes

For example, to perform a search for mail items in all existing Exchange mailboxes, we can use the following command syntax:

Get-Mailbox -ResultSize Unlimited | Search-Mailbox -SearchQuery

Example 2 – Perform Multiple mailbox search | All Exchange USER mailboxes

Get-Mailbox -Filter '(RecipientTypeDetails -eq "UserMailbox") | Search-Mailbox -SearchQuery

Example 3 – Perform Multiple mailbox search | All Exchange Shared mailboxes

Get-Mailbox -Filter '(RecipientTypeDetails -eq "SharedMailbox") | Search-Mailbox -SearchQuery

Example 4 – Perform Multiple mailbox search | All Exchange Room mailboxes

Get-Mailbox -Filter '(RecipientTypeDetails -eq "RoomMailBox") | Search-Mailbox -SearchQuery

Example 5 – Perform Multiple mailbox’s search | Exchange Mailboxes – members in Distribution Group

In this scenario, we want to perform a search by defining a “group of Exchange mailboxes” which “belong” (members) to a specific Distribution Group.

Get-DistributionGroupMember <"Distribution Group name"> | Search-Mailbox -SearchQuery

Search Query (Search filter)

The Search-Mailbox PowerShell cmdlet supports very powerful syntax that defines the Search Query (the Search filter or the Search criteria).

The search Query is implemented by using the parameter – SearchQuery + the specific filter that we want to use.

The search filter can be implemented as a simple search query or, as an advanced search query that is written by KQL language.

Note – in case that you want more information about the KQL language in the following articles:

Search FILTER -03
Example 1 – Search for a specific type of mail items

We can define a search filter that looks only for specific types of mail items.

For example,

To search only calendar items, we can define a search query using the following syntax:

Search-Mailbox <Source Mailbox> -SearchQuery “Kind: meetings"

To search only Contacts items, we can define a search query using the following syntax

Search-Mailbox <Source Mailbox> -SearchQuery “Kind: contacts"

Example 2 – Search for a mail item that sent from a specific sender or sent to a specific recipient

In case that we want to filter the search result by defining a specific sender or specific recipient, we can use the following syntax

Search for mail items sent by a specific sender:

Search-Mailbox <Source Mailbox> -SearchQuery from:"<E-mail address>"

Search for mail items, sent to a specific recipient:

Search-Mailbox <Source Mailbox> -SearchQuery to:"<E-mail address>"

Example 3 – looking for mail items that sent in a specific date

We can perform a search query that relates to the “date” of mail items.

For example

Search for mail items sent on a specific date:

Search-Mailbox <Source Mailbox> -SearchQuery sent:mm/dd/yyyy

Search for mail items sent on a specific date range:

Search-Mailbox <Source Mailbox> -SearchQuery {sent:mm/dd/yyyy..mm/dd/yyyy}

Example 4 – looking for mail items with attachments

In case that the information that we look for is mail items with attachments, we can use the following search query:

Search for mail items that, include a specific attachment (attachment file name):

Search-Mailbox <Source Mailbox> -SearchQuery attachment:"<Attachment file name>"

Search for ANY mail items that, include an attachment:

Search-Mailbox <Source Mailbox> -SearchQuery {HasAttachment -eq $true}

Example 5 – looking for mail items with a specific text string

To search Emails with Text String in mail SUBJECT, we can define a search query using the following syntax

Search-Mailbox <Source Mailbox> -SearchQuery ‘Subject:"<Text String>"'

To search Emails with Text String in mail BODY, we can define a search query using the following syntax

Search-Mailbox <Source Mailbox> -SearchQuery Body:"<Text String>"'

Search-Mailbox cmdlet and the required “action”

We can define three types of “actions” that the Search-Mailbox PowerShell command will perform:

  1. Create a Log File – this option can be used in case that we don’t want to get a copy of the mail items (the search result) but instead, only a “report” (Log) that include information on the mail items that were found.
  2. Copy the mail items (the search results) to “another” mailbox – this option can be used in a scenario in which we want to recover or save mail items that appear in the search result.
  3. Delete the mail items that were founded – this option can be used in a scenario in which we want to “destroy” (delete) the specific mail items. For example, a scenario in which our organization was attacked by a virus, and we want to locate all the infected mail items and delete them.

In addition, we can choose to “combine’” couple of “actions.” For example, we can define an action in which the mail items will be deleted from the source mailbox, but in addition, a copy of the mail items will be saved in a “target mailbox” + create a Log file that includes information about each mail items that appear in the search results.

The required Action -01

The concept of “SOURCE mailbox” and “TARGET mailbox”

An important concept of the Search-Mailbox PowerShell cmdlet is the concept of:

  1. Source Mailbox
  2. Target Mailbox
  3. Target Folder

As mentioned, most of the time the action of “Search Results” is translated to a Log file or, to a copy of the mail items that was found in the search process.

To be able to “store” the “Search Results” (the Log file or the mail items that were found), we need to define a “target store” meaning – Target Mailbox.
In addition, we need to define a Target Folder that will be created, and that will contain the search results.

The Search-Mailbox cmdlet will need to “know” – what is the Source Mailbox, what is the Target Mailbox (that will store the search results) and what is the name of the Target Folder.

Target Folder

Given that we provide the name of the Target Folder name, the Search-Mailbox cmdlet will create this NEW folder in the Target Mailbox.

An example of the PowerShell syntax that we use for defining these “entities” could be:

Search-Mailbox <Source Mailbox> -TargetMailbox <Target mailbox> -TargetFolder <Target Folder>

The concept of – Source mailbox and Target Mailbox -02

The target Folder naming convention and structure

As mentioned, the Search-Mailbox cmdlet creates the Target folder (based upon the Target Folder name whom we provide as part of the PowerShell command) in the Target Mailbox. The Target Folder serves as a “store” for the search results, and have a specific hierarchy.

In the following diagram, we can see the structure of the Target Folder.

The Target Folder structure and hierarchy

Target Folder provided name

This is the name whom we provide as part of the Search-Mailbox command mandatory parameters.

Mailbox Display name + current search date

“Under” the name of the Target Folder, Search-Mailbox cmdlet creates the following hierarchy:

The source mailbox “Display name” + the current search time

The “folder name” that stores the search result is built from a combination of the Source mailbox display name + the current search time.

Notice that the “Time” that appears as part of the folder name considers as “GMT +0”.
The meaning is that in most of the scenarios, the search results “time” that appears as part of the folder name is a different time than your current \local time.

In case that you want to adjust the time to your local time zone, you will need to add or subtract the hours based on your local GMT.

For example, my time zone is GMT+3

In the following screenshot, we can see that the time that is mentioned is 10:13

In my scenario, the “real time” is 13:13 (10:13 + 3 hours).

Search-mailbox results folder name -02

The folder name – Primary mailbox

Search-Mailbox cmdlet creates a folder named – Primary mailbox.

This term relates to the “standard user mailbox” which defines as – Primary mailbox.

The reason that the Search-Mailbox cmdlet refers uniquely to the standard mailbox is because that theoretically, an Exchange user can have additional mailbox or a secondary mailbox which describes as the Archive mailbox.

Under the Primary mailbox, we can find the search result (a copy of the original mail items from the Source Mailbox). The Search-Mailbox cmdlet will keep the same folder hierarchy as it appears in the “source mailbox.”

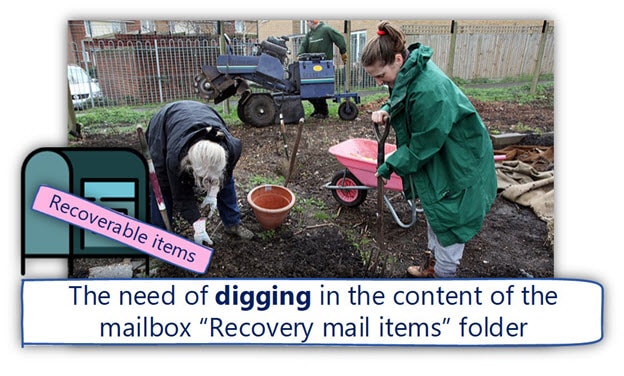
Recoverable items

As mentioned, one of the most powerful abilities of the Search-Mailbox cmdlet is, the ability to search and “export” (copy) mail items stored in the Recovery mail folder (Dumpster).

In case that the search results include mail items that were stored in the Recovery mail folder (Dumpster), a new folder named – Recoverable items will be created.

Note – the mailbox owner cannot see the Recovery mail folder (Dumpster) because this is a hidden folder. Only the Exchange administrator who performs the search has the “privilege” to view this folder and the folder content as part of the search results that stored in the Target Mailbox (in the Target folder).

The folder name – Archive mailbox

This folder name “appears” only in a scenario in which the Source Mailbox has Archive (additional mailbox).

In this case, the Search-Mailbox cmdlet will store the search results that were found in the Source Mailbox archive

Source mailbox “space” or “scope”

In this section, I would like to briefly review that way that the Search-Mailbox cmdlet relate to the source mailbox “space.”

Search-Mailbox cmdlet define the of Exchange mailbox “space.”

  1. The Primary mailbox space.
  2. The Recovery mail folder (Dumpster) space.
  3. The Archive mailbox space.

mailbox space - 03

By default, the Search-Mailbox cmdlet will look (search) for mail items in all three parts above.

In some scenarios, we will need to instruct the Search-Mailbox cmdlet to “ignore” one of those “spaces” or to “concentrate” only in a specific “space.”

Example 1 – Perform a search only in the Recovery mail folder (SearchDumpsterOnly)

For example, a scenario in which we need to recover mail items that were Soft Deleted or Hard Deleted by the user. In this case, we want to define a very specific mailbox scope – the Recovery mail folder (Dumpster).

To restrict the search scope only for mail items stored in the recovery mail folder (defined also as the Dumpster), we can use the following syntax:

Search-Mailbox <Source Mailbox> -SearchDumpsterOnly

Example 2 – Perform a search only in the Recovery mail folder (SearchDumpsterOnly)

In this case, we want to perform a mailbox search, but we don’t want that the search will run on the Recovery mail folder (Dumpster) of the Source Mailbox.

To exclude the Recovery mail folder (Dumpster) from the search results, we can use the parameter SearchDumpster:$False

For example:

Search-Mailbox <Source Mailbox> -SearchDumpster:$false

Note – in case that you want more information about the “Recovery mail folder” you can read the article – Recover deleted mail items in the Exchange Online environment | Single item recovery | 2#7

Example 3 – Perform a search only in the primary mailbox

In case that the user has an archive mailbox, and we want to exclude the Archive Mailbox from the search process, we can use that parameter DoNotIncludeArchive

For example:

Search-Mailbox <Source Mailbox> -DoNotIncludeArchive

Search-Mailbox cmdlet and required permissions

Using the Search-Mailbox cmdlet for “snooping” Exchange mailboxes require a special permission because from the “data privacy point of view,” we are looking at a private user data. In case that we use the Search-Mailbox cmdlet for deleting mail items, we are deleting private user data.

Attached a quotation from Microsoft’s article, about the required permissions that need to be assigned to the Exchange administrator who perform the search (or the deletion) by using the Search-Mailbox cmdlet:

You need to be assigned both of the following management roles to search for and delete messages in users’ mailboxes:

  • Mailbox SearchThis role allows you to search for messages across multiple mailboxes in your organization. Administrators aren’t assigned this role by default. To assign yourself this role so that you can search mailboxes, add yourself as a member of the Discovery Management role group. See Assign eDiscovery permissions in Exchange.
  • Mailbox Import ExportThis role allows you to delete messages from a user’s mailbox. By default, this role isn’t assigned to any role group. To delete messages from users’ mailboxes, you can add the Mailbox Import Export role to the Organization Management role group. For more information, see the “Add a role to a role group” section in Manage role groups .
[Source of information – search for and delete messages – Admin help]

To assign the roles directly to a user via PowerShell, run the following PowerShell commands:

New-ManagementRoleAssignment -Role "Mailbox Import Export" -User "<user name or alias>"

New-ManagementRoleAssignment -Role "Mailbox Search" -User "<user name or alias>"

Search-Mailbox cmdlet and limitation

The Search-Mailbox cmdlet have two limitations that we should know about.
1. Maximum “source mailboxes.
The Search-Mailbox cmdlet can perform a multiple mailbox searches for a maximum of 10,000 mailboxes.

You can search a maximum of 10,000 mailboxes using the Search-Mailbox cmdlet. If you’re an Exchange Online organization and have more than 10,000 mailboxes, you can use the Compliance Search feature (or the corresponding New-ComplianceSearch cmdlet) to search an unlimited number of mailboxes. Then you can use the New-ComplianceSearchAction cmdlet to delete the messages returned by a compliance search. For more information, see Search for and delete email messages from your Office 365 organization.

[Source of information – search for and delete messages – Admin help]

2. The maximum search results when using search queries
When we use the Search-Mailbox cmdlet + a search query, meaning using the –SearchQuery parameter, the results are limited to a maximum of 10,000 results.

When we run the Search-Mailbox cmdlet, the following warning appears:

WARNING: The Search-Mailbox cmdlet returns up to 10000 results per mailbox if a search query is specified. To return more than 10000 results, use the New-MailboxSearch cmdlet or the In-Place eDiscovery & Hold console in the Exchange Administration Center.


The Search-Mailbox | PowerShell scripts series

The Search-Mailbox PowerShell cmdlet is very powerful and can be used for a various type of administrative scenarios. For this reason, I have created a “series” of PowerShell scripts, that will help you to “enroll” the Search-Mailbox PowerShell cmdlet for implementing different type of tasks:

Search for mail items using the Search-Mailbox PowerShell cmdlet (1#4)

A PowerShell menu script that is used for – performing a search in a single Exchange Online mailbox, by using various types of filters such as – specific text, specific date, a specific type of mail items (calendar, contact, etc.), mail with attachment and more.
Searching hidden Email addresses Using PowerShell - Office 365 - Part 11-13


Recover mail items using the Search-Mailbox PowerShell cmdlet (2#4)

PowerShell menu script, that is used for – Recovers mail items that are stored in the Recovery mail folder (Exchange Online Mailbox Dumpster). The PowerShell script, will help you to Recover all the content of the recovery mail folder or, use a search filter that will recover only specific mail items that answer a specific character such as – specific text, specific date, specific type of mail items (calendar, contact, etc.), mail with attachment and more.
Using the Search-Mailbox PowerShell command - Recover mail abc- Part 3-5u


Delete mail items – Multiple Exchange mailboxes (Bulk) using PowerShell (3#4)

PowerShell menu script, that is used for – performing a Deletion of specific mail items from multiple Exchange Online mailboxes (bulk mode). The “Deletion” of this mail item, is implemented by selecting a “search filter” that will delete only mail items that have specific characters such as – specific text, specific date, a specific type of mail items (calendar, contact, etc.), mail with attachment and more.

Search and Delete mail items from Multiple Exchange mailboxes Bulk using Search-Mailbox PowerShell cmdlets-Part 4-5


Search and Delete mail from Single Exchange mailboxes using PowerShell (4#4)

PowerShell menu script, that is used for – performing a Deletion of specific mail items from a single Exchange Online mailbox.
The “Deletion” of this mail item, is implemented by selecting a “search filter” that will delete only mail items that have specific characters such as – specific text, specific date, a specific type of mail items (calendar, contact, etc.), mail with attachment and more.
Search and Delete mail items from the Exchange mailbox using Search-Mailbox PowerShell cmdlets - Single mailbox-Part 5-5

Restore Exchange Online mailbox | Article series index

Now it’s Your Turn!
It is important for us to know your opinion on this article

The post Using the Search-Mailbox PowerShell command – Introduction | Part 1#5 appeared first on o365info.com.

Search + Save a copy of mail items using PowerShell | Part 2#5

$
0
0
In the current article, we will review how to use the Search-Mailbox PowerShell cmdlet for performing a search on a specific Exchange mailbox + copy the search results to a “destination mailbox” (Target Mailbox).

PowerShell | Help & additional information

Running PowerShell commands in Office 365 based environment
To be able to run the PowerShell commands specified in the current article, you will need to create a remote PowerShell with Azure Active Directory or Exchange Online. In case that you need help with the process of creating a Remote PowerShell session, you can use the links on the bottom of the Article.

Scenario description

The Goals

The goals we seek to achieve are:

  1. Perform a search in a specific Exchange mailbox (Bob Mailbox). The search is implemented by defining a specific Search Query (search criteria), that will help us to locate specific mail items that answer the Search Query.
  2. The Search Results (mail items) will be copied to a Target Mailbox and saved in a dedicated folder (Target Folder).
  3. In addition, we want to create a detailed report (Log), about each mail items that appear in the Search Results (the Log \ Report file will be saved in the Target Folder)

Source mailbox + Target mailbox (and Target Folder)

  • The Source Mailbox (the mailbox on which we perform the search) is Bob’s mailbox
  • The Target Mailbox which we use for storing the search result (the mail items) is Adele’s
  • The Target Folder name will be – Search Results – Bob.

Scenario description - Search mailbox + Save search results to other mailbox

The mailbox search scope

By default, the Search-Mailbox cmdlet performs a search in the “Source Mailbox” that includes the following “Mailbox spaces”:

Primary mailbox

  1. The Search-Mailbox cmdlet will perform a search that relates to all folders and sub folders in the Primary mailbox.
  2. Recovery mail folder – by default, the Search-Mailbox cmdlet will also search for mail items stored in the Recovery mail folder (the Dumpster).

Archive mailbox

In case that the Source Mailbox has Archive mailbox,

  1. The Search-Mailbox cmdlet will perform a search that relates to all folders and sub folders in the Archive mailbox.
  2. Recovery mail folder – by default, the Search-Mailbox cmdlet will also search for mail items stored in the mailbox archive Recovery mail folder (the Dumpster).

In the following screenshot, we can see an example to a scenario in which the Source Mailbox belongs to Bob, and the Target mailbox is – Adele’s mailbox.

The Search-Mailbox cmdlet creates a New folder (Target Folder) and stores all the Search Results (copy the mail items) in this folder (the Target folder).

The search results folder hierarchy includes two separated “spaces”:

  1. Archive mailbox (A in screenshot)
  2. Primary mailbox (B in screenshot)

Each of the “mailbox spaces” (Archive and Primary) includes a dedicated folder named – Recoverable Items, that store the Search Results that were “fetched” from the Recovery mail folder -the Dumpster (number 2 in the diagram), that include Soft deleted + Hard deleted mail items.

search mailbox - Mailbox and folder scope

Using the Search-Mailbox for performing a search | PowerShell command syntax

As mentioned, the Search-Mailbox cmdlet is a very powerful PowerShell cmdlet, that can use many types of Search Query filter that will help us to “fetch” (find and copy) a very specific mail items.

In the following section, we review a couple of examples to the various Search Query that we can use.

Search and Copy mail items | ALL mail items


In this example, we use the Search-Mailbox cmdlet without any “filter” or Search query filters.

In this scenario, our goal is to copy all the mail items that exist in the Source Mailbox to the Target Mailbox. The search results will include all the mail items from the Primary Mailbox, Archive Mailbox (if exists) and the Recovery mail folder (the Dumpster).

Search + Save a copy ALL mail items | Search Query – NO Filter (no Search Query)

PowerShell command syntax

Search-Mailbox <Source Mailbox> -TargetMailbox <Destination mailbox>-TargetFolder <Folder> -LogLevel Full

PowerShell command Example

Search-Mailbox Bob -TargetMailbox Adele -TargetFolder “Search Results - Bob” -LogLevel Full

Search and Copy mail items | Search query Filter – specific Type of Mail item

In this scenario, we want to locate (search) and copy only a specific type of mail items from the Source Mailbox.

Search + Save a copy of mail items | Search Query filter – Calendar items

Search for specific type of mail items – Calendar items

PowerShell command syntax

Search-Mailbox <Source Mailbox> -SearchQuery "Kind:meetings" -TargetMailbox <Destination mailbox> -TargetFolder <Folder> -LogLevel Full

PowerShell command Example

Search-Mailbox Bob -SearchQuery "Kind:meetings" -TargetMailbox Adele -TargetFolder “Search Results - Bob” -LogLevel Full

Search + Save a copy of mail items | Search Query – Contact items

Search for specific type of mail items – Contacts items
PowerShell command syntax

Search-Mailbox <Source Mailbox> -SearchQuery "Kind:contacts" -TargetMailbox <Destination mailbox> -TargetFolder <Folder> -LogLevel Full

PowerShell command Example

Search-Mailbox Bob -SearchQuery "Kind:contacts" -TargetMailbox Adele -TargetFolder “Search Results - Bob” -LogLevel Full

Note

By default, if not specified, the Search-Mailbox cmdlet will look for all types of message types.

When using the option the “kind” search filter, valid values can be one or more of the following:

  • Email
  • Meetings
  • Tasks
  • Notes
  • Docs
  • Journals
  • Contacts
  • IM

Search and Copy mail items | Search query Filter – Text String

In this section, we use Search Query that looks for mail items that include a specific text string.

General note – because we use the quotation marks, the search will fetch only results in which all the words in the text string that we define appear.

For example, in our example, we look for the text string: “A meeting in New York.”
Mail items that include the words “New York” or “meeting” will not appear in the Search Results.

Only mail items that include all the text phrases that appear inside the quotation marks, will be considered as “valid mail items” that answer the Search Query (exact phrases or keywords in subjects of items).

Search + Save a copy of mail items | Search Query – Mail items with Text String in mail SUBJECT

Search for mail items with a specific TEXT string that appears is an E-mail Message Subject line.
PowerShell command syntax

Search-Mailbox <Source Mailbox> -SearchQuery Subject:"<Text String>" -TargetMailbox <Destination mailbox> -TargetFolder <Folder> -LogLevel Full

PowerShell command Example

Search-Mailbox Bob -SearchQuery Subject:"A meeting in New York" -TargetMailbox Adele -TargetFolder “Search Results - Bob” -LogLevel Full

Search + Save a copy of mail items | Search Query – Mail items with Text String in mail BODY

Search for mail items with a specific TEXT string that appears is an E-mail Body.

PowerShell command syntax

Search-Mailbox <Source Mailbox> -SearchQuery body:"<Text String>" -TargetMailbox <Destination mailbox> -TargetFolder <Folder> -LogLevel Full

PowerShell command Example

Search-Mailbox Bob -SearchQuery Subject:"A meeting in New York" -TargetMailbox Adele -TargetFolder “Search Results - Bob” -LogLevel Full

Search + Save a copy of mail items | Search Query – Mail items with Text String in mail BODY or Mail Subject

Search for mail items with a specific TEXT string that appears is an E-mail Message Subject line or Mail Subject.
PowerShell command syntax

Search-Mailbox <Source Mailbox> -SearchQuery "<Text String>" -TargetMailbox <Destination mailbox> -TargetFolder <Folder> -LogLevel Full

PowerShell command Example

Search-Mailbox Bob -SearchQuery "A meeting in New York" -TargetMailbox Adele -TargetFolder “Search Results - Bob” -LogLevel Full

Additional PowerShell command syntax that we can use for performing a search that includes two types of search criteria is:

PowerShell command Example

Search-Mailbox Bob -SearchQuery {Subject:"A meeting in New York" OR body:"A meeting in New York"} -TargetMailbox Adele -TargetFolder “Search Results - Bob” -LogLevel Full

Search and Copy mail items | Search query Filter – specific Date or Date Range

General information about the subject of “Date and Date format.”

The subject of the date format that we use in the Search-Mailbox query is a little tricky because the date format is affected the Windows OS Date format, the Exchange Online Mailbox Date format, etc.

Case 1 – most of the time, the date format that you need to use in the Search Query is your Windows OS Date format.

Case 2 – when using a date format in Search-Mailbox queries needs to be in a format that conforms to the Exchange server’s Regional settings.

In case that you get an error such as – “The KQL parser threw an exception,”, use the “month name” instead of the format of “month number.”

For example, instead of using the Date format – 07/21/2017 use the following format –  02/July/2017

Search + Save a Copy of mail items | Search Query – Emails SENT on a Specific date

Search for mail items with Sent on a specific Date.

PowerShell command syntax

Search-Mailbox <Source Mailbox> -SearchQuery sent:mm/dd/yyyy -TargetMailbox <Destination mailbox> -TargetFolder <Folder> -LogLevel Full

PowerShell command Example

Search-Mailbox Bob -SearchQuery sent:21/07/2017 -TargetMailbox Adele -TargetFolder “Search Results - Bob” -LogLevel Full

Search + Save a copy of mail items | Search Query – Emails SENT in a specific Date Range

Search for mail items with Sent on a specific Date Range.

PowerShell command syntax

Search-Mailbox <Source Mailbox> -SearchQuery {sent:mm/dd/yyyy..mm/dd/yyyy}  -TargetMailbox <Target mailbox> -TargetFolder <Target Folder> -LogLevel Full

PowerShell command Example

Search-Mailbox Bob -SearchQuery {sent:21/06/2017..07/21/2017} -TargetMailbox Adele -TargetFolder “Search Results - Bob” -LogLevel Full

Search + Save a copy of mail items | Search Query – Emails RECEIVED in a specific Date Range

Search for mail items that was Received on a specific Date range.
PowerShell command syntax

Search-Mailbox <Source Mailbox> -SearchQuery {Received:mm/dd/yyyy..mm/dd/yyyy}  -TargetMailbox <Target mailbox> -TargetFolder <Target Folder> -LogLevel Full

PowerShell command Example

Search-Mailbox Bob -SearchQuery {Received:21/06/2017..21/07/2017} -TargetMailbox Adele -TargetFolder “Search Results - Bob” -LogLevel Full

Search + Save a copy of mail items | Search Query – Emails SENT in a specific Date + Emails RECEIVED in a specific Date

Search for mail items that was Sent or Received on a specific Date range.

PowerShell command syntax

Search-Mailbox <Source Mailbox> -SearchQuery {sent:mm/dd/yyyy OR Received: mm/dd/yyyy} -TargetMailbox <Destination mailbox> -TargetFolder <Folder> -LogLevel Full

PowerShell command Example

Search-Mailbox Bob -SearchQuery {sent:30/07/2017 OR Received:30/07/2017}-TargetMailbox Adele -TargetFolder “Search Results - Bob” -LogLevel Full

Search and Copy mail items | Search query Filter – sender or by Recipient

In this section, we would like to search mail items that were sent from a specific sender or reach to a specific recipient.

Search + Save a copy of mail items | Filter scope – Email sent by a specific SENDER

Search for mail items that was Sent from a specific Sender (the FROM mail felid).
PowerShell command syntax

Search-Mailbox <Source Mailbox> -SearchQuery from:"<E-mail address>" -TargetMailbox <Target mailbox> -TargetFolder <Target Folder> -LogLevel Full

PowerShell command Example

Search-Mailbox Bob -SearchQuery from:"John@o365info.com" -TargetMailbox Adele -TargetFolder “Search Results - Bob” -LogLevel Full

Search + Save a copy of mail items | Filter scope – Emails sent TO a specific RECIPIENT

Search for mail items that were Received from a specific recipient (sent to a specific recipient – the TO mail felid)

PowerShell command syntax

Search-Mailbox <Source Mailbox> -SearchQuery to:"<E-mail address>" -TargetMailbox <Target mailbox> -TargetFolder <Target Folder> -LogLevel Full

PowerShell command Example

Search-Mailbox Bob -SearchQuery to:"Alice@outlook.com" -TargetMailbox Adele -TargetFolder “Search Results - Bob” -LogLevel Full

Search and Copy mail items | Search query Filter – E-mail Attachments

In this section, we would like to search mail items that have an attachment.

Search + Save a copy of mail items | Filter scope – Emails that include a specific attachment file name

Search for mail items, that have an attachment with a specific File extension.

PowerShell command syntax

Search-Mailbox <Source Mailbox> -SearchQuery attachment:"<Attachment file name>" -TargetMailbox <Target mailbox> -TargetFolder <Target Folder> -LogLevel Full

PowerShell command Example

Search-Mailbox Bob -SearchQuery attachment:"Customer.pdf" -TargetMailbox Adele -TargetFolder “Search Results - Bob” -LogLevel Full

Search + Save a copy of mail items | Filter scope – specific attachment type (suffix)

Search for mail items, that have an attachment with a specific file name suffix.

PowerShell command syntax

Search-Mailbox <Source Mailbox> -SearchQuery {Attachment -like "*.<suffix>"} -TargetMailbox <Target mailbox> -TargetFolder <Target Folder> -LogLevel Full

PowerShell command Example

Search-Mailbox Bob -SearchQuery {Attachment -like "*.PDF"} -TargetMailbox Adele -TargetFolder “Search Results - Bob” -LogLevel Full

Search + Save a copy of mail items | Filter scope – Emails with Attachment

Search for mail items, that have an attachment.
PowerShell command syntax

Search-Mailbox <Source Mailbox> -SearchQuery {HasAttachment -eq $true} -TargetMailbox <Target mailbox> -TargetFolder <Target Folder> -LogLevel Full

PowerShell command Example

Search-Mailbox Bob -SearchQuery -SearchQuery {HasAttachment -eq $true} -TargetMailbox Adele -TargetFolder “Search Results - Bob” -LogLevel Full

Search and Copy mail items | Search query Filter – Additional search queries

Search for mail items, that their size is “bigger” (greater) than a specific size.

Search + Save a copy of mail items | Filter scope – E-mail items size greater than X MB

PowerShell command syntax

Search-Mailbox <Source Mailbox> -SearchQuery {Size -gt <size in KB or MB>} -TargetMailbox <Target mailbox> -TargetFolder <Target Folder> -LogLevel Full

PowerShell command Example

Search-Mailbox Bob -SearchQuery -SearchQuery {Size -gt 5MB} -TargetMailbox Adele -TargetFolder “Search Results - Bob” -LogLevel Full

Search-Mailbox | Mailbox Search scope| The Recovery mail folder (Dumpster) and Archive Mailbox

In the following section, I would like to briefly review the subject of “Mailboxes search scope.”

As mentioned, the Search-Mailbox cmdlet will perform by default search in all the following mailbox locations:

  1. Primary mailbox
  2. Primary mailbox – Recovery mail folder (the Dumpster)
  3. Archive mailbox
  4. Archive mailbox – Recovery mail folder (the Dumpster)

The Search-Mailbox cmdlet enables us to define a specific mailbox search scope or to exclude a specific mailbox scope from the search results.

Mailbox scope Recovery mail folder (the Dumpster)

One of the most conspicuous advantages of the Search-Mailbox cmdlets is, the ability that it provides to Exchange administrator to view (search) the content of the Recovery mail folder (the Dumpster) and “fetch” a copy of Soft Deleted + Hard Deleted mail items stored in the Recovery mail folder.

By default, the Search-Mailbox cmdlets will perform a search in the Primary mailbox + in the Recovery mail folder (the Dumpster).

For example, in case that we don’t define a specific mailbox scope filter the search task will include the Primary mailbox space + the Recovery mail folder (the Dumpster)

Search-Mailbox <Source Mailbox> -TargetMailbox <Target mailbox> -TargetFolder <Target Folder> -LogLevel Full

Exclude the Recovery mail folder (dumpster) search

In case that we want to exclude the Recovery mail folder (the Dumpster) from the search, we can use the parameter SearchDumpster and set the switch to $False, for example –SearchDumpster:$False

Search-Mailbox <Source Mailbox> -TargetMailbox <Target mailbox> -TargetFolder <Target Folder> -SearchDumpster:$false -LogLevel Full

Search Dumpster Only

In case that we want to perform a search only in the Recovery mail folder (the Dumpster), we can use the parameter – SearchDumpsterOnly which specifies that only the Recoverable Items folder of the specified mailbox be searched.

Search-Mailbox <Source Mailbox> -TargetMailbox <Target mailbox> -TargetFolder <Target Folder> -SearchDumpsterOnly -LogLevel Full

Archive mailbox scope

By default, in case that as specific Exchange mailbox has an archive, the archive is always searched.

To exclude the Archive from the search, use the DoNotIncludeArchive parameter

Search-Mailbox <Source Mailbox> -TargetMailbox <Target mailbox> -TargetFolder <Target Folder> -DoNotIncludeArchive -LogLevel Full

Writing advanced \ combined search filters.

An additional part that I would like to briefly, mention is the subject of defining a more advanced or more sophisticated search query that combines two or more “filter” or search conditions.

To define two or more filters, we can use the logical operators such as – “OR”, “AND” and more.

In the following diagram, we can see some example of the syntax that we use for defining a more advanced Search Query.

Using a combination of Search Query parameters

Example 1

Look for all mail items, that answer the following search criteria’s:

E-mail items that have attachment + in addition, the mail subject is “Test

Search-Mailbox <Source Mailbox> -SearchQuery {HasAttachment -eq $true and subject:Test} -TargetMailbox <Target mailbox> -TargetFolder <Target Folder>

Example 2

Look for all mail items, that answers the following search criteria’s:

E-mail message mail items or calendar mail items or Contact

Search-Mailbox <Source Mailbox> -SearchQuery {kind:email OR kind:meetings} -TargetMailbox <Target mailbox> -TargetFolder <Target Folder>

Example 3

Look for all mail items, that answers the following search criteria’s:

Mail items that have the subject Test + sent from john@o365info.com + sent on a specific date 30/07/2017

Search-Mailbox <Source Mailbox> -SearchQuery {Subject:"Test" AND From:"john@o365info.com" AND Sent:"30/07/2017"} -TargetMailbox <Target mailbox> -TargetFolder <Target Folder>


The Search-Mailbox | PowerShell scripts series

The Search-Mailbox PowerShell cmdlet is very powerful and can be used for a various type of administrative scenarios. For this reason, I have created a “series” of PowerShell scripts, that will help you to “enroll” the Search-Mailbox PowerShell cmdlet for implementing different type of tasks:

Search for mail items using the Search-Mailbox PowerShell cmdlet (1#4)

A PowerShell menu script that is used for – performing a search in a single Exchange Online mailbox, by using various types of filters such as – specific text, specific date, a specific type of mail items (calendar, contact, etc.), mail with attachment and more.
Searching hidden Email addresses Using PowerShell - Office 365 - Part 11-13


Recover mail items using the Search-Mailbox PowerShell cmdlet (2#4)

PowerShell menu script, that is used for – Recovers mail items that are stored in the Recovery mail folder (Exchange Online Mailbox Dumpster). The PowerShell script, will help you to Recover all the content of the recovery mail folder or, use a search filter that will recover only specific mail items that answer a specific character such as – specific text, specific date, specific type of mail items (calendar, contact, etc.), mail with attachment and more.
Using the Search-Mailbox PowerShell command - Recover mail abc- Part 3-5u


Delete mail items – Multiple Exchange mailboxes (Bulk) using PowerShell (3#4)

PowerShell menu script, that is used for – performing a Deletion of specific mail items from multiple Exchange Online mailboxes (bulk mode). The “Deletion” of this mail item, is implemented by selecting a “search filter” that will delete only mail items that have specific characters such as – specific text, specific date, a specific type of mail items (calendar, contact, etc.), mail with attachment and more.

Search and Delete mail items from Multiple Exchange mailboxes Bulk using Search-Mailbox PowerShell cmdlets-Part 4-5


Search and Delete mail from Single Exchange mailboxes using PowerShell (4#4)

PowerShell menu script, that is used for – performing a Deletion of specific mail items from a single Exchange Online mailbox.
The “Deletion” of this mail item, is implemented by selecting a “search filter” that will delete only mail items that have specific characters such as – specific text, specific date, a specific type of mail items (calendar, contact, etc.), mail with attachment and more.
Search and Delete mail items from the Exchange mailbox using Search-Mailbox PowerShell cmdlets - Single mailbox-Part 5-5


Getting started with Office 365 PowerShell

PowerShell Naming Conventions & general information
Get more information about the Naming Conventions that are used in the PowerShell articles – Help and additional information – o365info.com PowerShell articles
Creating a remote PowerShell session to Exchange Online 
To get more information about the required remote PowerShell commands that you need to use for connecting to Exchange Online, read the following article:
Connect to Exchange Online by using Remote PowerShell
Creating a remote PowerShell session to Azure Active Directory
To get more information about the required software component + the remote PowerShell commands that you need to use for connecting Azure Active Directory, read the following article: Part 2: Connect to Office 365 by using Remote PowerShell
Basic introduction to PowerShell in Office 365 based environment
If you are new in the PowerShell world, you can read more information about how to start working with PowerShell in Office 365 based environment in the following article series:  Getting started with Office 365 PowerShell – Part 1, Part 2, Part 3.
Running and using o365info PowerShell scripts
In case that you need more information about how to use the o365info PowerShell scripts that I add to the PowerShell articles, you can read the article – How to run and use o365info PowerShell menu script

Restore Exchange Online mailbox | Article series index

Now it’s Your Turn!
It is important for us to know your opinion on this article

The post Search + Save a copy of mail items using PowerShell | Part 2#5 appeared first on o365info.com.

Recover mail items from Recovery mail folder (the Dumpster) using PowerShell | Part 3#5

$
0
0

In the current article, we will review how to use the PowerShell cmdlet Search-Mailbox for -recover mail item stored in the Recovery mail folder (also named the Dumpster).The recovery mail folder considers as a “system folder” and it’s not visible to the user (mailbox owner).

PowerShell | Help & additional information

Running PowerShell commands in Office 365 based environment
To be able to run the PowerShell commands specified in the current article, you will need to create a remote PowerShell with Azure Active Directory or Exchange Online. In case that you need help with the process of creating a Remote PowerShell session, you can use the links on the bottom of the Article.

The purpose of the Recovery mail folder is to serve as a “container” for Soft Deleted mail items and Hard deleted mail items.

Using the Search-Mailbox PowerShell cmdlet enables Exchange administrator, to “look at” the content of the Recovery mail folder + Copy ALL the recovery mail folder content to a Target Mailbox or, only specific items stored in the Recovery mail folder.

Note – in case that you want more information about the “Recovery mail folder” you can read the article – Recover deleted mail items in the Exchange Online environment | Single item recovery | 2#7

The parameter “SearchDumpsterOnly”

By default, the Search-Mailbox PowerShell cmdlet will perform a search in all the mailbox folders (inbox, etc.), including the Recovery mail folder (the Dumpster).

In a scenario in which we want to restrict the search scope only to the Recovery mail folder (the Dumpster), we can use the following cmdlet parameter – SearchDumpsterOnly

Using this parameter is suitable for a scenario in which we need to help users to recover mail items that were deleted and stored in the Recovery mail folder (the Dumpster).

Scenario 1 – emails that were disappearing

A user that report about “emails that were disappeared”, and we need to check if these mail items are deleted (as mentioned, the user cannot access the specific folder in the “Recovery mail folder store” which stored Hard Deleted mail items).

Scenario 2 –  restore (recover) mail items that saved by In-Place Hold or Litigation Hold.

In case that we use the option of – In-Place Hold or Litigation Hold, mail items that deleted by the user will be saved in the Recovery mail folder (the Dumpster).

Only the Exchange administrator can access this special folder and one of the methods that Exchange administrator can use for “fetching” data from the Recovery mail folder (the Dumpster) is by using the Search-Mailbox PowerShell cmdlet.

Recovery mail folder (the Dumpster) and deleted mail items “Lifetime”

An additional detail that I would like to mention is, that by default, the Recovery mail folder (the Dumpster) stored deleted mail items for a period of 14 days.
At the end of this period, Soft Deleted and Hard deleted mail items older than 14 days, will be permanently deleted without any option to recover this mail item!

In other words, the Search-Mailbox PowerShell cmdlet can serve as a utility for viewing and export the content of the Recovery mail folder (the Dumpster) but, cannot help us to recover old mail items.

Note – The exception to this “14 days rule” is an Exchange mailbox with Litigation Hold or In-Place Hold.

Scenario description

The Goals

The goals we seek to achieve are:

  1. View + Copy mail items stores in a specific Exchange mailbox in the Recovery mail folder (the Dumpster).
  2. The search is implemented by defining a specific Search Query (search criteria), that will help us to locate specific mail items that answer the Search Query.
  3. The Search Results will be copied to a Target Mailbox and saved in a dedicated folder (Target Folder).
  4. In addition, we want to create a detailed report (Log), about each mail items that appear in the Search Results (the Log \ Report file will be saved in the Target Folder)

Source mailbox + Target mailbox (and Target Folder)

  • The Source Mailbox (the mailbox on which we perform the search) is Bob’s mailbox
  • The Target Mailbox which we use for storing the search result (the mail items) is Adele’s
  • The Target Folder name will be – Search Results – Bob -Recovered mail items.

Scenario description - Search mailbox + Save search results to other mailbox

The mailbox search scope

In the current scenario, we restrict the Search-Mailbox cmdlet to perform a search in the “Source Mailbox” only in the Recovery mail folder (the Dumpster).

Primary mailbox

  1. The Search-Mailbox cmdlet will perform a search only for mail items stored in the Recovery mail folder (the Dumpster).

Archive mailbox

In case that the Source Mailbox has Archive mailbox,

  1. The Search-Mailbox cmdlet will perform a search only for mail items stored in the Archive Mailbox Recovery mail folder (the Dumpster).

An example of the outcome of search results

In the following screenshot, we can see an example of a scenario in we use the Search-Mailbox cmdlet to perform a search on Bob’s mailbox – Recovery mail folder and copy the Search results to Adele’s mailbox.

The Search-Mailbox cmdlet creates a New folder (Target Folder) and store all the Search Results (copy the mail items) in this folder (the Target folder).

In our scenario, Bob mailbox has an archive mailbox + Bob Mailbox uses In-Place Hold.

The search results folder hierarchy includes two separated “spaces”:

  1. Archive mailbox (A in screenshot)
  2. Primary mailbox (B in screenshot)

To understand better the result that we got, let’s review the Primary mailbox (B in the screenshot)

In our case, we perform a search that “ignore” the content of the mailbox and relates only to the Recovery mail folder (the Dumpster).

Under the Primary mailbox store, we can see the Recoverable Items store.

The Recoverable item’s store includes the following sub folders:

  1. Deletions: this is the folder that store – Soft Deleted mail items
  2. Purges: this is the folder that store – Hard Deleted mail items
  3. DiscoveryHolds: this is the folder that store – mail items that saved by the In-Place policy.

Search-Mailbox Recover mail items from recover folder Dumpster

Using the Search-Mailbox for performing a search | PowerShell command syntax

In the following section, we will demonstrate various type of scenario in which we use the
Search-Mailbox cmdlet + the parameter SearchDumpsterOnly, for “fetching” mail items from the Recovery mail folder (the Dumpster).

Search and Copy mail items from Recovery Folder (Dumpster) | ALL mail items.

In this example, we use the Search-Mailbox cmdlet without any “Search query filters.

In this scenario, our goal is to copy all the mail items that exist in the Source Mailbox in the Recovery mail folder (the Dumpster) the Target Mailbox.

Search + Save a copy ALL mail items | Search Query – NO Filter (no Search Query)

PowerShell command syntax

Search-Mailbox <Source Mailbox> -SearchDumpsterOnly -TargetMailbox <Destination mailbox> -TargetFolder <Folder> -LogLevel Full

PowerShell command Example

Search-Mailbox Bob -SearchDumpsterOnly -TargetMailbox Adele -TargetFolder “Search Results - Bob” -LogLevel Full

Search and Copy mail items from Recovery Folder (Dumpster) | Search query Filter – specific Type of Mail item

In this scenario, we want to locate (search) and copy only a specific type of mail items from the Source Mailbox stored in Recovery mail folder (the Dumpster).

Search + Save a copy of mail items | Search Query filter – Calendar items

Search for mail items stored in Recovery mail folder (the Dumpster), look for a specific type of mail items – Calendar items
PowerShell command syntax

Search-Mailbox <Source Mailbox> -SearchDumpsterOnly -SearchQuery "Kind:meetings" -TargetMailbox <Destination mailbox> -TargetFolder <Folder> -LogLevel Full

PowerShell command Example

Search-Mailbox Bob -SearchDumpsterOnly -SearchQuery "Kind:meetings" -TargetMailbox Adele -TargetFolder “Search Results - Bob” -LogLevel Full

Search + Save a copy of mail items | Search Query – Contact items

Search for mail items stored in Recovery mail folder (the Dumpster), look for a specific type of mail items – Contacts items

PowerShell command syntax

Search-Mailbox <Source Mailbox> -SearchDumpsterOnly -SearchQuery "Kind:contacts" -TargetMailbox <Destination mailbox> -TargetFolder <Folder> -LogLevel Full

PowerShell command Example

Search-Mailbox Bob -SearchDumpsterOnly -SearchQuery "Kind:contacts" -TargetMailbox Adele -TargetFolder “Search Results - Bob” -LogLevel Full

Note

By default, if not specified, the Search-Mailbox cmdlet will look for all types of message types.

When using the option the “kind” search filter, valid values can be one or more of the following:

  • Email
  • Meetings
  • Tasks
  • Notes
  • Docs
  • Journals
  • Contacts
  • IM

Search and Copy mail items from Recovery Folder (Dumpster) | Search query Filter – Text String

In this section, we use Search Query that looks for mail items that include a specific text string.

General note – because we use the quotation marks, the search will fetch only results in which all the words in the text string that we define appear.

For example, in our example, we look for the text string: “A meeting in New York.”
Mail items that include the words “New York” or “meeting” will not appear in the Search Results.

Only mail items that include all the text phrases that appear inside the quotation marks, will be considered as “valid mail items” that answer the Search Query (exact phrases or keywords in subjects of items).

Search + Save a copy of mail items | Search Query – Mail items with Text String in mail SUBJEC

In the following example, we look for mail items stored in Recovery mail folder (the Dumpster) that include a specific TEXT string that appears in E-mail Message Subject line.

PowerShell command syntax

Search-Mailbox <Source Mailbox> -SearchDumpsterOnly -SearchQuery Subject:"<Text String>" -TargetMailbox <Destination mailbox> -TargetFolder <Folder> -LogLevel Full

PowerShell command Example

Search-Mailbox Bob -SearchQuery Subject:"A meeting in New York" -TargetMailbox Adele -TargetFolder “Search Results - Bob” -LogLevel Full

Search + Save a copy of mail items | Search Query – Mail items with Text String in mail BODY

Search for mail items stored in Recovery mail folder (the Dumpster), that include a specific TEXT string that appears in E-mail Message Body.

PowerShell command syntax

Search-Mailbox <Source Mailbox> -SearchDumpsterOnly -SearchQuery body:"<Text String>" -TargetMailbox <Destination mailbox> -TargetFolder <Folder> -LogLevel Full

PowerShell command Example

Search-Mailbox Bob -SearchDumpsterOnly -SearchQuery Subject:"A meeting in New York" -TargetMailbox Adele -TargetFolder “Search Results - Bob” -LogLevel Full

Search + Save a copy of mail items | Search Query – Mail items with Text String in mail BODY or Mail Subject

Search for mail items stored in Recovery mail folder (the Dumpster), that include a specific TEXT string that appears in E-mail Message Body or Mail Subject.

PowerShell command syntax

Search-Mailbox <Source Mailbox> -SearchDumpsterOnly -SearchQuery "<Text String>" -TargetMailbox <Destination mailbox> -TargetFolder <Folder> -LogLevel Full

PowerShell command Example

Search-Mailbox Bob -SearchDumpsterOnly -SearchQuery "A meeting in New York" -TargetMailbox Adele -TargetFolder “Search Results - Bob” -LogLevel Full

Additional PowerShell command syntax that we can use for performing a search that includes two types of search criteria is: PowerShell command Example

Search-Mailbox Bob -SearchDumpsterOnly -SearchQuery {Subject:"A meeting in New York" OR body:"A meeting in New York"} -TargetMailbox Adele -TargetFolder “Search Results - Bob” -LogLevel Full

Search and Copy mail items from Recovery Folder (Dumpster) | Search query Filter – specific Date or Date Range

General information about the subject of “Date and Date format.”

The subject of the date format that we use in the Search-Mailbox query is a little tricky because the date format is affected the Windows OS Date format, the Exchange Online Mailbox Date format, etc.

Case 1 – most of the time, the date format that you need to use in the Search Query is your Windows OS Date format.

Case 2 – when using a date format in Search-Mailbox queries needs to be in a format that conforms to the Exchange server’s Regional settings.

In case that you get an error such as – “The KQL parser threw an exception,”, use the “month name” instead of the format of “month number.”

For example, instead of using the Date format – 07/21/2017 use the following format –  02/July/2017

Search + Save a Copy of mail items | Search Query – Emails SENT on a Specific Date

Search for mail items stored in Recovery mail folder (the Dumpster), that sent on a specific date.

PowerShell command syntax

Search-Mailbox <Source Mailbox> -SearchDumpsterOnly -SearchQuery sent:mm/dd/yyyy -TargetMailbox <Destination mailbox> -TargetFolder <Folder> -LogLevel Full

PowerShell command Example

Search-Mailbox Bob -SearchDumpsterOnly -SearchQuery sent:21/07/2017 -TargetMailbox Adele -TargetFolder “Search Results - Bob” -LogLevel Full

Search + Save a copy of mail items | Search Query – Emails SENT in a specific Date Range

Search for mail items stored in Recovery mail folder (the Dumpster), that sent on a specific Date Range.

PowerShell command syntax

Search-Mailbox <Source Mailbox> -SearchDumpsterOnly -SearchQuery {sent:mm/dd/yyyy..mm/dd/yyyy}  -TargetMailbox <Target mailbox> -TargetFolder <Target Folder> -LogLevel Full

PowerShell command Example

Search-Mailbox Bob -SearchDumpsterOnly -SearchQuery {sent:21/06/2017..07/21/2017} -TargetMailbox Adele -TargetFolder “Search Results - Bob” -LogLevel Full

Search + Save a copy of mail items | Search Query – Emails RECEIVED in a specific Date Range

Search for mail items stored in Recovery mail folder (the Dumpster), that Received on a specific date range.

PowerShell command syntax

Search-Mailbox <Source Mailbox> -SearchDumpsterOnly -SearchQuery {Received:mm/dd/yyyy..mm/dd/yyyy}  -TargetMailbox <Target mailbox> -TargetFolder <Target Folder> -LogLevel Full

PowerShell command Example

Search-Mailbox Bob -SearchDumpsterOnly -SearchQuery {Received:21/06/2017..21/07/2017} -TargetMailbox Adele -TargetFolder “Search Results - Bob” -LogLevel Full

Search + Save a copy of mail items | Search Query – Emails SENT in a specific Date + Emails RECEIVED in a specific Date

Search for mail items stored in Recovery mail folder (the Dumpster), that Sent or Received on a specific date range.

PowerShell command syntax

Search-Mailbox <Source Mailbox> -SearchDumpsterOnly -SearchQuery {sent:mm/dd/yyyy OR Received: mm/dd/yyyy} -TargetMailbox <Destination mailbox> -TargetFolder <Folder> -LogLevel Full

PowerShell command Example

Search-Mailbox Bob -SearchDumpsterOnly -SearchQuery {sent:30/07/2017 OR Received:30/07/2017}-TargetMailbox Adele -TargetFolder “Search Results - Bob” -LogLevel Full

Search and Copy mail items from Recovery Folder (Dumpster) | Search query Filter – sender or by Recipient

In this section, we would like to search mail items that were sent from a specific sender or reach to a specific recipient.

Search + Save a copy of mail items | Filter scope – Email sent by a specific SENDERR

Search for mail items stored in Recovery mail folder (the Dumpster), that was Sent from a specific Sender (the FROM mail felid).

PowerShell command syntax

Search-Mailbox <Source Mailbox> -SearchDumpsterOnly -SearchQuery from:"<E-mail address>" -TargetMailbox <Target mailbox> -TargetFolder <Target Folder> -LogLevel Full

PowerShell command Example

Search-Mailbox Bob -SearchDumpsterOnly -SearchQuery from:"John@o365info.com" -TargetMailbox Adele -TargetFolder “Search Results - Bob” -LogLevel Full

Search + Save a copy of mail items | Filter scope – Emails sent TO a specific RECIPIENT

Search for mail items stored in Recovery mail folder (the Dumpster), that was Received by a specific recipient (sent to a specific recipient – the TO mail felid).

PowerShell command syntax

Search-Mailbox <Source Mailbox> -SearchDumpsterOnly -SearchQuery to:"<E-mail address>" -TargetMailbox <Target mailbox> -TargetFolder <Target Folder> -LogLevel Full

PowerShell command Example

Search-Mailbox Bob -SearchDumpsterOnly -SearchQuery to:"Alice@outlook.com" -TargetMailbox Adele -TargetFolder “Search Results - Bob” -LogLevel Full

Search and Copy mail items from Recovery Folder (Dumpster) | Search query
Filter – E-mail Attachments

In this section, we would like to search mail items that have an attachment.

Search + Save a copy of mail items | Filter scope – Emails that include a specific attachment file name

Search for mail items stored in Recovery mail folder (the Dumpster), that have an attachment with a specific file name.

PowerShell command syntax

Search-Mailbox <Source Mailbox> -SearchDumpsterOnly -SearchQuery attachment:"<Attachment file name>" -TargetMailbox <Target mailbox> -TargetFolder <Target Folder> -LogLevel Full

PowerShell command Example

Search-Mailbox Bob -SearchDumpsterOnly -SearchQuery attachment:"Customer.pdf" -TargetMailbox Adele -TargetFolder “Search Results - Bob” -LogLevel Full

Search + Save a copy of mail items | Filter scope – specific attachment type (suffix)

Search for mail items stored in Recovery mail folder (the Dumpster), that have an attachment with a specific File extension.

PowerShell command syntax

Search-Mailbox <Source Mailbox> -SearchDumpsterOnly -SearchQuery {Attachment -like "*.<suffix>"} -TargetMailbox <Target mailbox> -TargetFolder <Target Folder> -LogLevel Full

PowerShell command Example

Search-Mailbox Bob -SearchDumpsterOnly -SearchQuery {Attachment -like "*.PDF"}-TargetMailbox Adele -TargetFolder “Search Results - Bob” -LogLevel Full

Search + Save a copy of mail items | Filter scope – Emails with Attachment

Search for mail items stored in Recovery mail folder (the Dumpster), that have an attachment with, that have an attachment.

PowerShell command syntax

Search-Mailbox <Source Mailbox> -SearchDumpsterOnly -SearchQuery {HasAttachment -eq $true} -TargetMailbox <Target mailbox> -TargetFolder <Target Folder> -LogLevel Full

PowerShell command Example

Search-Mailbox Bob -SearchDumpsterOnly -SearchQuery -SearchQuery {HasAttachment -eq $true}-TargetMailbox Adele -TargetFolder “Search Results - Bob” -LogLevel Full

Search and Copy mail items from Recovery Folder (Dumpster) | Search query Filter – Additional search queries

Search + Save a copy of mail items | Filter scope – E-mail items size greater than X MB

Search for mail items stored in Recovery mail folder (the Dumpster), that their size is “bigger” (greater) than a specific size.

PowerShell command syntax

Search-Mailbox <Source Mailbox> -SearchDumpsterOnly -SearchQuery {Size -gt <size in KB or MB>}-TargetMailbox <Target mailbox> -TargetFolder <Target Folder> -LogLevel Full

PowerShell command Example

Search-Mailbox Bob -SearchDumpsterOnly -SearchQuery -SearchQuery {Size -gt 5MB}-TargetMailbox Adele -TargetFolder “Search Results - Bob” -LogLevel Full

Writing advanced \ combined search filters.

An additional part that I would like to briefly, mention is the subject of defining a more advanced or more sophisticated search query that combines two or more “filter” or search conditions.

To define two or more filters, we can use the logical operators such as – “OR”,”AND” and more.

In the following diagram, we can see some example of the syntax that we use for defining a more advanced Search Query.

Using a combination of Search Query parameters

Example 1

Look for all mail items, that answer the following search criteria’s:

E-mail items that have attachment + in addition, the mail subject is “Test

Search-Mailbox <Source Mailbox> -SearchDumpsterOnly -SearchQuery {HasAttachment -eq $true and subject:Test} -TargetMailbox <Target mailbox> -TargetFolder <Target Folder>

Example 2

Look for all mail items, that answers the following search criteria’s:

E-mail message mail items or calendar mail items

Search-Mailbox <Source Mailbox> -SearchDumpsterOnly -SearchQuery {kind:email OR kind:meetings} -TargetMailbox <Target mailbox> -TargetFolder <Target Folder>

Example 3

Look for all mail items, that answers the following search criteria’s:

Mail items that have the subject Test + sent from john@o365info.com + sent on a specific date 30/07/2017

Search-Mailbox <Source Mailbox> -SearchDumpsterOnly -SearchQuery {Subject:"Test" AND From:"john@o365info.com" AND Sent:"30/07/2017"} -TargetMailbox <Target mailbox> -TargetFolder <Target Folder>


The Search-Mailbox | PowerShell scripts series

The Search-Mailbox PowerShell cmdlet is very powerful and can be used for a various type of administrative scenarios. For this reason, I have created a “series” of PowerShell scripts, that will help you to “enroll” the Search-Mailbox PowerShell cmdlet for implementing different type of tasks:

Search for mail items using the Search-Mailbox PowerShell cmdlet (1#4)

A PowerShell menu script that is used for – performing a search in a single Exchange Online mailbox, by using various types of filters such as – specific text, specific date, a specific type of mail items (calendar, contact, etc.), mail with attachment and more.
Searching hidden Email addresses Using PowerShell - Office 365 - Part 11-13


Recover mail items using the Search-Mailbox PowerShell cmdlet (2#4)

PowerShell menu script, that is used for – Recovers mail items that are stored in the Recovery mail folder (Exchange Online Mailbox Dumpster). The PowerShell script, will help you to Recover all the content of the recovery mail folder or, use a search filter that will recover only specific mail items that answer a specific character such as – specific text, specific date, specific type of mail items (calendar, contact, etc.), mail with attachment and more.
Using the Search-Mailbox PowerShell command - Recover mail abc- Part 3-5u


Delete mail items – Multiple Exchange mailboxes (Bulk) using PowerShell (3#4)

PowerShell menu script, that is used for – performing a Deletion of specific mail items from multiple Exchange Online mailboxes (bulk mode). The “Deletion” of this mail item, is implemented by selecting a “search filter” that will delete only mail items that have specific characters such as – specific text, specific date, a specific type of mail items (calendar, contact, etc.), mail with attachment and more.

Search and Delete mail items from Multiple Exchange mailboxes Bulk using Search-Mailbox PowerShell cmdlets-Part 4-5


Search and Delete mail from Single Exchange mailboxes using PowerShell (4#4)

PowerShell menu script, that is used for – performing a Deletion of specific mail items from a single Exchange Online mailbox.
The “Deletion” of this mail item, is implemented by selecting a “search filter” that will delete only mail items that have specific characters such as – specific text, specific date, a specific type of mail items (calendar, contact, etc.), mail with attachment and more.
Search and Delete mail items from the Exchange mailbox using Search-Mailbox PowerShell cmdlets - Single mailbox-Part 5-5


Getting started with Office 365 PowerShell

PowerShell Naming Conventions & general information
Get more information about the Naming Conventions that are used in the PowerShell articles – Help and additional information – o365info.com PowerShell articles
Creating a remote PowerShell session to Exchange Online 
To get more information about the required remote PowerShell commands that you need to use for connecting to Exchange Online, read the following article:
Connect to Exchange Online by using Remote PowerShell
Creating a remote PowerShell session to Azure Active Directory
To get more information about the required software component + the remote PowerShell commands that you need to use for connecting Azure Active Directory, read the following article: Part 2: Connect to Office 365 by using Remote PowerShell
Basic introduction to PowerShell in Office 365 based environment
If you are new in the PowerShell world, you can read more information about how to start working with PowerShell in Office 365 based environment in the following article series:  Getting started with Office 365 PowerShell – Part 1, Part 2, Part 3.
Running and using o365info PowerShell scripts
In case that you need more information about how to use the o365info PowerShell scripts that I add to the PowerShell articles, you can read the article – How to run and use o365info PowerShell menu script

Restore Exchange Online mailbox | Article series index

Now it’s Your Turn!
It is important for us to know your opinion on this article

The post Recover mail items from Recovery mail folder (the Dumpster) using PowerShell | Part 3#5 appeared first on o365info.com.

Delete mail items from Multiple Exchange mailboxes (Bulk) using PowerShell | Part 4#5

$
0
0
The current article serves as an introduction to the subject of Deleting mail items using the Search-Mailbox cmdlet. In this article, we review some various scenarios of using the Search-Mailbox cmdlet for deleting mail items from multiple Exchange mailboxes (Bulk Deletion).

PowerShell | Help & additional information

Running PowerShell commands in Office 365 based environment
To be able to run the PowerShell commands specified in the current article, you will need to create a remote PowerShell with Azure Active Directory or Exchange Online. In case that you need help with the process of creating a Remote PowerShell session, you can use the links on the bottom of the Article.

In the next article –  Delete mail items from Single Exchange mailbox using PowerShell | Part 5#5, we review a various scenario of using Search-Mailbox cmdlet for deleting mail items from a single Exchange.

Disclaimer and warning

Before we begin and before to run the PowerShell commands that we review in this article, I must strongly emphasize that you should be careful with this use of the Search-Mailbox PowerShell cmdlet, because the cmdlets perform Hard Delete of mail items.

In other words, you should have a good reason for using this option, and I recommend that you get familiar with the PowerShell syntax, and understand the exact Search Query that you use, what happened to the deleted mail, what are the Exchange mailboxes are impacted and so on.

The scenario in which we need to use the Search-Mailbox cmdlet for deleting mail items

An example of scenarios in which Exchange administrator need to enroll the Search-Mailbox cmdlet for “mail items deletion” from a single Exchange mailbox or from Multiple Exchange mailboxes (Bulk deletion) could be:

1. Virus attacks

A scenario in which a virus attacks your organization recipient. You need that the Virus sent for a couple of Exchange recipient, but you don’t know who is this recipient.

In this case, we would like to use the Search-Mailbox cmdlet for performing a search in ALL Exchange mailboxes looking for the virus file name, and after we locate this mail item, delete the mail items from the user mailbox.

2. A sensitive E-mail message that was sent by mistake to multiple recipients.

A scenario in which Exchange recipient sent by mistake a “sensitive E-mail message” to the recipients who were not supposed to read the specific mail item.

And again, in this case, we would like to use the Search-Mailbox cmdlet for performing a search in ALL Exchange mailboxes and “remove” (delete) this mail item.

The “logic” of the Search-Mailbox cmdlet relating to “mail item deletion”

Given that we decide that we must use the Search-Mailbox cmdlet for deleting mail items, there are two main scenarios which we can choose from:

Option 1 – Delete mail items from the source mailbox without saving a copy of the Deleted mail items.

In this scenario, we wish to delete from the Source Mailbox the specific mail items (the mail items that answer our Search Query of Filter scope) without saving any copy of these deleted mail items.

In this case, we use the PowerShell command syntax without providing information about
the Target Mailbox + The Target Folder.

An example of the PowerShell command syntax could be:

Search-Mailbox <Source Mailbox> -DeleteContent -Force

Option 2 – Delete mail items from Source mailbox + saving a copy of the Deleted mail items

In this scenario, we wish to delete from the Source Mailbox the specific mail items (the mail items that answer our Search Query of Filter scope) but save a copy of the Deleted mail items in a Target Mailbox (in a Target Folder)

In this case, we use the PowerShell command syntax + providing information about the
Target Mailbox + The Target Folder.

An example of the PowerShell command syntax could be:

Search-Mailbox <Source Mailbox> -TargetMailbox <Target mailbox> -TargetFolder <Target Folder> -DeleteContent -Force

Option 3 – Perform a search – locate the mail items that we are going to delete from Source mailbox + Generate Report (Log)

In this scenario, we wish to generate a report (Log file) which includes details about the mail items that we are “going to delete but without performing any “action” beside of the generating the report.

To generate only report without performing any action, we use the PowerShell parameter – LogOnly

My recommendation is to consider using this option before we start with the actual deletion. In other words-  better safer than sorry!

After we look at the information that appears in the report (Log) and after we “approve” to delete the specific mail items only then, go back and use one of the options mentioned above (delete the mail items without saving a copy or save a copy of the deleted mail items in the Target Mailbox).

In this case, we use the PowerShell command syntax + providing information about the Target Mailbox + The Target Folder that will “store” the report file.

An example of the PowerShell command syntax could be:

Search-Mailbox <Source Mailbox> -TargetMailbox <Target mailbox> -TargetFolder <Target Folder> -LogOnly

The logic of the Search-Mailbox cmdlet relating to mail item deletion

Scenario description

In the following example, I prefer to be on the safe side. For this reason, all the PowerShell command examples will be based on a scenario in which we save a copy of the Deleted mail items in the “Target Mailbox.” In case that you prefer to avoid this option, you can remove the section about the Target Mailbox + the Target Folder from the PowerShell command syntax.

The Goals

The goals we seek to achieve are:

  1. Perform a search in Multiple Exchange mailboxes (Bulk Mailbox search). The search is implemented by defining a specific Search Query (search criteria), that will help us to locate specific mail items that answer the Search Query.
  2. We wish to Delete all the mail items that appear in the Search Results.
  3. The Search Results (deleted mail items) will be copied to a Target Mailbox, and saved in a dedicated folder (Target Folder).
  4. In addition, we want to create a detailed report (Log), about each mail items that appear in the Search Results, and that was Deleted (the Log \ Report file will be saved in the Target Folder).

Source mailbox + Target mailbox (and Target Folder)

  • The Source Mailboxes (the mailboxes on which we perform the search) are ALL Exchange Mailboxes.
  • The Target Mailbox which we use for storing the search result (the mail items) is Adele’s
  • The Target Folder name will be – Search Results Multiple Mailbox search – DELETED mail item’s Backup.

Search Multiple mailboxes - Delete mail items + Save search results to other mailbox

The mailbox search scope

By default, the Search-Mailbox cmdlet performs a search in the “Source Mailbox” that includes the following “Mailbox spaces”:

Primary mailbox

  1. The Search-Mailbox cmdlet will perform a search that relates to all folders and sub folders in the Primary mailbox.
  2. Recovery mail folder – by default, the Search-Mailbox cmdlet will also search for mail items stored in the Recovery mail folder (the Dumpster).

Archive mailbox

In case that the Source Mailbox has Archive mailbox,

  1. The Search-Mailbox cmdlet will perform a search that relates to all folders and sub folders in the Archive mailbox.
  2. Recovery mail folder – by default, the Search-Mailbox cmdlet will also search for mail items stored in the mailbox archive Recovery mail folder (the Dumpster).

Cleaning the Recovery mail folder (the Dumpster).

The Search-Mailbox cmdlet has the ability, to delete mail items stored in the Recovery mail folder (the Dumpster).

The Recovery mail folder (the Dumpster) uses two separated folders for storing the following type of deleted mail items:

  • Deletion – the folder that store Soft Deleted mail items.
  • Purges – the folder that store Hard Deleted mail items.

It is important to mention that in case that we use the Search-Mailbox cmdlet for deleting mail items stored in the Recovery mail folder (the Dumpster); the Search-Mailbox cmdlet can only delete mail items that stored in the Deletion folder (the folder that store Soft Deleted mail items) but cannot delete mail items that are stored in the Purges folder (the folder that store Hard Deleted mail items).

Using the Search-Mailbox for deleting mail items | PowerShell parameters

The “active” the option of Deleting mail items using the Search-Mailbox cmdlet we need to add the following PowerShell command parameters:
1. DeleteContent

This “DeleteContent” parameter instructs the Search-Mailbox cmdlet to “search and destroys” the mail items that match the Search query criteria.
2. Force

This “Force” parameter is not a mandatory parameter. The purpose of this parameter is, to prevent from the Search-Mailbox cmdlet to ask us for a confirmation for each mail items that are going to be deleted.

In the following diagram, we can see the additional parameters that “turn” the Search-Mailbox cmdlet from a tool that searches and locate information (mail items) into a deadly weapon that destroys (Hard Delete) mail items!

Using the Search-Mailbox cmdlet for Deleting mail items

The term “Multiple mailbox search”

In the current article, we review how to use the Search-Mailbox cmdlet for performing a search + mail deletion of mail items that are stored on a “group” or “array” of Exchange mailboxes.

The definition of the Exchange mailboxes is a very flexible definition because there are multiple ways that we can use in addressing the Exchange mailboxes that consider as part of the “group.”

In other words, we have many options for defining the mailbox’s search scope.

The term Multiple mailbox search

The simplest example is – perform a mailbox’s search that relates to ALL existing Exchange mailboxes. In this scenario, we define the “group” of ALL existing Exchange mailboxes as:

Get-Mailbox -ResultSize Unlimited

After we define the characters or the specific mailbox “Group” (multiple mailboxes), we “pipe” the Exchange mailbox group to the Search-Mailbox PowerShell command.

There many options that we can use for defining a specific “group” of Exchange mailboxes.

Example 1 – Perform Multiple mailbox search | All types of Exchange mailboxes.
For example, to perform a search for mail items in all existing Exchange mailboxes, we can use the following command syntax:

Get-Mailbox -ResultSize Unlimited | Search-Mailbox -SearchQuery

Example 2 – Perform Multiple mailbox search | All Exchange USER mailboxes

Get-Mailbox -Filter '(RecipientTypeDetails -eq "UserMailbox") | Search-Mailbox -SearchQuery

Example 3 – Perform Multiple mailbox search | All Exchange Shared mailboxes

Get-Mailbox -Filter '(RecipientTypeDetails -eq "SharedMailbox") | Search-Mailbox -SearchQuery

Example 4 – Perform Multiple mailbox search | All Exchange Room mailboxes

Get-Mailbox -Filter '(RecipientTypeDetails -eq "RoomMailBox") | Search-Mailbox -SearchQuery

Example 5 – Perform Multiple mailbox’s search | Exchange Mailboxes – members in Distribution Group

In this scenario, we want to perform a search by defining a “group of Exchange mailboxes” which “belong” (members) to a specific Distribution Group.

Get-DistributionGroupMember <"Distribution Group name"> | Search-Mailbox -SearchQuery

Using the Search-Mailbox for performing a search | PowerShell command syntax

Search and Delete mail items + save a Copy of mail items | Delete mail items from the Recovery mail folder (the Dumpster).

In this example, we use the Search-Mailbox cmdlet without any “filter” or Search query filters.

Instead, we use that the PowerShell parameter SearchDumpsterOnly for restricting the search (and the deletion of mail items) only to mail items stored in the Recovery mail folder (the Dumpster).

In this scenario, our goal is to delete all Soft Deleted mail items stored in the Recovery mail folder (the Dumpster) + Save a copy all the mail items that were deleted from the Source Mailbox to the Target Mailbox.

As mentioned, the Search-Mailbox cmdlet cannot delete Hard Deleted mail items that are stored in the Purges sub folder (sub folder of the Recovery mail folder)

Search and Delete mail items + Save a Copy of mail items | Mailbox Search Scope Recovery mail folder (the Dumpster)

PowerShell command syntax

Get-Mailbox -ResultSize Unlimited | Search-Mailbox -SearchDumpsterOnly -TargetMailbox <Destination mailbox> -TargetFolder <Folder> -DeleteContent -Force -LogLevel Full

PowerShell command Example

Get-Mailbox -ResultSize Unlimited | Search-Mailbox -SearchDumpsterOnly -TargetMailbox Adele -TargetFolder “Search Results Multiple Mailbox search – DELETED mail item’s Backup” -DeleteContent -Force -LogLevel Full

Search and Delete mail items + Save a Copy of mail items | Search query Filter – specific Type of Mail item

In this scenario, we want to:

  • Look (search), only a specific type of mail items (such as calendar or contact mail items) in a multiple Source Mailboxes (Exchange mailboxes).
  • Delete these mail items
  • Save a copy of the delete d mail items in the Target mailbox

Search + Save a copy of mail items | Search Query filter – Calendar items

Search + Delete specific type of mail items – Calendar items

PowerShell command syntax

Get-Mailbox -ResultSize Unlimited | Search-Mailbox -SearchQuery "Kind:meetings" -TargetMailbox <Destination mailbox> -TargetFolder <Folder> -DeleteContent -Force -LogLevel Full

PowerShell command Example

Get-Mailbox -ResultSize Unlimited | Search-Mailbox -SearchQuery "Kind:meetings" -TargetMailbox Adele -TargetFolder “Search Results Multiple Mailbox search – DELETED mail item’s Backup” -DeleteContent -Force -LogLevel Full

Search + Save a copy of mail items | Search Query – Contact items

Search + Delete specific type of mail items – Contacts items

PowerShell command syntax

Get-Mailbox -ResultSize Unlimited | Search-Mailbox -SearchQuery "Kind:contacts" -TargetMailbox <Destination mailbox> -TargetFolder <Folder> -DeleteContent -Force -LogLevel Full

PowerShell command Example

Get-Mailbox -ResultSize Unlimited | Search-Mailbox -SearchQuery "Kind:contacts" -TargetMailbox Adele -TargetFolder “Search Results Multiple Mailbox search – DELETED mail item’s Backup” -DeleteContent -Force -LogLevel Full

Note

By default, if not specified, the Search-Mailbox cmdlet will look for all types of message types.

When using the option the “kind” search filter, valid values can be one or more of the following:

  • Email
  • Meetings
  • Tasks
  • Notes
  • Docs
  • Journals
  • Contacts
  • IM

Search and Delete mail items + Save a Copy of mail items | Search query Filter – Text String

In this section, we use Search Query that looks for mail items that include a specific text string.

General note – because we use the quotation marks, the search will fetch only results in which all the words in the text string that we define appear.

For example, in our scenario, we look for the text string: “A meeting in New York.”
Mail items that include the words “New York” or “meeting” will not appear in the Search Results.

Only mail items that include all the text phrases that appear inside the quotation marks, will be considered as “valid mail items” that answer the Search Query (exact phrases or keywords in subjects of items).

Search and Delete mail items + Save a Copy of mail items | Search Query – Mail items with Text String in mail SUBJECT

Search + Delete mail items with a specific TEXT string that appears is an E-mail Message Subject line.

PowerShell command syntax

Get-Mailbox -ResultSize Unlimited | Search-Mailbox -SearchQuery Subject:"<Text String>" -TargetMailbox <Destination mailbox> -TargetFolder <Folder> -LogLevel Full

PowerShell command Example

Get-Mailbox -ResultSize Unlimited | Search-Mailbox -SearchQuery Subject:"A meeting in New York" -TargetMailbox Adele -TargetFolder “Search Results Multiple Mailbox search – DELETED mail item’s Backup” -DeleteContent -Force -LogLevel Full

Search and Delete mail items + Save a Copy of mail items | Search Query – Mail items with Text String in mail BODY

Search + Delete mail items with a specific TEXT string that appears is an E-mail Body.

PowerShell command syntax

Get-Mailbox -ResultSize Unlimited | Search-Mailbox -SearchQuery body:"<Text String>" -TargetMailbox <Destination mailbox> -TargetFolder <Folder> -DeleteContent -Force -LogLevel Full

PowerShell command Example

Get-Mailbox -ResultSize Unlimited | Search-Mailbox -SearchQuery Subject:"A meeting in New York" -TargetMailbox Adele -TargetFolder “Search Results Multiple Mailbox search – DELETED mail item’s Backup” -DeleteContent -Force -LogLevel Full

Search and Delete mail items + Save a Copy of mail items | Search Query – Mail items with Text String in mail BODY or Mail Subject

Search + Delete mail items with a specific TEXT string that appears is an E-mail Message Subject line or Mail Subject.

PowerShell command syntax

Get-Mailbox -ResultSize Unlimited | Search-Mailbox -SearchQuery "<Text String>" -TargetMailbox <Destination mailbox> -TargetFolder <Folder> -DeleteContent -Force -LogLevel Full

PowerShell command Example

Get-Mailbox -ResultSize Unlimited | Search-Mailbox -SearchQuery "A meeting in New York" -TargetMailbox Adele -TargetFolder “Search Results Multiple Mailbox search – DELETED mail item’s Backup” -DeleteContent -Force -LogLevel Full

Additional PowerShell command syntax that we can use for performing a search that includes two types of search criteria is:

PowerShell command Example

Get-Mailbox -ResultSize Unlimited | Search-Mailbox -SearchQuery {Subject:"A meeting in New York" OR body:"A meeting in New York"} -TargetMailbox Adele -TargetFolder “Search Results Multiple Mailbox search – DELETED mail item’s Backup” -DeleteContent -Force -LogLevel Full

Search and Delete mail items + Save a Copy of mail items | Search query Filter – specific Date or Date Range

General information about the subject of “Date and Date format.”

The subject of the date format that we use in the Search-Mailbox query is a little tricky because the date format is affected the Windows OS Date format, the Exchange Online Mailbox Date format, etc.

Case 1 – most of the time, the date format that you need to use in the Search Query is your Windows OS Date format.

Case 2 – when using a date format in Search-Mailbox queries needs to be in a format that conforms to the Exchange server’s Regional settings.

In case that you get an error such as – “The KQL parser threw an exception,”, use the “month name” instead of the format of “month number.”

For example, instead of using the Date format – 07/21/2017 use the following format –  02/July/2017

>Search and Delete mail items + Save a Copy of mail items | Search Query – Emails SENT on a Specific date

Search + Delete mail items with Sent on a specific Date.

PowerShell command syntax

Get-Mailbox -ResultSize Unlimited | Search-Mailbox -SearchQuery sent:mm/dd/yyyy -TargetMailbox <Destination mailbox> -TargetFolder <Folder> -DeleteContent -Force -LogLevel Full

PowerShell command Example

Get-Mailbox -ResultSize Unlimited | Search-Mailbox -SearchQuery sent:21/07/2017 -TargetMailbox Adele -TargetFolder “Search Results Multiple Mailbox search – DELETED mail item’s Backup” -DeleteContent -Force -LogLevel Full

Search and Delete mail items + Save a Copy of mail items | Search Query – Emails SENT in a specific Date Range

Search + Delete mail items with Sent on a specific Date Range.

PowerShell command syntax

Get-Mailbox -ResultSize Unlimited | Search-Mailbox -SearchQuery {sent:mm/dd/yyyy..mm/dd/yyyy}  -TargetMailbox <Target mailbox> -TargetFolder <Target Folder> -DeleteContent -Force -LogLevel Full

PowerShell command Example

Get-Mailbox -ResultSize Unlimited | Search-Mailbox -SearchQuery {sent:21/06/2017..07/21/2017} -TargetMailbox Adele -TargetFolder “Search Results Multiple Mailbox search – DELETED mail item’s Backup” -DeleteContent -Force -LogLevel Full

Search and Delete mail items + Save a Copy of mail items | Search Query – Emails RECEIVED in a specific Date Range

Search + Delete mail items that were Received on a specific Date range.

PowerShell command syntax

Get-Mailbox -ResultSize Unlimited | Search-Mailbox -SearchQuery {Received:mm/dd/yyyy..mm/dd/yyyy}  -TargetMailbox <Target mailbox> -TargetFolder <Target Folder> -DeleteContent -Force -LogLevel Full

PowerShell command Example

Get-Mailbox -ResultSize Unlimited | Search-Mailbox -SearchQuery {Received:21/06/2017..21/07/2017} -TargetMailbox Adele -TargetFolder “Search Results Multiple Mailbox search – DELETED mail item’s Backup” -DeleteContent -Force -LogLevel Full

Search and Delete mail items + Save a Copy of mail items | Search Query – Emails SENT in a specific Date + Emails RECEIVED in a specific Date

Search + Delete mail items that were Sent or Received on a specific Date range.

PowerShell command syntax

Get-Mailbox -ResultSize Unlimited | Search-Mailbox -SearchQuery {sent:mm/dd/yyyy OR Received: mm/dd/yyyy} -TargetMailbox <Destination mailbox> -TargetFolder <Folder>
-DeleteContent -Force -LogLevel Full

PowerShell command Example

Get-Mailbox -ResultSize Unlimited | Search-Mailbox -SearchQuery {sent:30/07/2017 OR Received:30/07/2017}-TargetMailbox Adele -TargetFolder “Search Results Multiple Mailbox search – DELETED mail item’s Backup” -DeleteContent -Force -LogLevel Full

Search and Delete mail items + Save a Copy of mail items | Search query Filter – sender or by Recipient

In this section, we would like to Search + Delete mail items that were sent from a specific sender or reach to a specific recipient.

Search and Delete mail items + Save a Copy of mail items | Filter scope – Email sent by a specific SENDER

Search + Delete mail items that was Sent from a specific Sender (the FROM mail felid).

PowerShell command syntax

Get-Mailbox -ResultSize Unlimited | Search-Mailbox -SearchQuery from:"<E-mail address>" -TargetMailbox <Target mailbox> -TargetFolder <Target Folder> -LogLevel Full

PowerShell command Example

Get-Mailbox -ResultSize Unlimited | Search-Mailbox -SearchQuery from:John@o365info.com -TargetMailbox Adele -TargetFolder “Search Results Multiple Mailbox search – DELETED mail item’s Backup” -DeleteContent -Force -LogLevel Full

Search and Delete mail items + Save a Copy of mail items | Filter scope – Emails sent TO a specific RECIPIENT

Search + Delete mail items that were Received from a specific recipient (sent to a specific recipient – the TO mail felid)

PowerShell command syntax

Get-Mailbox -ResultSize Unlimited | Search-Mailbox -SearchQuery to:"<E-mail address>" -TargetMailbox <Target mailbox> -TargetFolder <Target Folder> -DeleteContent -Force -LogLevel Full

PowerShell command Example

Get-Mailbox -ResultSize Unlimited | Search-Mailbox -SearchQuery to:Alice@outlook.com -TargetMailbox Adele -TargetFolder “Search Results Multiple Mailbox search – DELETED mail item’s Backup” -DeleteContent -Force -LogLevel Full

Search and Delete mail items + Save a Copy of mail items | Search query Filter – E-mail Attachments

In this section, we would like to Search + Delete mail items that have an attachment.

Search and Delete mail items + Save a Copy of mail items | Filter scope – Emails that include a specific attachment file name

Search + Delete mail items, that have an attachment with a specific File extension.

PowerShell command syntax

Get-Mailbox -ResultSize Unlimited | Search-Mailbox -SearchQuery attachment:"<Attachment file name>" -TargetMailbox <Target mailbox> -TargetFolder <Target Folder> -DeleteContent -Force -LogLevel Full

PowerShell command Example

Get-Mailbox -ResultSize Unlimited | Search-Mailbox -SearchQuery attachment:"Customer.pdf" -TargetMailbox Adele -TargetFolder “Search Results Multiple Mailbox search – DELETED mail item’s Backup” -DeleteContent -Force -LogLevel Full

Search and Delete mail items + Save a Copy of mail items | Filter scope – specific attachment type (suffix)

Search + Delete mail items, that have an attachment with a specific file name suffix.

PowerShell command syntax

Get-Mailbox -ResultSize Unlimited | Search-Mailbox -SearchQuery {Attachment -like "*.<suffix>"} -TargetMailbox <Target mailbox> -TargetFolder <Target Folder> -DeleteContent -Force -LogLevel Full

PowerShell command Example

Get-Mailbox -ResultSize Unlimited | Search-Mailbox -SearchQuery {Attachment -like "*.PDF"}-TargetMailbox Adele -TargetFolder “Search Results Multiple Mailbox search – DELETED mail item’s Backup” -DeleteContent -Force -LogLevel Full

Search and Delete mail items + Save a Copy of mail items | Filter scope – Emails with Attachment

Search + Delete mail items, that have an attachment.

PowerShell command syntax

Get-Mailbox -ResultSize Unlimited | Search-Mailbox -SearchQuery {HasAttachment -eq $true}-TargetMailbox <Target mailbox> -TargetFolder <Target Folder> -DeleteContent -Force -LogLevel Full

PowerShell command Example

Get-Mailbox -ResultSize Unlimited | Search-Mailbox -SearchQuery -SearchQuery {HasAttachment -eq $true} -TargetMailbox Adele -TargetFolder “Search Results Multiple Mailbox search – DELETED mail item’s Backup” -DeleteContent -Force -LogLevel Full

Search and Delete mail items + Save a Copy of mail items | Search query Filter – Additional search queries

Search and Delete mail items + Save a Copy of mail items | Filter scope – E-mail items size greater than X MB

Search + Delete mail items, that their size is “bigger” (grater) than a specific size.

PowerShell command syntax

Get-Mailbox -ResultSize Unlimited | Search-Mailbox -SearchQuery {Size -gt <size in KB or MB>} -TargetMailbox <Target mailbox> -TargetFolder <Target Folder> -LogLevel Full

PowerShell command Example

Get-Mailbox -ResultSize Unlimited | Search-Mailbox -SearchQuery -SearchQuery {Size -gt 5MB} -TargetMailbox Adele -TargetFolder “Search Results Multiple Mailbox search – DELETED mail item’s Backup” -DeleteContent -Force -LogLevel Full

Search-Mailbox | Mailbox Search scope| The Recovery mail folder (dumpster) and Archive Mailbox

In the following section, I would like to briefly review the subject of “Mailboxes search scope.”

As mentioned, the Search-Mailbox cmdlet will perform by default search in all the following mailbox locations:

  1. Primary mailbox
  2. Primary mailbox – Recovery mail folder (the Dumpster)
  3. Archive mailbox
  4. Archive mailbox – Recovery mail folder (the Dumpster)

The Search-Mailbox cmdlet enables us to define a specific mailbox search scope or to exclude a specific mailbox scope from the search results.

Mailbox scope Recovery mail folder (the Dumpster)

One of the most conspicuous advantages of the Search-Mailbox cmdlets is, the ability that it provides to Exchange administrator to view (search) the content of the Recovery mail folder (the Dumpster) and “fetch” a copy of Soft Deleted + Hard Deleted mail items stored in the Recovery mail folder.

By default, the Search-Mailbox cmdlets will perform a search in the Primary mailbox + in the Recovery mail folder (the Dumpster).

For example, in case that we don’t define a specific mailbox scope filter the search task will include the Primary mailbox space + the Recovery mail folder (the Dumpster)

Search-Mailbox <Source Mailbox> -TargetMailbox <Target mailbox> -TargetFolder <Target Folder> -LogLevel Full

Exclude the Recovery mail folder (dumpster) search

In case that we want to exclude the Recovery mail folder (the Dumpster) from the search, we can use the parameter SearchDumpster and set the switch to $false, for example –SearchDumpster:$False

Get-Mailbox -ResultSize Unlimited | Search-Mailbox  -TargetMailbox <Target mailbox> -TargetFolder <Target Folder> -SearchDumpster:$false -LogLevel Full

Search Dumpster Only

In case that we want to perform a search only in the Recovery mail folder (the Dumpster), we can use the parameter – SearchDumpsterOnly which specifies that only the Recoverable Items folder of the specified mailbox be searched.

Get-Mailbox -ResultSize Unlimited | Search-Mailbox -TargetMailbox <Target mailbox> -TargetFolder <Target Folder> -SearchDumpsterOnly -LogLevel Full

Archive mailbox scope

By default, in case that as specific Exchange mailbox has an archive, the archive is always searched.

To exclude the Archive from the search, use the DoNotIncludeArchive parameter

Get-Mailbox -ResultSize Unlimited | Search-Mailbox -TargetMailbox <Target mailbox> -TargetFolder <Target Folder> -DoNotIncludeArchive -LogLevel Full

Writing advanced \ combined search filters.

An additional part that I would like to briefly, mention is the subject of defining a more advanced or more sophisticated search query that combines two or more “filter” or search conditions.

To define two or more filters, we can use the logical operators such as – “OR”,”AND” and more.

In the following diagram, we can see some example of the syntax that we use for defining a more advanced Search Query.

Using a combination of Search Query parameters

Example 1

Look for all mail items, that answer the following search criteria’s:

E-mail items that have attachment + in addition, the mail subject is “Test

Get-Mailbox -ResultSize Unlimited | Search-Mailbox -SearchQuery {HasAttachment -eq $true and subject:Test} -TargetMailbox <Target mailbox> -TargetFolder <Target Folder>

Example 2

Look for all mail items, that answers the following search criteria’s:

E-mail message mail items or calendar mail items or Contact

Get-Mailbox -ResultSize Unlimited | Search-Mailbox -SearchQuery {kind:email OR kind:meetings} -TargetMailbox <Target mailbox> -TargetFolder <Target Folder>

Example 3

Look for all mail items, that answers the following search criteria’s:

Mail items that have the subject Test + sent from john@o365info.com + sent on a specific date 30/07/2017

Get-Mailbox -ResultSize Unlimited | Search-Mailbox -SearchQuery {Subject:"Test" AND From:"john@o365info.com" AND Sent:"30/07/2017"}
-TargetMailbox <Target mailbox> -TargetFolder <Target Folder>


The Search-Mailbox | PowerShell scripts series

The Search-Mailbox PowerShell cmdlet is very powerful and can be used for a various type of administrative scenarios. For this reason, I have created a “series” of PowerShell scripts, that will help you to “enroll” the Search-Mailbox PowerShell cmdlet for implementing different type of tasks:

Search for mail items using the Search-Mailbox PowerShell cmdlet (1#4)

A PowerShell menu script that is used for – performing a search in a single Exchange Online mailbox, by using various types of filters such as – specific text, specific date, a specific type of mail items (calendar, contact, etc.), mail with attachment and more.
Searching hidden Email addresses Using PowerShell - Office 365 - Part 11-13


Recover mail items using the Search-Mailbox PowerShell cmdlet (2#4)

PowerShell menu script, that is used for – Recovers mail items that are stored in the Recovery mail folder (Exchange Online Mailbox Dumpster). The PowerShell script, will help you to Recover all the content of the recovery mail folder or, use a search filter that will recover only specific mail items that answer a specific character such as – specific text, specific date, specific type of mail items (calendar, contact, etc.), mail with attachment and more.
Using the Search-Mailbox PowerShell command - Recover mail abc- Part 3-5u


Delete mail items – Multiple Exchange mailboxes (Bulk) using PowerShell (3#4)

PowerShell menu script, that is used for – performing a Deletion of specific mail items from multiple Exchange Online mailboxes (bulk mode). The “Deletion” of this mail item, is implemented by selecting a “search filter” that will delete only mail items that have specific characters such as – specific text, specific date, a specific type of mail items (calendar, contact, etc.), mail with attachment and more.

Search and Delete mail items from Multiple Exchange mailboxes Bulk using Search-Mailbox PowerShell cmdlets-Part 4-5


Search and Delete mail from Single Exchange mailboxes using PowerShell (4#4)

PowerShell menu script, that is used for – performing a Deletion of specific mail items from a single Exchange Online mailbox.
The “Deletion” of this mail item, is implemented by selecting a “search filter” that will delete only mail items that have specific characters such as – specific text, specific date, a specific type of mail items (calendar, contact, etc.), mail with attachment and more.
Search and Delete mail items from the Exchange mailbox using Search-Mailbox PowerShell cmdlets - Single mailbox-Part 5-5


Getting started with Office 365 PowerShell

PowerShell Naming Conventions & general information
Get more information about the Naming Conventions that are used in the PowerShell articles – Help and additional information – o365info.com PowerShell articles
Creating a remote PowerShell session to Exchange Online 
To get more information about the required remote PowerShell commands that you need to use for connecting to Exchange Online, read the following article:
Connect to Exchange Online by using Remote PowerShell
Creating a remote PowerShell session to Azure Active Directory
To get more information about the required software component + the remote PowerShell commands that you need to use for connecting Azure Active Directory, read the following article: Part 2: Connect to Office 365 by using Remote PowerShell
Basic introduction to PowerShell in Office 365 based environment
If you are new in the PowerShell world, you can read more information about how to start working with PowerShell in Office 365 based environment in the following article series:  Getting started with Office 365 PowerShell – Part 1, Part 2, Part 3.
Running and using o365info PowerShell scripts
In case that you need more information about how to use the o365info PowerShell scripts that I add to the PowerShell articles, you can read the article – How to run and use o365info PowerShell menu script

Restore Exchange Online mailbox | Article series index

Now it’s Your Turn!
It is important for us to know your opinion on this article

The post Delete mail items from Multiple Exchange mailboxes (Bulk) using PowerShell | Part 4#5 appeared first on o365info.com.

Delete mail items from Single Exchange mailbox using PowerShell | Part 5#5

$
0
0

In this article, we review various scenarios of using the Search-Mailbox cmdlet for deleting mail items from a Single Exchange mailbox (Bulk Deletion).
In the former article –  we review various scenarios of using the Search-Mailbox cmdlet for deleting mail items from multiple Exchange mailboxes (Bulk Deletion).

PowerShell | Help & additional information

Running PowerShell commands in Office 365 based environment
To be able to run the PowerShell commands specified in the current article, you will need to create a remote PowerShell with Azure Active Directory or Exchange Online. In case that you need help with the process of creating a Remote PowerShell session, you can use the links on the bottom of the Article.

Disclaimer and warning

Before we begin and before to run the PowerShell commands that we review in this article, I must strongly emphasize that you should be careful with this use of the Search-Mailbox PowerShell cmdlet, because the cmdlets perform Hard Delete of mail items.

In other words, you should have a good reason for using this option, and I recommend that you get familiar with the PowerShell syntax, and understand the exact Search Query that you use, what happened to the deleted mail, what are the Exchange mailboxes are impacted and so on.

The “logic” of the Search-Mailbox cmdlet relating to “mail item deletion”

Given that we decide that we must use the Search-Mailbox cmdlet for deleting mail items, there are two main scenarios which we can choose from:

Option 1 – Delete mail items from the source mailbox without saving a copy of the Deleted mail items.

In this scenario, we wish to delete from the Source Mailbox the specific mail items (the mail items that answer our Search Query of Filter scope) without saving any copy of these deleted mail items.

In this case, we use the PowerShell command syntax without providing information about the Target Mailbox + The Target Folder.

An example of the PowerShell command syntax could be:

Search-Mailbox <Source Mailbox> -DeleteContent -Force

Option 2 – Delete mail items from Source mailbox + saving a copy of the Deleted mail items

In this scenario, we wish to delete from the Source Mailbox the specific mail items (the mail items that answer our Search Query of Filter scope) but save a copy of the Deleted mail items in a Target Mailbox (in a Target Folder)

In this case, we use the PowerShell command syntax + providing information about the Target Mailbox + The Target Folder.

An example of the PowerShell command syntax could be:

Search-Mailbox <Source Mailbox> -TargetMailbox <Target mailbox> -TargetFolder <Target Folder> -DeleteContent -Force

Option 3 – Perform a search – locate the mail items that we are going to delete from Source mailbox + Generate Report (Log)

In this scenario, we wish to generate a report (Log file) which includes details about the mail items that we are “going to delete but without performing any “action” besides of the generating the report.

To generate only report without performing any action we use the PowerShell parameter – LogOnly

My recommendation is to consider using this option before we start with the actual deletion. In other words-  better safer than sorry!

After we look at the information that appears on the report (Log) and after we “approve” to delete the specific mail items only then, go back and use one of the options mentioned above (delete the mail items without saving a copy or save a copy of the deleted mail items in the Target Mailbox).

In this case, we use the PowerShell command syntax + providing information about the Target Mailbox + The Target Folder that will “store” the report file.

An example of the PowerShell command syntax could be:

Search-Mailbox <Source Mailbox> -TargetMailbox <Target mailbox> -TargetFolder <Target Folder> -LogOnly

The logic of the Search-Mailbox cmdlet relating to mail item deletion -01

Scenario description

In the following example, I prefer to be on the safe side. For this reason, all the PowerShell command examples will be based on a scenario in which we save a copy of the Deleted mail items in the “Target Mailbox.” In case that you prefer to avoid this option, you can remove the section about the Target Mailbox + the Target Folder from the PowerShell command syntax.

The Goals

The goals we seek to achieve are:

  1. Perform a search in a specific Exchange mailbox (Bob Mailbox). The search is implemented by defining a specific Search Query (search criteria), that will help us to locate specific mail items that answer the Search Query.
  2. We wish to Delete all the mail items that appear in the Search Results.
  3. The Search Results will be copied to a Target Mailbox, and saved in a dedicated folder (Target Folder).
  4. In addition, we want to create a detailed report (Log), about each mail items that appear in the Search Results and that was Deleted (the Log \ Report file will be saved in the Target Folder).

Source mailbox + Target mailbox (and Target Folder)

  • The Source Mailbox (the mailbox on which we perform the search) is Bob’s mailbox
  • The Target Mailbox which we use for storing the search result (the mail items) is Adele’s
  • The Target Folder name will be – Search Results Bob -Backup – DELETED mail items.

Scenario description - Search mailbox only the Recovery mail folder -Save search results to other mailbox

The mailbox search scope

By default, the Search-Mailbox cmdlet performs a search in the “Source Mailbox” that includes the following “Mailbox spaces”:

Primary mailbox

  1. The Search-Mailbox cmdlet will perform a search that relates to all folders and sub folders in the Primary mailbox.
  2. Recovery mail folder – by default, the Search-Mailbox cmdlet will also search for mail items stored in the Recovery mail folder (the Dumpster).

Archive mailbox

In case that the Source Mailbox has Archive mailbox:

  1. The Search-Mailbox cmdlet will perform a search that relates to all folders and sub folders in the Archive mailbox.
  2. Recovery mail folder – by default, the Search-Mailbox cmdlet will also search for mail items stored in the mailbox archive Recovery mail folder (the Dumpster).

Using the Search-Mailbox cmdlet for Deleting mail items

Using the Search-Mailbox for deleting mail items | PowerShell parameters

The “active” the option of Deleting mail items using the Search-Mailbox cmdlet we need to add the following PowerShell command parameters:
1. DeleteContent

This “DeleteContent” parameter instructs the Search-Mailbox cmdlet to “search and destroys” the mail items that match the Search query criteria.
2. Force

This “Force” parameter is not a mandatory parameter. The purpose of this parameter is, to prevent from the Search-Mailbox cmdlet to ask us for a confirmation for each mail items that are going to be deleted.

In the following diagram, we can see the additional parameters that “turn” the Search-Mailbox cmdlet from a tool that searches and locate information (mail items) into a deadly weapon that destroys (Hard Delete) mail items!

Using the Search-Mailbox for performing a search | PowerShell command syntax

Search and Delete mail items + save a Copy of mail items | Delete mail items from the Recovery mail folder (the Dumpster).

In this example, we use the Search-Mailbox cmdlet without any “filter” or Search query filters.

Instead, we use that the PowerShell parameter SearchDumpsterOnly for restricting the search (and the deletion of mail items) only to mail items stored in the Recovery mail folder (the Dumpster).

In this scenario, our goal is to delete all Soft Deleted mail items stored in the Recovery mail folder (the Dumpster) + Save a copy all the mail items that were deleted from the Source Mailbox to the Target Mailbox.

As mentioned, the Search-Mailbox cmdlet cannot delete Hard Deleted mail items that are stored in the Purges sub folder (sub folder of the Recovery mail folder)

Search and Delete mail items + Save a Copy of mail items | Mailbox Search Scope Recovery mail folder (the Dumpster)

PowerShell command syntax

Search-Mailbox <Source Mailbox> -SearchDumpsterOnly -TargetMailbox <Destination mailbox> -TargetFolder <Folder> -DeleteContent -Force -LogLevel Full

PowerShell command Example

Search-Mailbox Bob -SearchDumpsterOnly -TargetMailbox Adele -TargetFolder “Search Results - Bob” -DeleteContent -Force -LogLevel Full

Search and Delete mail items + Save a Copy of mail items | Search query Filter – specific Type of Mail item

In this scenario, we want to:

  • Look (search), only a specific type of mail items (such as calendar or contact mail items) in a single Source Mailbox.
  • Delete these mail items.
  • Save a copy of the deleted mail items in the Target mailbox.

Search + Save a copy of mail items | Search Query filter – Calendar items

Search + Delete specific type of mail items – Calendar items

PowerShell command syntax

Search-Mailbox <Source Mailbox> -SearchQuery "Kind:meetings" -TargetMailbox <Destination mailbox> -TargetFolder <Folder> -DeleteContent -Force -LogLevel Full

PowerShell command Example

Search-Mailbox Bob -SearchQuery "Kind:meetings" -TargetMailbox Adele -TargetFolder “Search Results - Bob” -DeleteContent -Force -LogLevel Full

Search + Save a copy of mail items | Search Query – Contact items

Search + Delete specific type of mail items – Contacts items

PowerShell command syntax

Search-Mailbox <Source Mailbox> -SearchQuery "Kind:contacts" -TargetMailbox <Destination mailbox> -TargetFolder <Folder> -DeleteContent -Force -LogLevel Full

PowerShell command Example

Search-Mailbox Bob -SearchQuery "Kind:contacts" -TargetMailbox Adele -TargetFolder “Search Results - Bob” -DeleteContent -Force -LogLevel Full

Note

By default, if not specified, the Search-Mailbox cmdlet will look for all types of message types.

When using the option the “kind” search filter, valid values can be one or more of the following:

  • Email
  • Meetings
  • Tasks
  • Notes
  • Docs
  • Journals
  • Contacts
  • IM

Search and Delete mail items + Save a Copy of mail items | Search query Filter – Text String

In this section, we use Search Query that looks for mail items that include a specific text string.

General note – because we use the quotation marks, the search will fetch only results in which all the words in the text string that we define appear.

For example, in our scenario, we look for the text string: “A meeting in New York.”
Mail items that include the words “New York” or “meeting” will not appear in the Search Results.

Only mail items that include all the text phrases that appear inside the quotation marks, will be considered as “valid mail items” that answer the Search Query (exact phrases or keywords in subjects of items).

Search and Delete mail items + Save a Copy of mail items | Search Query – Mail items with Text String in mail SUBJECT

Search + Delete mail items with a specific TEXT string that appears is an E-mail Message Subject line.

PowerShell command syntax

Search-Mailbox <Source Mailbox> -SearchQuery Subject:"<Text String>" -TargetMailbox <Destination mailbox> -TargetFolder <Folder> -LogLevel Full

PowerShell command Example

Search-Mailbox Bob -SearchQuery Subject:"A meeting in New York" -TargetMailbox Adele -TargetFolder “Search Results - Bob” -DeleteContent -Force -LogLevel Full

Search and Delete mail items + Save a Copy of mail items | Search Query – Mail items with Text String in mail BODY

Search + Delete mail items with a specific TEXT string that appears is an E-mail Body.

PowerShell command syntax

Search-Mailbox <Source Mailbox> -SearchQuery body:"<Text String>" -TargetMailbox <Destination mailbox> -TargetFolder <Folder> -DeleteContent -Force -LogLevel Full

PowerShell command Example

Search-Mailbox Bob -SearchQuery Subject:"A meeting in New York" -TargetMailbox Adele -TargetFolder “Search Results - Bob” -DeleteContent -Force -LogLevel Full

Search and Delete mail items + Save a Copy of mail items | Search Query – Mail items with Text String in mail BODY or Mail Subject

Search + Delete mail items with a specific TEXT string that appears is an E-mail Message Subject line or Mail Subject.

PowerShell command syntax

Search-Mailbox <Source Mailbox> -SearchQuery "<Text String>" -TargetMailbox <Destination mailbox> -TargetFolder <Folder> -DeleteContent -Force -LogLevel Full

PowerShell command Example

Search-Mailbox Bob -SearchQuery "A meeting in New York" -TargetMailbox Adele -TargetFolder “Search Results - Bob” -DeleteContent -Force -LogLevel Full

Additional PowerShell command syntax that we can use for performing a search that includes two types of search criteria is: PowerShell command Example

Search-Mailbox Bob -SearchQuery {Subject:"A meeting in New York" OR body:"A meeting in New York"} -TargetMailbox Adele -TargetFolder “Search Results - Bob” -DeleteContent -Force -LogLevel Full

Search and Delete mail items + Save a Copy of mail items | Search query Filter – specific Date or Date Range

General information about the subject of “Date and Date format.”

The subject of the date format that we use in the Search-Mailbox query is a little tricky because the date format is affected the Windows OS Date format, the Exchange Online Mailbox Date format, etc.

Case 1 – most of the time, the date format that you need to use in the Search Query is your Windows OS Date format.

Case 2 – when using a date format in Search-Mailbox queries needs to be in a format that conforms to the Exchange server’s Regional settings.

In case that you get an error such as – “The KQL parser threw an exception,”, use the “month name” instead of the format of “month number.”

For example, instead of using the Date format – 07/21/2017 use the following format –  02/July/2017

Search and Delete mail items + Save a Copy of mail items | Search Query – Emails SENT on a Specific Date

Search + Delete mail items with Sent on a specific Date.

PowerShell command syntax

Search-Mailbox <Source Mailbox> -SearchQuery sent:mm/dd/yyyy -TargetMailbox <Destination mailbox> -TargetFolder <Folder> -DeleteContent -Force -LogLevel Full

PowerShell command Example

Search-Mailbox Bob -SearchQuery sent:21/07/2017 -TargetMailbox Adele -TargetFolder “Search Results - Bob” -DeleteContent -Force -LogLevel Full

Search and Delete mail items + Save a Copy of mail items | Search Query – Emails SENT in a specific Date Range

Search + Delete mail items with Sent on a specific Date Range

PowerShell command syntax

Search-Mailbox <Source Mailbox> -SearchQuery {sent:mm/dd/yyyy..mm/dd/yyyy}  -TargetMailbox <Target mailbox> -TargetFolder <Target Folder> -DeleteContent -Force -LogLevel Full

PowerShell command Example

Search-Mailbox Bob -SearchQuery {sent:21/06/2017..07/21/2017} -TargetMailbox Adele -TargetFolder “Search Results - Bob” -DeleteContent -Force -LogLevel Full

Search and Delete mail items + Save a Copy of mail items | Search Query – Emails RECEIVED in a specific Date Range

Search + Delete mail items that were Received on a specific Date range.

PowerShell command syntax

Search-Mailbox <Source Mailbox> -SearchQuery {Received:mm/dd/yyyy..mm/dd/yyyy}  -TargetMailbox <Target mailbox> -TargetFolder <Target Folder> -DeleteContent -Force -LogLevel Full

PowerShell command Example

Search-Mailbox Bob -SearchQuery {Received:21/06/2017..21/07/2017} -TargetMailbox Adele -TargetFolder “Search Results - Bob” -DeleteContent -Force -LogLevel Full

Search and Delete mail items + Save a Copy of mail items | Search Query – Emails SENT in a specific Date + Emails RECEIVED in a specific Date

Search + Delete mail items that were Sent or Received on a specific Date range.

PowerShell command syntax

Search-Mailbox <Source Mailbox> -SearchQuery {sent:mm/dd/yyyy OR Received: mm/dd/yyyy} -TargetMailbox <Destination mailbox> -TargetFolder <Folder>
-DeleteContent -Force -LogLevel Full

PowerShell command Example

Search-Mailbox Bob -SearchQuery {sent:30/07/2017 OR Received:30/07/2017}-TargetMailbox Adele -TargetFolder “Search Results - Bob” -DeleteContent -Force -LogLevel Full

Search and Delete mail items + Save a Copy of mail items | Search query Filter – sender or by Recipient

In this section, we would like to Search + Delete mail items that were sent from a specific sender or reach to a specific recipient.

Search and Delete mail items + Save a Copy of mail items | Filter scope – Email sent by a specific SENDER

Search + Delete mail items that were Sent from a specific Sender (the FROM mail felid).

PowerShell command syntax

Search-Mailbox <Source Mailbox> -SearchQuery from:"<E-mail address>" -TargetMailbox <Target mailbox> -TargetFolder <Target Folder> -LogLevel Full

PowerShell command Example

Search-Mailbox Bob -SearchQuery from:"John@o365info.com" -TargetMailbox Adele -TargetFolder “Search Results - Bob” -DeleteContent -Force -LogLevel Full

Search and Delete mail items + Save a Copy of mail items | Filter scope – Emails sent TO a specific RECIPIENT

Search + Delete mail items that were Received from a specific recipient (sent to a specific recipient – the TO mail felid)

PowerShell command syntax

Search-Mailbox <Source Mailbox> -SearchQuery to:"<E-mail address>" -TargetMailbox <Target mailbox> -TargetFolder <Target Folder> -DeleteContent -Force -LogLevel Full

PowerShell command Example

Search-Mailbox Bob -SearchQuery to:"Alice@outlook.com" -TargetMailbox Adele -TargetFolder “Search Results - Bob” -DeleteContent -Force -LogLevel Full

Search and Delete mail items + Save a Copy of mail items | Search query Filter – E-mail Attachments

In this section, we would like to Search + Delete mail items that have an attachment.

Search and Delete mail items + Save a Copy of mail items | Filter scope – Emails that include a specific attachment file name

Search + Delete mail items, that have an attachment with a specific File extension.

PowerShell command syntax

Search-Mailbox <Source Mailbox> -SearchQuery attachment:"<Attachment file name>" -TargetMailbox <Target mailbox> -TargetFolder <Target Folder> -DeleteContent -Force -LogLevel Full

PowerShell command Example

Search-Mailbox Bob -SearchQuery attachment:"Customer.pdf" -TargetMailbox Adele -TargetFolder “Search Results - Bob” -DeleteContent -Force -LogLevel Full

Search and Delete mail items + Save a Copy of mail items | Filter scope – specific attachment type (suffix)

Search + Delete mail items, that have an attachment with a specific file name suffix.

PowerShell command syntax

Search-Mailbox <Source Mailbox> -SearchQuery {Attachment -like "*.<suffix>"} -TargetMailbox <Target mailbox> -TargetFolder <Target Folder> -DeleteContent -Force -LogLevel Full

PowerShell command Example

Search-Mailbox Bob -SearchQuery {Attachment -like "*.PDF"} -TargetMailbox Adele -TargetFolder “Search Results - Bob” -DeleteContent -Force -LogLevel Full

Search and Delete mail items + Save a Copy of mail items | Filter scope – Emails with Attachment

Search + Delete mail items, that have an attachment.

PowerShell command syntax

Search-Mailbox <Source Mailbox> -SearchQuery {HasAttachment -eq $true} -TargetMailbox <Target mailbox> -TargetFolder <Target Folder> -DeleteContent -Force -LogLevel Full

PowerShell command Example

Search-Mailbox Bob -SearchQuery -SearchQuery {HasAttachment -eq $true} -TargetMailbox Adele -TargetFolder “Search Results - Bob” -DeleteContent -Force -LogLevel Full

Search and Delete mail items + Save a Copy of mail items | Search query Filter – Additional search queries

Search + Delete mail items, that their size is “bigger” (greater) than a specific size.

Search and Delete mail items + Save a Copy of mail items | Filter scope – E-mail items size greater than X MB

PowerShell command syntax

Search-Mailbox <Source Mailbox> -SearchQuery {Size -gt <size in KB or MB>} -TargetMailbox <Target mailbox> -TargetFolder <Target Folder> -LogLevel Full

PowerShell command Example

Search-Mailbox Bob -SearchQuery -SearchQuery {Size -gt 5MB} -TargetMailbox Adele -TargetFolder “Search Results - Bob” -DeleteContent -Force -LogLevel Full

Search-Mailbox | Mailbox Search scope| The Recovery mail folder (dumpster) and Archive Mailbox

In the following section, I would like to briefly review the subject of “Mailboxes search scope.”

As mentioned, the Search-Mailbox cmdlet will perform by default search in all the following mailbox locations:

  1. Primary mailbox
  2. Primary mailbox – Recovery mail folder (the Dumpster)
  3. Archive mailbox
  4. Archive mailbox – Recovery mail folder (the Dumpster)


The Search-Mailbox cmdlet enables us to define a specific mailbox search scope or to exclude a specific mailbox scope from the search results.

Mailbox scope Recovery mail folder (the Dumpster)

One of the most conspicuous advantages of the Search-Mailbox cmdlets is, the ability that it provides to Exchange administrator to view (search) the content of the Recovery mail folder (the Dumpster) and “fetch” a copy of Soft Deleted + Hard Deleted mail items stored in the Recovery mail folder.

By default, the Search-Mailbox cmdlets will perform a search in the Primary mailbox + in the Recovery mail folder (the Dumpster).

For example, in case that we don’t define a specific mailbox scope filter the search task will include the Primary mailbox space + the Recovery mail folder (the Dumpster)

Search-Mailbox <Source Mailbox> -TargetMailbox <Target mailbox> -TargetFolder <Target Folder> -LogLevel Full

Exclude the Recovery mail folder (dumpster) search

In case that we want to exclude the Recovery mail folder (the Dumpster) from the search, we can use the parameter SearchDumpster and set the switch to $False, for example –SearchDumpster:$false

Search-Mailbox <Source Mailbox> -TargetMailbox <Target mailbox> -TargetFolder <Target Folder> -SearchDumpster:$false -LogLevel Full

Search Dumpster Only

In case that we want to perform a search only in the Recovery mail folder (the Dumpster), we can use the parameter – SearchDumpsterOnly which specifies that only the Recoverable Items folder of the specified mailbox be searched.

Search-Mailbox <Source Mailbox> -TargetMailbox <Target mailbox> -TargetFolder <Target Folder> -SearchDumpsterOnly -LogLevel Full

Archive mailbox scope

By default, in case that as specific Exchange mailbox has an archive, the archive is always searched.

To exclude the Archive from the search, use the DoNotIncludeArchive parameter

Search-Mailbox <Source Mailbox> -TargetMailbox <Target mailbox> -TargetFolder <Target Folder> -DoNotIncludeArchive -LogLevel Full

Writing advanced \ combined search filters.

An additional part that I would like to briefly, mention is the subject of defining a more advanced or more sophisticated search query that combines two or more “filter” or search conditions.

To define two or more filters, we can use the logical operators such as – “OR”,”AND” and more.

In the following diagram, we can see some example of the syntax that we use for defining a more advanced Search Query.

Using a combination of Search Query parameters

Example 1

Look for all mail items, that answer the following search criteria’s:

E-mail items that have attachment + in addition, the mail subject is “Test

Get-Mailbox -ResultSize Unlimited | Search-Mailbox -SearchQuery {HasAttachment -eq $true and subject:Test} -TargetMailbox <Target mailbox> -TargetFolder <Target Folder>

Example 2

Look for all mail items, that answers the following search criteria’s:

E-mail message mail items or calendar mail items OR Contact

Get-Mailbox -ResultSize Unlimited | Search-Mailbox -SearchQuery {kind:email OR kind:meetings} -TargetMailbox <Target mailbox> -TargetFolder <Target Folder>

Example 3

Look for all mail items, that answers the following search criteria’s:

Mail items that have the subject Test + sent from john@o365info.com + sent on a specific date 30/07/2017

Get-Mailbox -ResultSize Unlimited | Search-Mailbox -SearchQuery {Subject:"Test" AND From:"john@o365info.com" AND Sent:"30/07/2017"}
-TargetMailbox <Target mailbox> -TargetFolder <Target Folder>


The Search-Mailbox | PowerShell scripts series

The Search-Mailbox PowerShell cmdlet is very powerful and can be used for a various type of administrative scenarios. For this reason, I have created a “series” of PowerShell scripts, that will help you to “enroll” the Search-Mailbox PowerShell cmdlet for implementing different type of tasks:

Search for mail items using the Search-Mailbox PowerShell cmdlet (1#4)

A PowerShell menu script that is used for – performing a search in a single Exchange Online mailbox, by using various types of filters such as – specific text, specific date, a specific type of mail items (calendar, contact, etc.), mail with attachment and more.
Searching hidden Email addresses Using PowerShell - Office 365 - Part 11-13


Recover mail items using the Search-Mailbox PowerShell cmdlet (2#4)

PowerShell menu script, that is used for – Recovers mail items that are stored in the Recovery mail folder (Exchange Online Mailbox Dumpster). The PowerShell script, will help you to Recover all the content of the recovery mail folder or, use a search filter that will recover only specific mail items that answer a specific character such as – specific text, specific date, specific type of mail items (calendar, contact, etc.), mail with attachment and more.
Using the Search-Mailbox PowerShell command - Recover mail abc- Part 3-5u


Delete mail items – Multiple Exchange mailboxes (Bulk) using PowerShell (3#4)

PowerShell menu script, that is used for – performing a Deletion of specific mail items from multiple Exchange Online mailboxes (bulk mode). The “Deletion” of this mail item, is implemented by selecting a “search filter” that will delete only mail items that have specific characters such as – specific text, specific date, a specific type of mail items (calendar, contact, etc.), mail with attachment and more.

Search and Delete mail items from Multiple Exchange mailboxes Bulk using Search-Mailbox PowerShell cmdlets-Part 4-5


Search and Delete mail from Single Exchange mailboxes using PowerShell (4#4)

PowerShell menu script, that is used for – performing a Deletion of specific mail items from a single Exchange Online mailbox.
The “Deletion” of this mail item, is implemented by selecting a “search filter” that will delete only mail items that have specific characters such as – specific text, specific date, a specific type of mail items (calendar, contact, etc.), mail with attachment and more.
Search and Delete mail items from the Exchange mailbox using Search-Mailbox PowerShell cmdlets - Single mailbox-Part 5-5

Getting started with Office 365 PowerShell

PowerShell Naming Conventions & general information
Get more information about the Naming Conventions that are used in the PowerShell articles – Help and additional information – o365info.com PowerShell articles
Creating a remote PowerShell session to Exchange Online 
To get more information about the required remote PowerShell commands that you need to use for connecting to Exchange Online, read the following article:
Connect to Exchange Online by using Remote PowerShell
Creating a remote PowerShell session to Azure Active Directory
To get more information about the required software component + the remote PowerShell commands that you need to use for connecting Azure Active Directory, read the following article: Part 2: Connect to Office 365 by using Remote PowerShell
Basic introduction to PowerShell in Office 365 based environment
If you are new in the PowerShell world, you can read more information about how to start working with PowerShell in Office 365 based environment in the following article series:  Getting started with Office 365 PowerShell – Part 1, Part 2, Part 3.
Running and using o365info PowerShell scripts
In case that you need more information about how to use the o365info PowerShell scripts that I add to the PowerShell articles, you can read the article – How to run and use o365info PowerShell menu script

Restore Exchange Online mailbox | Article series index

Now it’s Your Turn!
It is important for us to know your opinion on this article

The post Delete mail items from Single Exchange mailbox using PowerShell | Part 5#5 appeared first on o365info.com.


Managing Focused Inbox in Office 365 using PowerShell

$
0
0

In the current article, we review how to manage the option of – Focused Inbox in Office 365 by using PowerShell.

Generally speaking, we can enable or disable the option Focused Inbox in “organization level” by using the PowerShell cmdlet – Get-OrganizationConfig or by managing single Exchange mailbox” by using the PowerShell cmdlet – Set-FocusedInbox

What is the purpose of the Focused Inbox feature?

Focused Inbox—focus on the emails that matter most

For many, the inbox is the command center for their day. It’s the way to keep track of what is going on and what needs to get done. Outlook’s Focused Inbox makes this process easier by helping you focus on the emails that matter most to you. It separates your inbox into two tabs—Focused and Other. Emails that matter most to you are in the Focused tab, while the rest remain easily accessible—but out of the way in the Other tab. You’ll be informed about email flowing to “Other”, and you can switch between tabs at any time to take a quick look.

For more about what makes Focused Inbox great, see Outlook helps you focus on what matters to you.

[Source of information – Managing Focused Inbox in Office 365 and Outlook]

Transition from Clutter to Focused Inbox in Office 365

Users can keep using the existing Clutter experience through the transition. However, after the transition period, Clutter will be completely replaced by Focused Inbox.

In the meantime, if a Clutter user chooses to opt-in to using Focused Inbox they will no longer receive the less important email in the “Clutter” folder.

Instead, the email will be split between the Focused and Other tabs in their inbox. Tenant admins will be proactively notified before Clutter is fully replaced.

[Source of information – Managing Focused Inbox in Office 365 and Outlook]

SECTION A: Enable “Focused Inbox” option

Enable Focused Inbox option | Organization level

When using the PowerShell cmdlet – Set-OrganizationConfig, the option of Focused Inbox will be applied (activated) for all existing Exchange mailboxes + to all NEW Exchange mailboxes that will be created in the Future.

In case that we want to Disable the option of Focused Inbox for a specific Exchange mailbox, we can use the PowerShell cmdlet – Set-FocusedInbox

PowerShell command Example

Set-OrganizationConfig -FocusedInboxOn $True

Enable Focused Inbox | Single Mailbox

PowerShell command syntax

Set-FocusedInbox -Identity <Mailbox> -FocusedInboxOn $True

PowerShell command Example

Set-FocusedInbox -Identity Bob -FocusedInboxOn $True

Enable Focused Inbox | All Exchange USER Mailboxes (Bulk)

PowerShell command Example

Get-MailBox -Filter '(RecipientTypeDetails -eq "UserMailbox")' | Set-FocusedInbox -FocusedInboxOn $True

SECTION B: Disable “Focused Inbox” option

Disable Focused Inbox | Organization level

When using the PowerShell cmdlet – Set-OrganizationConfig, the option of Focused Inbox will be applied (activated) for all existing Exchange mailboxes + to all NEW Exchange mailboxes that will be created in the Future.

In case that we want to Enable the option of Focused Inbox for a specific Exchange mailbox, we can use the PowerShell cmdlet – Set-FocusedInbox

PowerShell command Example

Set-OrganizationConfig -FocusedInboxOn $False

Disable Focused Inbox | Single Mailbox

PowerShell command syntax

Set-FocusedInbox -Identity <Mailbox> -FocusedInboxOn $False

PowerShell command Example

Set-FocusedInbox -Identity Bob -FocusedInboxOn $False

Disable Focused Inbox | All Exchange USER Mailboxes (Bulk)

PowerShell command Example

Get-MailBox -Filter '(RecipientTypeDetails -eq "UserMailbox")' | Set-FocusedInbox -FocusedInboxOn $False

Export + View (Display) “Focused Inbox” settings” option

View Focused Inbox settings | Organization level

PowerShell command Example

Get-OrganizationConfig | Select *FocusedInbox*

View Focused Inbox settings | Single Mailbox

PowerShell command syntax

Get-FocusedInbox -Identity <Mailbox>

PowerShell command Example

Get-FocusedInbox -Identity Bob |Select MailboxIdentity, FocusedInboxOn ,FocusedInboxOnLastUpdateTime

View (Display) information about All Exchange user mailboxes Focused Inbox (Enabled or Disabled)

PowerShell command Example

Get-MailBox -Filter '(RecipientTypeDetails -eq "UserMailbox")' | Get-FocusedInbox | Select MailboxIdentity, FocusedInboxOn ,FocusedInboxOnLastUpdateTime

View (Display) information about All Exchange user mailboxes that their Focused Inbox option is Enabled

PowerShell command Example

Get-Mailbox | Where {$_.RecipientTypeDetails -eq 'UserMailbox'}| Get-FocusedInbox | Where {$_.FocusedInboxOn -eq ‘$True’} | Select MailboxIdentity, FocusedInboxOn ,FocusedInboxOnLastUpdateTime

View (Display) information about All Exchange user mailboxes that their Focused Inbox option is Disabled

PowerShell command Example

Get-Mailbox | Where {$_.RecipientTypeDetails -eq 'UserMailbox'}| Get-FocusedInbox | Where {$_.FocusedInboxOn -eq $False} | Select MailboxIdentity, FocusedInboxOn ,FocusedInboxOnLastUpdateTime

Export information about All Exchange user mailboxes Focused Inbox (Enabled or Disabled)

PowerShell command Example

Get-MailBox -Filter '(RecipientTypeDetails -eq "UserMailbox")' | Get-FocusedInbox | Select MailboxIdentity, FocusedInboxOn ,FocusedInboxOnLastUpdateTime | Export-CSVc:\temp\"All Exchange user mailboxes that their Focused Inbox option is Enabled.CSV" –NoTypeInformation -Encoding utf8

SECTION D: Using Exchange Online rule to send specific E-mails Focused Inbox

When using the Focused Inbox option, the Exchange server who manages the user mailbox, “decide” according to an internal algorithm to “move” (or not to “move”) a specific E-mail message to the Focused Inbox view.

In some scenarios, the Focused Inbox algorithm, can decide not to classify E-mail messages as an E-mail that will be sent to the Focused Inbox view. In other words, the Focused Inbox algorithm, can decide that specific E-mail address is not important, and this E-mail will not “sent” to the Focused Inbox view.

To be able to override this decision and to be able to “inform” Exchange server that we would like to send a specific E-mail to the Focused view.

The Exchange rule is implemented by, defining the characters of these specific emails, and asks from Exchange to add a specific mail field to the E-mail message header.

This special mail field is named – X-MS-Exchange-Organization-BypassFocusedInbox.

We will need to add this mail field, and set the value of this mail field to “true

For example

X-MS-Exchange-Organization-BypassFocusedInbox = true

In case that Exchange server “locate” this mail field, he “understands” that he needs to bypass the Focused Inbox process.

The Exchange rule can be created manually or via PowerShell.

In the following section, we review two examples of such as Exchange rule that will bypass the Focused Inbox process for specific mail items.

Create an Exchange rule that bypasses the Focused Inbox process for E-mail that includes a specific text in the mail SUBJECT

PowerShell command syntax

New-TransportRule -Name <Name of the rule> -SubjectContainsWords "<Text String>" -SetHeaderName " X-MS-Exchange-Organization-BypassFocusedInbox" -SetHeaderValue "true"

PowerShell command Example

New-TransportRule -Name “Bypass Clutter – Subject important” -SubjectContainsWords "important" -SetHeaderName " X-MS-Exchange-Organization-BypassFocusedInbox" -SetHeaderValue "true"

Create an Exchange rule that will bypass Focused Inbox process for E-mail that sent from a specific SENDER

PowerShell command syntax

New-TransportRule -Name <Name of the rule> -From "<E-mail address>" -SetHeaderName " X-MS-Exchange-Organization-BypassFocusedInbox" -SetHeaderValue "true"

PowerShell command Example

New-TransportRule -Name “Bypass Clutter – E-mail from Bob” -From Bob@o365info.com -SetHeaderName " X-MS-Exchange-Organization-BypassFocusedInbox"
-SetHeaderValue "true"


Managing Focused Inbox in Office 365 using PowerShell

The Focused Inbox PowerShell script will help you to manage various aspects that relate to the Exchange Online Feature – Focused Inbox such as – Enable or Disable Focused Inbox option for single or multiple (Bulk mode) Exchange mailboxes, and export information about the Focused Inbox settings (applied or not) for Exchange Online recipients.

Managing Focused Inbox in Office 365 using PowerShell

Enable or Disable Focused Inbox Using Exchange Online transport rule

Video links – Focused Inbox


Getting started with Office 365 PowerShell

PowerShell Naming Conventions & general information
Get more information about the Naming Conventions that are used in the PowerShell articles – Help and additional information – o365info.com PowerShell articles
Creating a remote PowerShell session to Exchange Online 
To get more information about the required remote PowerShell commands that you need to use for connecting to Exchange Online, read the following article:
Connect to Exchange Online by using Remote PowerShell
Creating a remote PowerShell session to Azure Active Directory
To get more information about the required software component + the remote PowerShell commands that you need to use for connecting Azure Active Directory, read the following article: Part 2: Connect to Office 365 by using Remote PowerShell
Basic introduction to PowerShell in Office 365 based environment
If you are new in the PowerShell world, you can read more information about how to start working with PowerShell in Office 365 based environment in the following article series:  Getting started with Office 365 PowerShell – Part 1, Part 2, Part 3.
Running and using o365info PowerShell scripts
In case that you need more information about how to use the o365info PowerShell scripts that I add to the PowerShell articles, you can read the article – How to run and use o365info PowerShell menu script

Now it’s Your Turn!
It is important for us to know your opinion on this article

PowerShell command syntax – Office 365 | Article series index

The post Managing Focused Inbox in Office 365 using PowerShell appeared first on o365info.com.

o365info PowerShell script index

$
0
0


Manage Exchange Online mailbox Audit – o365info PowerShell script

The Audit PowerShell menu script, will help you to perform various management tasks that relate to Exchange Audit mailbox option such as – enable Mailbox Audit for a single Exchange mailbox or, for multiple Exchange Online mailboxes (Bulk mode), export the Exchange Mailbox audit LOG to various file types (TXT, CSV, HTML), find Exchange mailboxes with Audit enabled and more.

You can read more detailed information about the PowerShell command that are used in the script in the article: Manage Mailbox Audit using PowerShell | Office 365

Manage Mailbox Audit using PowerShell


Send E-mail to Office 365 mail server – encrypted and authenticated session

You can read more detailed information about the PowerShell commands that are used in the script in the articles:

Send E-mail to office 365 using PowerShell script - Part 1-2


Using Get-MessageTrace PowerShell command for viewing and exporting information on mail sent and received

The PowerShell menu script, use the PowerShell cmdlet – Get-MessageTrace to access, search and Export Exchange Online LOG file, that includes a documentation of every inbound and outbound mail transaction. The script menus enable you to define a “Search filter”, looking for information about specific mail flow, such as – email that was sent by specific sender or received at a specific recipient, mail that was sent from a sender with a specific domain name suffix, mail that was sent in a specific date range and more.

Using Get-MessageTrace PowerShell command- Exchange Online 1#2


Managing Focused Inbox in Office 365 using PowerShell

The Focused Inbox PowerShell script will help you to manage various aspects that relate to the Exchange Online Feature – Focused Inbox such as – Enable or Disable Focused Inbox option for single or multiple (Bulk mode) Exchange mailboxes, and export information about the Focused Inbox settings (applied or not) for Exchange Online recipients.

Managing Focused Inbox in Office 365 using PowerShell


Manage Room Mailbox by using PowerShell | Office 365

PowerShell menu script, that will help you to perform management tasks related to Room Mailbox, such as – Crate new Room mailbox, configure Room mailbox – Booking options, Assign or Remove Full Access, Send As permissions assigned to a Room mailbox, export information about existing Room mailboxes, convert a Room mailbox to regular mailbox and vice versa and more.

You can read more detailed information about the PowerShell commands that are used in the script in the article: Manage Room Mailbox by using PowerShell | Office 365

Manage Room Mailbox by using PowerShell


DKIM Powershell Script

In case that you want to implement DKIM signature for your Public Domain name using Office 365 selector that his FQDN includes your public Domain name, you will need to publish two dedicated CNAME records with a specific syntax.
The DKIM PowerShell menu script will help you to get the required information about the syntax of the two DKIM CNAME DNS records in an Office 365 environment.

You can read more detailed information about the PowerShell commands that are used in the script in the article: How to create the CNAME records for Outbound DKIM signing using GoDaddy DNS | Office 365 | Part 8#10

Creating the required two CNAME required for Outbound DKIM signing using GoDaddy DNS - Part 8-10

Managing Clutter Inbox in Office 365 using PowerShell

The Clutter Inbox PowerShell script, will help you to manage various aspects that relate to the Exchange Online Feature – Clutter Inbox such as – Enable or Disable Clutter Inbox option for single or multiple Exchange mailboxes (Bulk mode), and export information about the Clutter Inbox settings (applied or not) for Exchange Online recipients.

You can read more detailed information about the PowerShell commands that are used in the script in the article: Manage Clutter by using PowerShell | Office 365

Disable clutter for all users using PowerShell

Manage Shared Mailbox by using PowerShell | Office 365

The Shared Mailbox PowerShell menu script will help you to perform various management tasks that relate to the Exchange Shared Mailbox such as – Assign or Remove Full Access, Send As permissions assigned to a Shared mailbox, export information about existing Shared mailboxes, convert Shared mailbox to regular mailbox and vice versa and more.

You can read more detailed information about the PowerShell commands that are used in the script in the article: Shared Mailbox – PowerShell commands reference
Manage Shared Mailbox by using PowerShell


Manage Office 365 Users Passwords using PowerShell | Office 365

You can read more detailed information about the PowerShell commands that are used in the script in the article: Manage Office 365 Users Passwords using PowerShell | Office 365
Manage Office 365 Users Passwords using PowerShell


Manage Office 365 Recycle bin by using PowerShell | Office 365

PowerShell menu script, that will help you to perform management tasks related to – Azure Active Directory recycle bin (store of Deleted Office 365 users) such as: Restore Office 365 users, Display and export information about Deleted users stored in the Azure Active Directory recycle bin, remove deleted user from the Azure Active Directory Recycle bin and more.

You can read more detailed information about the PowerShell commands that are used in the script in the article: Manage Office 365 Recycle bin by using PowerShell | Office 365

Manage Office 365 Recycle bin by using PowerShell

Manage Retention Policy and Tags by using PowerShell | Office 365

PowerShell menu script that will help you to perform various management tasks that relate to Exchange Retention policy such as – Assign Exchange Retention policy to single or group of Exchange mailboxes, Display + Export information about Retention policy and more.

You can read more detailed information about the PowerShell commands that are used in the script in the article: Manage Retention Policy by using PowerShell
Manage Retention Policy and Tags by using PowerShell

Manage Mailbox Permissions by using PowerShell | Office 365

You can read more detailed information about the PowerShell commands that are used in the script in the article: Mailbox Permissions – PowerShell commands
Manage Mailbox Permissions by using PowerShell


Managing Mailbox Time Zone and Language setting by using PowerShell | Office 365

You can read more detailed information about the PowerShell commands that are used in the script in the article: Managing Mailbox Time Zone and Language setting by using PowerShell

Manage User Time zone and Language using PowerShell


Exchange Online – Display and Export information using PowerShell

You can read more detailed information about the PowerShell commands that are used in the script in the article: Exchange Online – Display and Export information using PowerShell

Exchange Online – Display and Export information using PowerShell


Manage Folder Permission by using PowerShell | Office 365

You can read more detailed information about the PowerShell commands that are used in the script in the article: Folder Permission – PowerShell commands

Manage Folder Permission by using PowerShell


Save a copy of sent items when using Send As permissions | Shared mailbox | Office 365

You can read more detailed information about the PowerShell commands that are used in the script in the article: Save a copy of sent items when using Send As permissions | Shared mailbox | Office 365
Save a copy of sent mail items when using Send As permissions - Shared mailbox - Office 365

Disable Access to Service (protocol ) by using PowerShell

PowerShell menu script that will help you to Disable or Enable mail access protocols such as -OWA, Outlook AnyWhere, ActiveSync and more for a single Exchange Online mailbox.

You can read more detailed information about the PowerShell commands that are used in the script in the article: Disable Access to Service by using  PowerShell

Disable Access to a service (Protocol) using PowerShell

Manage Forward Mail by using PowerShell | Office 365

PowerShell menu script, that will help you to perform various management tasks that relate to the mailbox Forward E-mail options such as – Set or disable Forward E-mail for single Exchange mailbox, export information about all Exchange mailboxes that have Forward E-mail option, import Forward E-mail setting from a CSV file and more.

You can read more detailed information about the PowerShell commands that are used in the script in the article: Forward Mail – PowerShell commands
Manage Forward Mail by using PowerShell – Office 365

Using PowerShell for view and export information about mailbox migration to Office 365

The following PowerShell script will help you in a scenario in which you perform mailbox migration from your Exchange On-Premise environment to Office 365 (Exchange Online).
The PowerShell script includes various menus that will export information about a specific migrated mailbox, specific migration batch, information about migration endpoints and more.

You can find additional information about the subject of exporting information about mailbox migration in the following articles:


Manage Modern Authentication in Office 365 using PowerShell

PowerShell menu script will help you to Enable, Disable, and view the settings of Exchange Online Manage Modern authentication.

Enable Auto Expanding Archive in Exchange Online using PowerShell

You can use the Exchange Online auto-expanding archiving feature in Office 365 to enable unlimited storage space for archive mailboxes. When auto-expanding archiving is turned on, additional storage space is automatically added to a user’s archive mailbox when it approaches the storage limit.

Managing E-mail Addresses | PowerShell scripts series

The subject of “Managing E-mail addresses” in an Exchange environment, can be translated into various administrative tasks such as – Bulk Adding Alias E-mail address to multiple Exchange Online mailboxes, Bulk Removing Alias E-mail address from multiple Exchange Online mailboxes, backup existing E-mail address, replace primary E-mail address and so on.
To be able to accomplish these various tasks, I have created seven PowerShell menu scripts, that will help you in performing these tasks.

Export Email addresses | Exchange Online | Using PowerShell | 1#7

A PowerShell menu script, that will help you to:
Create a report (that will be exported to files) about – All Exchange Online recipients and their different type of E-mail address such as SMTP E-mail address (Primer E-mail address and Alias E-mail address), SIP address, X.500 E-mail address, etc.

You can read more detailed information about the PowerShell commands that are used in the script in the articles:

Export and display information about Email addresses using PowerShell - Office 365 - Part 6-13

Search Email Addresses + export | Exchange Online | Using PowerShell | 2#7

A PowerShell menu script that will help you to:
Perform a search for a specific E-mail address or, for an E-mail address that uses a specific Domain name suffix of Exchange Online recipients, and exports the information to files.

In case that you want to get more detailed information about the subject of – locating specific E-mail addresses, you can read the articles:

Searching hidden Email addresses Using PowerShell - Office 365 - Part 11-13

Bulk Add Alias E-mail address – Specific Domain name suffix | 3#7

A PowerShell menu script that will help you to:
TEST + implement the process of – Bulk add additional Alias E-mail addresses with a specific Domain name suffix, to multiple Exchange Online mailboxes.

Additional information

In case that you want to get more detailed information about the subject of – adding additional Alias E-mail address, you can read the articles:

Adding Email addresses using PowerShell - Bulk mode - Office 365 - Part 4-13

Add Additional Proxy (Alias) E-mail address | import from a CSV | 4#7

A PowerShell menu script that will help you to:
TEST + implement the process of – Bulk add an additional Proxy (Alias) E-mail addresses to the Exchange Online recipient, that are imported from a CSV file.

Additional information

In case that you want to get more detailed information about the subject of – Add additional Alias E-mail by importing the information from a CSV file, you can read the articles:

Adding Email addresses using PowerShell - Office 365 - Part 3-13

Bulk Remove Alias E-mail address – Specific Domain name suffix | 5#7

A PowerShell menu script that will help you to:
TEST + implement the process of – Bulk deleting existing Alias E-mail addresses with a specific Domain name suffix from multiple Exchange Online mailboxes.

Additional information

In case that you want to get more detailed information about the subject of – removing (deleting) E-mail address with a specific domain name suffix, you can read the article   Remove Email addresses using PowerShell | Office 365 | Part 12#130
Remove Email addresses using PowerShell - Office 365 - Part 12-13

Assign NEW Primary E-mail address using a specific Domain name suffix | 6#7

A PowerShell menu script that will help you to:
TEST + implement the process of – Bulk replacing (remove) existing primary E-mail addresses, with a NEW Primary E-mail address that has a specific Domain name suffix.

Additional information

In case that you want to get more detailed information about the subject of – replacing Primary E-mail address, you can read the article – Adding Email addresses using PowerShell | Office 365 | Part 3#13

Adding Email addresses using PowerShell - Bulk mode - Office 365 - Part 4-13

Manage E-mail addresses – Single mailbox | Exchange Online | 7#7

A PowerShell menu script that will help you to:
Manage E-mail address of a specific Exchange Online mailbox (add Alias, delete Alias, replace primary E-mail address).
Adding Email addresses using PowerShell - Office 365 - Part 3-13


The Search-Mailbox | PowerShell scripts series

The Search-Mailbox PowerShell cmdlet is very powerful and can be used for a various type of administrative scenarios. For this reason, I have created a “series” of PowerShell scripts, that will help you to “enroll” the Search-Mailbox PowerShell cmdlet for implementing different type of tasks:

Search for mail items using the Search-Mailbox PowerShell cmdlet (1#4)

A PowerShell menu script that is used for – performing a search in a single Exchange Online mailbox, by using various types of filters such as – specific text, specific date, a specific type of mail items (calendar, contact, etc.), mail with attachment and more.
Searching hidden Email addresses Using PowerShell - Office 365 - Part 11-13

Recover mail items using the Search-Mailbox PowerShell cmdlet (2#4)

PowerShell menu script, that is used for – Recovers mail items that are stored in the Recovery mail folder (Exchange Online Mailbox Dumpster). The PowerShell script, will help you to Recover all the content of the recovery mail folder or, use a search filter that will recover only specific mail items that answer a specific character such as – specific text, specific date, specific type of mail items (calendar, contact, etc.), mail with attachment and more.
Using the Search-Mailbox PowerShell command - Recover mail abc- Part 3-5u

Delete mail items – Multiple Exchange mailboxes (Bulk) using PowerShell (3#4)

PowerShell menu script, that is used for – performing a Deletion of specific mail items from multiple Exchange Online mailboxes (bulk mode). The “Deletion” of this mail item, is implemented by selecting a “search filter” that will delete only mail items that have specific characters such as – specific text, specific date, a specific type of mail items (calendar, contact, etc.), mail with attachment and more.

Search and Delete mail items from Multiple Exchange mailboxes Bulk using Search-Mailbox PowerShell cmdlets-Part 4-5

Search and Delete mail from Single Exchange mailboxes using PowerShell (4#4)

PowerShell menu script, that is used for – performing a Deletion of specific mail items from a single Exchange Online mailbox.
The “Deletion” of this mail item, is implemented by selecting a “search filter” that will delete only mail items that have specific characters such as – specific text, specific date, a specific type of mail items (calendar, contact, etc.), mail with attachment and more.
Search and Delete mail items from the Exchange mailbox using Search-Mailbox PowerShell cmdlets - Single mailbox-Part 5-5

The post o365info PowerShell script index appeared first on o365info.com.

Office 365 spam mail report using PowerShell | Introduction | 1#3

$
0
0
The current article is the first article in a three-article series. The Purpose of this article series is to Show you a relatively new PowerShell cmdlet named – Get-MailDetailSpamReport, that was created for Exchange Online and Office 365 administrator that need to view and export information stored in Exchange Online spam mail log file.

The syntax of the Get-MailDetailSpamReport PowerShell cmdlet is quite simple. In the next article, we review some basic example syntax example of the Get-MailDetailSpamReport PowerShell cmdlet and in addition we also review more advanced PowerShell syntax that will help us to “squeeze more juice” from the Get-MailDetailSpamReport PowerShell cmdlet

The real challenges of – using the Office 365 spam mail report

Associatively the task of reading spam mail reports looks like and easy and simple task for the average Exchange Online administrator.

My arguments are that:

  1. Although the term “spam mail” like quite an obvious term, in Office 365 and Exchange Online based environment this term is not so obvious because the term “spam mail” can relate to many different types of “problematic emails” (Spoofing or Phishing mail, bulk mail and more).
  2. Analyzing the data in the spam mail report

Given that we manage to get the Office 365 spam mail report via the web admin interface or by using PowerShell command. The real question is – what do we do with this information?

And again, although it looks like a simple task, in reality, the conclusions we can draw the “raw data” are not so clear.

The little secret that is not known for most of us is that the “data” in the spam mail report can be very interesting and useful data that can help is to identify security risks that are “hidden” in the “spam mail report data”.

For example, by viewing the information in the spam mail report we can Identify in advance and prevent “events such as –

  • Identify event in which hostile element try to spoof the E-mail address of our legitimate organization user\s.
  • Identify event in which an organization user account was comprised and it used by hostile element for distributing spam mail.
  • Identify event in which a legitimate granitization user is implemented Improper use of mail and for this reason his mail stamped as “spam mail”.

What is the exact meaning of spam mail and, how to analyze the spam mail report results

General review of- “spam mail” concepts in Office 365 (Exchange Online) environment

Before we begin with the technical description of the – how to use the Get-MailDetailSpamReport PowerShell cmdlet,” it is important that we get familiar with the basic concept of the term: “spam mail” in “Microsoft based environment” and especially, in Office 365 (Exchange Online) based environment.

Spam mail and SCL score

The basic technical definition of the term – “spam mail” in the Exchange Online environment is mail item, which his SCL score is a value between 2 and 9.

This leads us to the next question – what is SCL?

The term SCL stands for – Spam Confidence Level.
SCL is a method, which is used in an Exchange server environment to define the “trust level” of specific mail items.
An SCL value of “-1,” defines a mail item that is fully trusted.
The higher the SCL score\value, the meaning is that the specific mail item is – less trusted.
In other words, the higher the SCL score\value, it is more likely to assume that the E-mail message is defiantly “bad mail” (spam mail).

The term spam mail in Office 365 environment -01

What is the meaning of “spam mail”?

The term “spam mail” is quite vague because, in real life, the meaning of this term can be realities to – spam mail (as the name imply) but at the same time, to another type of “problematic mail” such as – spoof mail, Phishing mail, Bulk mail and more.

Bottom line – in Exchange Online and Office 365 environment, we should understand that spam mail can be related to many types of “unwanted” mail items.

Spam mail can be translated to -02

Spam mail | The Sender versus the Receiver 

Another classification of “spam mail” that we should know is the definition of “Sender” versus the “Receiver” of the spam mail.

  • Spam mail Sender – this is the entity that is responsible for “distributing” the spam mail.
  • Spam mail Receiver – this is the entity that “suffer” from the spam mail.

Spam mail - The Sender versus the Receiver -03

Apparently, the definition of “spam mail sender“ versus “spam mail Receiver,” look quite obvious.
But in reality, things can get a little complicated because this classification of “bad guy” versus “good guy” is not always so clear.

For example, the “spam mail sender“ can be a “bad guy” (external user), that bothersome our organization users (Exchange recipients) but at the same time, the “spam mail sender,” can be a legitimate organization recipient.

The same logic can be implemented regarding the “entity” that gets (receive) the spam mail.
It is true that most of the times, the recipients who get the spam mail are, our organization recipients, but in some scenario in which – organization user is sending spam mail, the recipient who “suffer” from the spam mail could be external recipients (non-organization recipients).

Spam mail - Sender versus the Receiver -Classification -04

“Information” about spam mail events versus, what happened to spam mail

In this part, I would like to emphasize the difference between the concept of the “information about spam mail events” versus, what the mail infrastructure (Exchange Online in our scenario) is “doing” with the spam mail.

Each mail that is sent or received by EOP (Exchange Online Protection), and “stamped” as spam mail, will appear on the spam mail report. In other words, the documentation of the “spam mail events” is written to Log file.

The “action” taken on mail that is identified as – “spam mail,” is implemented by a different mechanism, such as – the Exchange Online spam policy filter or Exchange Online Transport rules.

In other words, the information that appears in the spam mail report doesn’t include information about “what happened” to the spam mail.
Instead, the information in the spam mail log, include a documentation about “spam mail event” meaning, an event in which a specific E-mail message is “stamped” as a spam mail.

Information about spam mail events versus, what happened to spam mail -01

What is our mail focus when analyzing the spam mail report?

Assuming that we already get the “spam mail report.” The questions that can appear now are:

Q1: What can I do with this information?
Q2: Can I benefit from the information that appears in the spam mail report?
Q3: Should I need to generate different spam mail reports, that emphasizes different spam mail events aspects?
Q4: What should be my mail focus – the sender of the spam mail, the receiver of the spam mail?
Q5: Should I look for specific events that relate to my organization recipient or should I put my main focus on “external entities” that try to attack my organization users?

The answer is, that there is no one “right answer.”
Our main challenge is to take the “dry data,” and see what’s hiding behind is the “boring numbers.”

When I wrote the current spam mail reports PowerShell script, my aim was to simplify the process.
The PowerShell script will give you the option to export spam mail reports, that “light” different aspects of the event that we should observe, and analyze for the purpose “reacting” with the needed security and administrative steps.

What is our mail focus when analyzing the spam mail report -02

Spam mail Report usage

In the following section, I would like to give you a couple of examples of “security event’s scenarios,” that we can “fetch,” by looking over the data stored in the spam mail reports.

Spam mail sender

When we decide to focus on the “spam mail sender,” in some scenario, we can identify events in which the “spam sender” entity, appears to be the entity of a legitimate organization user (an E-mail address of organization user or E-mail address that has our domain name suffix).

Despite the underlying premise that our organization users are the “good guys,” in reality, we can reveal scenarios, in which one of our organization recipients (deliberately or on purpose), is involved in sending mail that is recognized as “spam mail” (in the Exchange Online environment these phenomena described as – internal spam).

Another possible explanation to such a scenario could be – a scenario in which the organization user account was comprised, and now it is used by hostile elements for distributing spam mail.

An additional optional scenario could be, a hostile element that tries to “present himself” as a legitimate organization user, by spoofing the E-mail address (the identity) of a specific organization user.

Spam mail Report usage -01

Spam mail Receiver

When we decide to focus on the element that “gets the spam mail” (most of the time our organization users), we should look at the “spam mail report data,” and try to understand if we can locate specific “trends” hidden within the row data.

For example, locate a trend in which specific “attacker” (specific E-mail address or specific E-mail address with a specific domain name suffix), is trying to attack our organization users.
In other words, is there a specific Identifiable “element” that targets our users?

Another scenario could be a hostile element that uses many types of E-mail addresses, but when we take a closer look at the data, we can see that he tries to attack specific organization users (such as scenarios of – spear phishing).

Spam mail Report usage -02
Spam mail “Originator” (sender)

In this section, I would like to view in more details the subject of “spam mail sender.”

As mentioned, the term “spam mail sender” is associatively associated with “bad guy” that plotting evil, and trying to hurt our Innocent organization user but the reality is more complex.

Spam mail Originator (sender) -01

Spam mail sender | External entity

The “spam mail sender” can be indeed, “external entity” that uses non-organization identity meaning – external E-mail address.

At the same time, this “external entity” could try to appear as a – legitimate organization user, by using the identity of a specific existing organization user (existing organization E-mail address) or by using an E-mail address that includes our organization domain name (our organization domain name suffix).

Notice that the “spam mail report” can not help you to identify “spoofed E-mail address,” but only “point” on a specific event\s, in which a specific organizational identity (organization E-mail address) is involved in spam mail activity.

When we identify such as scenario, in which a specific external recipient is involved in sending a lot of spam emails to our organization users, we should review the information and try to answer such as:

  • What is the average amount of spam mail that the specific sender “generate”?
  • Is the spam mail addressed to a specific user\s?

Spam mail Originator (sender) -02

Spam mail sender | Legitimate organization user

In this scenario, the “spam mail originator,” is indeed legitimate organization user.

There could be many reasons for such a scenario. For example:
Scenario 1 – Bulk mail
Organization user who sends E-mail to hundreds or thousands of recipients, and “stamped” by EOP as “bulk mail” (translated into an email message that has an SCL value of 2-9).

Scenario 2 – compromised E-mail client.

A scenario in which malware is using existing mail client such as – Outlook, for distributing spam mail.

Scenario 3 – compromised Office 365 user account.

A scenario in which hostile element, manage to get the credentials of a legitimate Office 365 user, and use these credentials for sending spam mail.

In a scenario in which the spam mail sender appears as one of our organization users, the questions that we can ask could be:

  • Is the user aware of the fact that his E-mail classified as “spam mail”?
  • Does the user know and confirm the email address of the target recipients?
  • Does the mail that the organizational user sends have certain characteristics?

Spam mail Originator (sender) -04


Export SPAM mail reports – Office 365

PowerShell menu based script, that will help you to display and export information (to various file formats -TXT, CSV, and HTML) about – spam mail events in an Office 365 based environment. The spam mail report includes – summary spam mail report, which counts the sent and received spam mails for specific recipients or detailed spam mail report, that includes a description of each spam mail event.

Now it’s Your Turn!
It is important for us to know your opinion on this article

The post Office 365 spam mail report using PowerShell | Introduction | 1#3 appeared first on o365info.com.

Using Get-MailDetailSpamReport PowerShell cmdlet | View and export spam mail report | Part 2#3 

$
0
0

The PowerShell Get-MailDetailSpamReport cmdlet was created as a tool that simplifies the process of viewing and “dumping” information stored in Exchange Online spam log file.The Exchange Online spam log file, serve as a store that holds the documentation for each of the “spam mail events” that relates to incoming and outgoing mail flow.

In the current article, we review how we can expand and enhance the capabilities of the Exchange Online PowerShell cmdlet – Get-MailDetailSpamReport.

In the first part, we review the basic PowerShell syntax examples that can be used with the Get-MailDetailSpamReport cmdlet.

In the second part, we will review the more advanced use of the Get-MailDetailSpamReport cmdlet, by using a PowerShell script that will help us perform a sequence of tasks and to generate various types of spam mail reports (by using search queries).

Part 1#2 – basic use of the Get-MailDetailSpamReport cmdlet

Display – spam mail report information

To be able to get the spam mail report, all we need to do is just type the name of the Get-MailDetailSpamReport cmdlet without any other mandatory parameters.

For example:

Get-MailDetailSpamReport | FT  Date,Subject,Direction,SenderAddress,RecipientAddress

Get-MailDetailSpamReport output

PS C:\Users\Eyal\>  Get-MailDetailSpamReport | FT  Date,Domain,Subject,Direction,SenderAddress,RecipientAddress,EventType,MessageSize,MessageId,MessageTraceId

Date                   Domain                    Subject                                                                                                           Direction SenderAddress                               RecipientAddress                        
----                   ------                    -------                                                                                                           --------- -------------                               ----------------                        
2017-09-28 1:42:16 PM  o365info.com              INBOX SMTP,RDP,UNLIMITED WEBMAIL,FRESH LEADS,FUND TRANSFER TO ALL BANKS IN USA..all available now.                Inbound   ojomade200@gmail.com                        alice@o365info.com                      
2017-09-28 1:42:25 PM  o365info.com              Undeliverable: INBOX SMTP,RDP,UNLIMITED WEBMAIL,FRESH LEADS,FUND TRANSFER TO ALL BANKS IN USA..all available now. Outbound  postmaster@o365info.com                     eyal@o365info.com                       
2017-09-28 1:42:25 PM  o365info.com              Undeliverable: INBOX SMTP,RDP,UNLIMITED WEBMAIL,FRESH LEADS,FUND TRANSFER TO ALL BANKS IN USA..all available now. Outbound  postmaster@o365info.com                     ojomade200@gmail.com                    
2017-09-28 7:50:37 PM  o365info.com              Scan Data                                                                                                         Outbound  documents@o365info.com                      u003eisabely@o365info.com               
2017-09-28 8:24:52 PM  o365info2.onmicrosoft.com Cloud App Security: suspicious administrative activity detected                                                   Inbound   no-reply@cloudappsecurity.com               admin@o365info2.onmicrosoft.com         
2017-09-28 11:35:40 PM o365info.com              近期计划安排!0433                                                                                                       Inbound   veejnt@gdhcau.mobi                          job@o365info.com                        
2017-09-29 12:41:46 AM o365info.com              RE: ANITA ROBERTS ( DEVCOIN CRYPTOCURRENCY )                                                                      Inbound   anita.roberts@devcoin.com                   eyal@o365info.com                       
    
2017-09-29 2:39:59 AM  o365info.com              Scan Data                                                                                                         Outbound  scanner@o365info.com                        john@o365info.com                       
2017-09-29 7:02:53 PM  o365info.com              Become a Target Content Curator Today!                                                                            Inbound   target@affiliates.acceleration-partners.com eyal@o365info.com                       
2017-09-29 11:31:00 PM mottie.com                Invoice                                                                                                           Outbound  Lynne@mottie.com                            eyal@o365info.com                       
2017-09-29 11:56:57 PM o365info.com              业务没激情没业绩怎么办?                                                                                                      Inbound   evoamdvna@nfujbc.info                       john02@o365info.com                     
2017-09-30 5:16:18 AM  alwasmiwater.com          BENEFICIARY PAYMENT ADVICE                                                                                        Outbound  accounts@alwasmiwater.com                   eyal@o365info.com                       
2017-09-30 6:38:37 AM  o365info.com              Top On Web                                                                                                        Inbound   info@webdeta.biz                            eyal@o365info.com                       
2017-09-30 7:07:23 AM  eenvoudigonline.be        Invoice                                                                                                           Outbound  Kaye@eenvoudigonline.be                     whiskers@o365info.com                   
2017-09-30 8:04:06 AM  timberlineroof.net        Invoice                                                                                                           Outbound  Millard@timberlineroof.net                  job@o365info.com                        
2017-09-30 9:24:07 AM  o365info.com              Invitation: UNITED BANK OF AFRICA @ Friday, 29 September 2017                                                     Inbound   onyema.onye@yahoo.com                       alice@o365info.com                      
2017-10-01 7:43:34 PM  interia.com               QUOTATION  doc20171002                                                                                            Outbound  tina.anish@interia.com                      eyal@o365info.com                       
2017-10-02 4:09:56 AM  o365info.com              Hi                                                                                                                Inbound   Katherineqvs@cynjin.com                     ht@o365info.com                         
2017-10-02 8:24:58 AM  o365info.com              What's up                                                                                                         Inbound   Violetteeqog@valedotijuco.com.br            ui@o365info.com                         
2017-10-02 7:54:21 PM  o365info.com              胡良平主讲-SAS统计分析全方位应用课程学习班 john@o365info.com                                                                         Inbound   vdkhdb9528@gmail.com                        john@o365info.com                       
2017-10-02 10:36:54 PM o365info.com              Hey, Sweety                                                                                                       Inbound   Evelinann@fibertel.com.ar                   ui@o365info.com                         
2017-10-03 1:15:58 AM  o365info.com              Emailed Invoice - 822287                                                                                          Outbound  Muriel@o365info.com                         paramedi@o365info.com                   
2017-10-03 2:19:17 AM  o365info.com              Hey, Sweety                                                                                                       Inbound   Evelinacmgfl@telkom.net.id                  ht@o365info.com                         
2017-10-03 3:24:55 AM  o365info.com              Hey, Sweety

Export spam mail report information to CSV file.

To be able to export the result from the spam mail report to a CSV file, we can use the following syntax:

PowerShell command syntax

Get-MailDetailSpamReport | Export-CSV <Path> –NoTypeInformation -Encoding utf8

PowerShell command example

Get-MailDetailSpamReport | Export-CSV c:\temp\"spam mail report.CSV" –NoTypeInformation -Encoding utf8

Export spam mail report information to CSV file | Specific Date range

In this scenario, we want to export the result from the spam mail report to a CSV file, but this time. We want to define a specific date range for the spam mail report.

To define the required date range, we use the parameters StartDate and EndDate.

PowerShell command syntax

Get-MailDetailSpamReport -StartDate <Date> -EndDate <Date>

PowerShell command example

Get-MailDetailSpamReport -StartDate 09/01/2017 -EndDate 10/01/2017

Note – Later , we review more sophisticated methods that we can use for defining that required date range.

Brief prefix – spam mail sender versus spam mail receiver

The spam log file includes many “properties” of each spam mail events.

One of the most important distinctions that we need to be familiar with is – the event in which some entity (represented as E-mail address) sends spam mail. The meaning is – the side that holds the rule of the “attacker,” versus the entity of the user or the recipient who receives the spam emails meaning, the victim of the spam mail attack.

Spam mail - The Sender versus the Receiver -01

The implementation of this distinction is implemented by using the following PowerShell parameters:

  • The PowerShell parameter – SenderAddress, define the entity that sends the spam mail
  • The PowerShell parameter – RecipientAddress, define the entity that receives the spam mail.

Spam mail - The Sender versus the Receiver -02

Get spam mail report | Filter results – specific spam mail receiver

In this scenario, we want to get information about all the spam mail events, in which the spam mail was sent to (received by) a specific “destination E-mail address”.

To define the identity of the “receiver”, we use the PowerShell parameter RecipientAddress, and provide the E-mail address of the destination recipient.

PowerShell command syntax

Get-MailDetailSpamReport -RecipientAddress <Sender E-mail address>

PowerShell command example

Get-MailDetailSpamReport -RecipientAddress john@o365info.com

Get spam mail report | Filter results | Specific spam mail Sender

In this scenario, we want to get information about all the spam mail events, in which the spam mail was sent from (sent by) a specific E-mail address.

To define the identity of the “sender,” we use the PowerShell parameter SenderAddress, and provide the E-mail address of the sender.

PowerShell command syntax

Get-MailDetailSpamReport -SenderAddress <Sender E-mail address>

PowerShell command example

Get-MailDetailSpamReport -SenderAddress john@o365info.com

Get spam mail report | Filter results | Spam mail RECEIVER that their E-mail address includes specific domain name suffix

In this scenario, we want to get information about spam emails that were sent to specific recipients (destination E-mail addresses). Notice that this time we are interested in “multiple recipients” versus the default PowerShell parameter “RecipientAddress” that relate to a single entity of the recipient.

Our wish is to get information about all the spam emails, that was sent to recipients, which their E-mail address includes a specific domain name suffix.
For example, get information about all the spam emails that were sent to our organization recipients, meaning, recipients whom their E-mail address includes our organization domain name suffix.

In this scenario, we use the PowerShell parameter “Where-Object” which filter the information based on the search query that we define. In our scenario, the search query syntax is:

{$_.RecipientAddress -like "*@<Domain name suffix>*"}

PowerShell command syntax

Get-MailDetailSpamReport -StartDate <Date> -EndDate <Date> | Where-Object {$_.RecipientAddress -like "*@<Domain name suffix>*"} | Select SenderAddress,RecipientAddress ,Date

PowerShell command example

Get-MailDetailSpamReport -StartDate $StartDate -EndDate $EndDate | Where-Object {$_.RecipientAddress -like "*@o365info.com*"} | Select SenderAddress,RecipientAddress ,Date

Get spam mail report | Filter results | Spam mail SENDERS that their E-mail address includes specific domain name suffix

This scenario is similar to the former scenario, but this time; we want to get information about all spam emails events, which relate to the “spam mail senders” (the entity that sends the spam mail) which use E-mail with a specific domain name suffix.

PowerShell command syntax

Get-MailDetailSpamReport -StartDate <Date> -EndDate <Date> | Where-Object {$_.SenderAddress -like "*@<Domain name suffix>*"} | Select SenderAddress,RecipientAddress ,Date

PowerShell command example

Get-MailDetailSpamReport -StartDate $StartDate -EndDate $EndDate | Where-Object {$_.SenderAddress -like "*@o365info.com*"} | Select SenderAddress,RecipientAddress ,Date

Part 2#2 – More advanced use of the Get-MailDetailSpamReport cmdlet

General concepts of Get-MailDetailSpamReport cmdlet use

The term “spam mail event”

Along the current article, we will mention the term “spam mail event” a couple of times. This term is not a formal term, but instead, my term that I use.

The term “spam mail event,” define a recorded in the Exchange Online spam mail log file, that includes a documentation of one of the two options:

  • Spam mail that was Sent From (Sent by) a specific entity (E-mail address).
  • Spam mail that was Received by (Sent to) specific entity (E-mail address).

The term “spam mail event record” includes the properties of the events such as date, message ID, message subject and so on.

Optimize the way we use Date ranges

As far as I know, at the current time, there is no formal information about the default time range that is used by the Get-MailDetailSpamReport PowerShell cmdlet.

Note – I don’t know what is the maximum date range of spam mail events that saved in the Exchange Online spam mail log file. From my experience, we can “fetch” information about spam mail events within 30 days ranges or more.

To be able to define that exact date range, we can add to the basic Get-MailDetailSpamReport PowerShell cmdlet the parameters – StartDate and EndDate, which enable us to set the exact date range.

For example

Get-MailDetailSpamReport -StartDate 09/01/2017 -EndDate 10/01/2017

In the current article, I will use a customization of “Date range parameters.”
We will use a simple PowerShell formula, which defines Date range that will be measured in “day’s units.”

In our examples, we define Date range of 30 days.
Note – using this simple PowerShell formula, you can very easily create the required date rage customization for your specific needs.

The End Date value

Instead of manually providing the value for the “End Date”, we use a variable, that stores the results that we get from the PowerShell cmdlet Get-Date.

The PowerShell cmdlet Get-Date is configured to “fetch” the current date.

The Start Date value

Instead of manually providing the value for the “Start Date,” we use a variable that stores the results of a simple formula. The formula that we use, take the current date and subtract from this date the number of days that we specify.

The result of this formula will be – the “Start Date.”

An example of the two variables that we will use along this current article is:

$EndDate = Get-Date

$StartDate = $EndDate.Adddays(-30)

In this example, we define a date range of “30 days”.

In the following diagram, we can see an example of the “date range” concept.

The Date Range

Dump the content of the Exchange Online spam mail Log file

In this section, we review the how to “dump” the content of the Exchange Online spam mail Log file, but the point is a trick that we use that will help us to bypass the default limitation of the
Get-MailDetailSpamReport PowerShell cmdlet, so we will be able to export (dump) the whole content of the Exchange Online spam mail Log file, for the date ranges that we define.

Export Spam Mail Reports | ALL Spam mail events | Last 30 days

Our mission: export all existing spam mail events from last 30 days.

Notice that in this scenario, we don’t want to use any type of filter or define a specific search query. Instead, we just want to “dump” all the information from the Exchange Online spam mail Log file to – a local file.

Exchange Online and secret data limitation default settings

When we ask for Exchange Online to “fetch” information that is stored in the data center Log file, the little secret that is not known to most of us is, that by default, Exchange Online will not “volunteer” to provide us 100% of the information.

Even when we provide a defined “date range,” Exchange Online is configured to provide a “restricted amount of data.”

The reason for this built-in limitation is probably some kind of “server protection mechanism” that was created for preventing excess loads from Exchange Online server or prevent excess loads of communication lines by limiting the amount of data that flows from the “cloud.”

The data measurement unit – the page   

The way that we use to measure the “amount of data” that Exchange Online server provides, defined using a measurement unit named “page.”

Each “page” can contain the maximum number of “rows.”
In case that we need to get more information than the information that can be stored in a single “page,” we need to “instruct” Exchange Online to provide us additional “pages.”

Page content default and maximum limit

  • The default number of “events” (Log rows) that appear on a single page is – 1,000.
  • The maximum number of “events” (Log rows) that can appear on a single page is – 5,000.

Pages default and maximum limit

  • The default number of pages is – 1.
  • The maximum number pages that can be provided by Exchange Online is – 1,000.

The concept of – Page

If you like to do the match, the maximum results that Exchange Online can provide us are – 5 million events (5,000,00000).

The maximum number of events that Exchange Online can provide

Exchange Online and the Get-MailDetailSpamReport cmdlet default settings

Regarding the output that we get from the Get-MailDetailSpamReport PowerShell cmdlet, the default setting is configured to produce “1 page” that contains a maximum of one thousand lines (1 X 1,000).
In other words, by default, the Get-MailDetailSpamReport PowerShell cmdlet, is configured to provide us only the “first page” from existing information that is stored in the Exchange Online spam mail Log file.

To demonstrate this concept, let’s use the following scenario: Exchange Online spam mail log, including a documentation of 15,000 spam mail events.
(The Exchange Online spam mail log file includes –  15,000 rows).

In case that we use the Get-MailDetailSpamReport PowerShell cmdlet without any filters or parameters, Exchange Online will “send” us information about 1,000 events.

A quick reminder – Exchange Online is configured to provide by default only one “page” and each page is configured by default to a maximum of 1,000 “rows.”

This “default configuration,” could lead to problems with “data integrity” because, we cannot see the full picture and instead, we see only part of the whole information.

The good news is the Get-MailDetailSpamReport PowerShell cmdlet, allow us to define two important parameters:

  • Page size – the maximum number of “events” (rows) that each page contains. The maximum rows that a page can contain is – 5,000.
  • The number of pages – the number of pages that we “ask to get”.

Additional reading

In our scenario, in case that we want to get “Full spam mail report” that will include 100% of the available information, we will need to “expend” the default Get-MailDetailSpamReport PowerShell command syntax in the following way:

Get-MailDetailSpamReport -PageSize 5000 -Page 3

Using a PowerShell script that will dump all the information from the spam log file

Although this “solution” look like a satisfactory answer to our problem, we have additional issues that we need to solve!

In the current scenario, I mentioned that we “know” that the Exchange Online spam mail log file includes 15,000 rows but, in reality, how can we really know what is the number of events that are stored in the log file, so we can make the required adjustment to the PowerShell command syntax?

And the answer is, that most of the times, we don’t know what is the exact “number” of rows (events) that appeared in the Exchange Online Server Log file.

To be able to deal with this challenge, we can use a little PowerShell “tweak” that will provide the required solution.

The solution is implemented by using a “loop” procedure, that will instruct Exchange Online to provide us the required results, using a page size of 5,000 rows.

In case that there is additional information in the Exchange Online spam mail log file, the PowerShell “loop command” asks for Exchange Online to create a “NEW page,” that will contain the next 5,000 results and so on and so forth.

This loop process will run until we get all the available information that is stored in the Exchange Online spam mail log file.

In the following section, we can see an example of such a solution. The PowerShell script will perform the following sequence of actions:

Define the date range as a date range of 30 days (30 days going backward from the current date).

  1. Automatically create in drive C: NEW folder structure, that will serve as a container for the information that will be exported.
  2. The “data” that is collected from the PowerShell “loop process” that fetches all the available information from Exchange Online spam log file, will be saved in a variable named – $SpamMailLogFileContent.
  3. The content of the variable named – $SpamMailLogFileContent will be exported to a CSV file.

Export all information from Exchange Online spam log file | Last 30 days

$EndDate = Get-Date

$StartDate = $EndDate.Adddays(-30)

# Define the Date format variable

$Datef = Get-Date -Format "\Da\te dd-MM-yyyy \Ti\me H-mm"

# Define variables that contain the folder names

$A20 = "C:\INFO\Spam mail Reports"

$A21 = "$A20\ALL Spam mail events - Last 30 days - $Datef"

# C:\INFO\Spam mail Reports

IF (!(Test-Path -path $A20))

{New-Item $A20 -type directory | Out-Null}

# ALL Spam mail events - Last 30 days - <Date>

IF (!(Test-Path -path $A21))

{New-Item $A21 -type directory | Out-Null}

# Define the variable for the exported Filename

$File1 = "Full spam mail report – All information – last 30 Days"

# Using PowerShell command that will verify that ALL the available information will be exported.

# Get the complete content of the Exchange Online spam mail Log file (all existing spam mail events in the last 30 days)

$SpamMailLogFileContent  =

for($c=1;$c -lt 1001; $c++)

{

if((Get-MailDetailSpamReport -StartDate $StartDate -EndDate $EndDate -PageSize 5000 -Page $c).count -gt 0)

{

Get-MailDetailSpamReport -StartDate $StartDate -EndDate $EndDate -PageSize 5000 -Page $c

}

else

{break;}

}

# Define a variable that store the content of the Exchange Online spam log file

$ExportSpamLog = $SpamMailLogFileContent | Sort-Object -Property Date -descending

# Export information to the CSV file

$ExportSpamLog | Export-CSV $A21\"$File1.CSV" –NoTypeInformation -Encoding utf8

Count Sent and Received Spam emails | Spam mail report.

In this section, I would like to demonstrate how to use the Get-MailDetailSpamReport PowerShell cmdlet, for generating a specific type of spam mail report, which will count the number of specific spam mail events versus the standard output of the Get-MailDetailSpamReport PowerShell cmdlet that display information about a specific spam mail event (the details about the specific spam mail event).

By default, the Get-MailDetailSpamReport PowerShell cmdlet doesn’t “know” how to count spam mail events. In the current section, we will demonstrate how to use PowerShell script that will “add” this required capacity.

Counting the sum of spam mail events

The goal we seek to achieve is, to count the following types of spam mail events:

  • Sum (count) the amount of spam mail that was Received (sent to) specific entity.
  • Sum (count) the amount of spam mail that was sent from (Sent by) a specific entity.

In our scenario, the term “entity” is translated to – “E-mail address.”
The “E-mail address identity,” could be the E-mail address of the external recipient (non-organization recipient) or the E-mail address of recipient organization.

Export Spam Mail Summary | Count (sum) all received Spam emails | All E-mail Addresses

In this section, we review how to use PowerShell script, which will generate a spam mail “summary report”, that count all the spam emails that were Sent to (Received by) each E-mail address that appears in the Exchange Online spam log file.

The goal we seek to achieve is, to count the following type of spam mail events:

  • Sum (count) the amount of spam mail that was Received by (sent to) specific entity.

Spam mail - The Sender versus the Receiver -01

Before we begin with the description of the PowerShell script that includes many different parts, I would like to present the basic PowerShell command structure that we use for counting the number of spam mail event that received (sent to) a specific E-mail address.

The basic PowerShell command syntax

Before we provide the “complex” PowerShell syntax, let’s view the basic PowerShell syntax structure that we need to use in this scenario:

$ReceiveEvents = Get-MailDetailSpamReport -RecipientAddress <E-mail address> -StartDate <StartDate> -EndDate <EndDate>

$ReceiveEventsCount = @($ReceiveEvents).count

write-host "The Number of Received spam emails is: $ReceiveEventsCount"

In this scenario, the PowerShell script that will implement the following sequence of tasks:

Task 1 – Get information from Exchange Online spam mail log file about all the spam mail events, which occurred in the last 30 days.

The content of the spam log file is fetched by the PowerShell command that we revive in the section XXX.

We use the variable – $SpamMailLogFileContent as a logical container, that will store the content of the spam log file.

Task 2 – Create a list of all E-mail addresses that appear in the Exchange Online spam mail log file.

The list of all E-mail addresses from the Exchange Online spam log file that appears “under” the column – “spam mail Receiver,” is created by using the following PowerShell command:

$ALLSpamMailRecipients = $SpamMailLogFileContent | Group-Object -Property RecipientAddress  | Sort-Object name -descending | Select-Object name,count

We use the variable – $ALLSpamMailRecipients as a logical container, that will store the list of the E-mail addresses.

Task 3 – Create a folder hierarchy which will store the exported spam mail summary report.

Task 4 – Run a loop process, which will take the “first E-mail address” on the list, and count all the spam mail events that relate to this E-mail address.
Then the loop process will “move on” to the next E-mail address in the list until he reaches the last E-mail address in the list.

The information about each E-mail address and the “sum” of receiving spam events will be written to the PowerShell console and in parallel exported to a report file.

The output from the loop process takes place in a dedicated space which describes as – a hash array.

In our scenario the hash array named – $Results = @()

The loop process in which we query the spam log file for each E-mail address, is implemented by the following PowerShell command:

$ReceiveEvents = Get-MailDetailSpamReport -RecipientAddress $ID1 -StartDate $StartDate -EndDate $EndDate

We use the variable – $ReceiveEvents as a logical container, that will store the information about all spam mail events that are related to the specified E-mail address (represented as $ID1)

Counting the spam mail events

Given that we have the list of spam mail events that are related to the specific E-mail address (specific receiver), we can use PowerShell formal, that we count the number of the existing spam mail events.

The counting process, is implemented by the following PowerShell command:

$ReceiveEventsCount = @($ReceiveEvents).count

We use the variable – $ReceiveEventsCount as a logical container, that will store the “counting results” for the specific E-mail address.

Task 5 – Write the information that was saved in the hash array to – CSV file.
The PowerShell command that we use for exporting spam mail report to CSV file is:

$ResultsExport | Export-CSV $A22\"$File1.CSV" –NoTypeInformation -Encoding utf8

We use the variable – $ResultsExport as a logical container, that store all the result from that was gathered during the loop process. The meaning is – each E-mail address of “spam mail receiver” and the sum of the spam emails (spam events) that was sent to the specific E-mail address.

The PowerShell script Count (sum) all received Spam emails

# Define variables for a start date, and End date

$EndDate = Get-Date

$StartDate = $EndDate.Adddays(-30)

# Define variables that contain the folder names

$A20 = "C:\INFO\Spam mail Reports"

$A21 = "$A20\Summary Spam Report"

$A22 = "$A21\1. Count RECEIVED spam mail report – Each Unique E-mail Address"

# Create folders Structure that contains the exported information

# C:\INFO\Spam mail Reports

IF (!(Test-Path -path $A20))

{New-Item $A20 -type directory | Out-Null}

# Summary Spam Report

IF (!(Test-Path -path $A21))

{New-Item $A21 -type directory | Out-Null}

# 2. Count SENT + RECEIVED spam mail report – each Unique E-mail Address - <Date>

IF (!(Test-Path -path $A22))

{New-Item $A22 -type directory | Out-Null}

# Get the complete content of the Exchange Online spam mail Log file (all existing spam mail events in the last 30 days)

$SpamMailLogFileContent  =

for($c=1;$c -lt 1001; $c++)

{

if((Get-MailDetailSpamReport -StartDate $StartDate -EndDate $EndDate -PageSize 5000 -Page $c).count -gt 0)

{

Get-MailDetailSpamReport -StartDate $StartDate -EndDate $EndDate -PageSize 5000 -Page $c

}

else

{break;}

}

# Create a list of unique E-mail addresses that appear in the spam mail report | Spam Mail receiver (recipients that spam mail sent to them)

$ALLSpamMailRecipients    = $SpamMailLogFileContent | Group-Object -Property RecipientAddress  | Sort-Object name -descending | Select-Object name,count

# Define an array (hash) that will store information about spam mail events that fetched from the mail spam mail report

$Results = @()

ForEach ($SpamEvent in $ALLSpamMailRecipients)

{

# Specific Unique identity (E-mail address)

$ID1 = $SpamEvent.name

# Display progress bar information on the PowerShell console

Write-Progress -Activity "Export to Log Files – SPAM mail Report for $ID1 E-mail address - last 30 days"

# Define a variable that store ALL spam mail events of emails that were received by (sent to) specified recipient

$ReceiveEvents = Get-MailDetailSpamReport -RecipientAddress $ID1 -StartDate $StartDate -EndDate $EndDate

# Count the number of - all spam emails events of E-mail that sent to the specified recipient

$ReceiveEventsCount = @($ReceiveEvents).count

write-host  -ForegroundColor white      ----------------------------------------------------------------------------

write-host  -ForegroundColor white "Spam mail information about - Exchange Online User " -NoNewline;Write-Host $ID1 -ForegroundColor white  -BackgroundColor DarkGreen

write-host  -ForegroundColor white "(The last 30 days)"

write-host

write-host  -ForegroundColor white "* Number of RECEIVED spam emails:" $ReceiveEventsCount

write-host  -ForegroundColor white      ----------------------------------------------------------------------------

# Define that array of properties, that appears in the spam mail report

$Properties = @{

"E-mail address"  = $ID1

"Spam mail Received"  = $ReceiveEventsCount

}

# Define a variable that store the information about each identity

$Results += New-Object psobject -Property $properties

$ResultsExport = $Results | Select-Object  "E-mail address","Spam mail Received"

}

# Define the variable for the exported Filename

$File1 = "Received Spam emails per unique E-mail Address"

# Export information about - Sent SPAM mail Report

$ResultsExport | Export-CSV $A22\"$File1.CSV" –NoTypeInformation -Encoding utf8

Export Spam Mail Summary | Count (sum) all Sent Spam emails | All E-mail Addresses

The current scenario is similar to the former scenario which we review in the former section.

The main variance from the former scenario is that now, our main focus is about the entities that send spam mail.

The goal we seek to achieve is, to count the following type of spam mail events:

  • Sum (count) the number of spam mail that was sent from (Sent by) a specific entity.

Export Spam Mail Summary -Count (sum) all SENT Spam emails -02

The basic PowerShell command syntax

The basic PowerShell syntax structure that we need to use in this scenario is:

$ReceiveEvents = Get-MailDetailSpamReport -SenderAddress <E-mail address> -

$SENTEventsCount =  @($SENTEvents).count

write-host "The Number of Sent spam emails is: $SENTEventsCount"

The PowerShell script – Count (sum) all Sent Spam emails

# Define variables for a start date, and End date

$EndDate = Get-Date

$StartDate = $EndDate.Adddays(-30)

# Define variables that contain the folder names

$A20 = "C:\INFO\Spam mail Reports"

$A21 = "$A20\Summary Spam Report"

$A22 = "$A21\2. Count SENT spam mail report – Each Unique E-mail Address"

# Create folders Structure that contains the exported information

# C:\INFO\Spam mail Reports

IF (!(Test-Path -path $A20))

{New-Item $A20 -type directory | Out-Null}

# Summary Spam Report

IF (!(Test-Path -path $A21))

{New-Item $A21 -type directory | Out-Null}

# 2. Count SENT + RECEIVED spam mail report – each Unique E-mail Address - <Date>

IF (!(Test-Path -path $A22))

{New-Item $A22 -type directory | Out-Null}

# Get the complete content of the Exchange Online spam mail Log file (all existing spam mail events in the last 30 days)

$SpamMailLogFileContent  =

for($c=1;$c -lt 1001; $c++)

{

if((Get-MailDetailSpamReport -StartDate $StartDate -EndDate $EndDate -PageSize 5000 -Page $c).count -gt 0)

{

Get-MailDetailSpamReport -StartDate $StartDate -EndDate $EndDate -PageSize 5000 -Page $c

}

else

{break;}

}

# Create a list of unique E-mail addresses that appear in the spam mail report | Spam Mail Sender (E-mail address that sent spam mail)

$ALLSpamMailSenders = $SpamMailLogFileContent |  Group-Object -Property SenderAddress | Sort-Object name -descending | Select-Object name,count

# Define an array (hash) that will store information about spam mail events that fetched from the mail spam mail report

$Results = @()

ForEach ($SpamEvent in $ALLSpamMailSenders)

{

# Specific Unique identity (E-mail address)

$ID1 = $SpamEvent.name

# Display progress bar information on the PowerShell console

Write-Progress -Activity "Export to Log Files – SPAM mail Report for $ID1 E-mail address - last 30 days"

# Define a variable that store ALL spam mail events of emails that where SENT by specified recipient

$SENTEvents = Get-MailDetailSpamReport -SenderAddress $ID1 -StartDate $StartDate -EndDate $EndDate

# Count the number of - Spam emails that was sent by (Sent from) a specific E-mail Address

$SENTEventsCount =  @($SENTEvents).count

write-host  -ForegroundColor white      ----------------------------------------------------------------------------

write-host  -ForegroundColor white "Spam mail information about - Exchange Online User " -NoNewline;Write-Host $ID1 -ForegroundColor white  -BackgroundColor DarkGreen

write-host  -ForegroundColor white "(The last 30 days)"

write-host

write-host  -ForegroundColor white "* Number of SENT spam emails is: " -NoNewline;Write-Host $SENTEventsCount -ForegroundColor white  -BackgroundColor Darkred

write-host  -ForegroundColor white      ----------------------------------------------------------------------------

# Define that array of -properties, that appears in the spam mail report

$Properties = @{

"E-mail address" = $ID1

"Spam mail SENT" = $SENTEventsCount

}

# Define a variable that store the information about each identity

$Results += New-Object psobject -Property $properties

$ResultsExport = $Results | Select-Object  "E-mail address","Spam mail SENT"

}

# Define the variable for the exported Filename

$File1 = "SENT Spam emails per unique E-mail Address"

# Export information about - Sent SPAM mail Report

$ResultsExport | Export-CSV $A22\"$File1.CSV" –NoTypeInformation -Encoding utf8

Generate Dedicated Spam Mail Reports For Each Exchange mailbox user (Bulk mode)

In this section, we use a method that will generate a “dedicated spam mail report” for each Exchange Online User E-mail address, that appears in the Exchange Online spam mail log file.

I use the term “dedicated,” for describing the process in which the PowerShell will automatically create a dedicated folder for each Exchange Online User E-mail address.
This folder will serve as a container that stores the “dedicated spam mail report” that includes information about – all the spam mail events that are related to the specified E-mail address.

Generate a Dedicated Spam Mail Reports For Each Exchange mailbox user

We will review two variations of this scenario.

Scenario 1 – in this scenario, we create a dedicated spam mail report for each Exchange Online User E-mail address, which appears as an E-mail address that “RECEIVE” spam mail.
In this case, our purpose is to analyze spam mail events in which hostile element attacks our organization recipients.

Scenario 2 – in this scenario, we create a dedicated spam mail report for each Exchange Online User E-mail address, which appears as – E-mail address that “SEND” spam mail.
In this case, our purpose is to analyze spam mail events, in which one of our organization users is distributing (Intentionally or unintentionally) spam mail.

Export dedicated Spam Mail events Report | RECEIVED Spam Mail | For Each Exchange mailbox user recipient

In the current scenario, we would like to get a detailed information about spam mail events, in which we organotin users are being attacked by the hostile element that sends them spam mail.

The PowerShell script that will implement the following sequence of tasks:

Task 1 – Get information from Exchange Online spam mail log file about all the spam mail events, which occurred in the last 30 days.

Task 2 – Create a list of all E-mail addresses of Exchange Online recipients who describe as “Exchange Online users” (user with a mailbox).

The “list” of the Exchange Online user recipient will be created by using the following PowerShell command:

$GetMBXUser =  Get-MailBox -Filter '(RecipientTypeDetails -eq "UserMailbox")' |  Where-Object {$_.name -notlike '*DiscoverySearchMailbox*'} | Sort-Object -Property Displayname

We use the variable $GetMBXUser as a logical container, that will store the list of Exchange Online Users E-mail addresses.

Task 3 – Scan the information that was fetched from the Exchange Online spam log file, and perform a loop process.

The PowerShell script will take the “first E-mail address” in the list, and check if there is any information in the spam log about – spam mail events in which spam mail was sent to the specific E-mail address.

In case that there is no information that related to the specific E-mail address, the PowerShell script will continue to implement the same process for the “next E-mail address” in the list.

In case that the PowerShell script finds information about spam emails that was sent to the specific E-mail address, the PowerShell script will perform the following actions:

3.1 – Create a dedicated folder, and name the folder using the Display name of the Exchange Online user recipient.

3.2 – Generate spam event log that includes all the spam mail events in which spam mail was sent to the specified E-mail address (described as Received spam).

The PowerShell script – Export Dedicated Spam Mail events Report | RECEIVED Spam Mail

# Define variables for a start date and End date

$EndDate = Get-Date

$StartDate = $EndDate.Adddays(-30)

# All Exchange Online USER Mailboxes

$GetMBXUser = Get-MailBox -Filter '(RecipientTypeDetails -eq "UserMailbox")' | Where-Object {$_.name -notlike '*DiscoverySearchMailbox*'} | Sort-Object -Property Displayname

# Define variables that contain the folder names

$A30 = "$A10\C. Dedicated Spam Mail Report For Each E-mail Address"

$A31 = "$A30\1. Exchange Online users"

$A32 = "$A31\1.1 - RECEIVED Spam mail report"

# Create folders Structure that contains the exported information

# C:\INFO\Spam mail Reports

# C. Dedicated Spam Mail Report For Each E-mail Address

IF (!(Test-Path -path $A30))

{New-Item $A30 -type directory | Out-Null}

# 1. Exchange Online users

IF (!(Test-Path -path $A31))

{New-Item $A31 -type directory | Out-Null}

# 1.1 - RECEIVED Spam mail report

IF (!(Test-Path -path $A32))

{New-Item $A32 -type directory | Out-Null}

# Loop via the list of existing Exchange Online mailbox users | locate information about the spam mail event for each E-mail address

ForEach ($Mailbox in $GetMBXUser)

{

# Specific Exchange Online mailbox identity | Specific member from mailboxes Array

$ID1 = $Mailbox.Displayname

$ID2 = $Mailbox.PrimarySmtpAddress

#  Define variable - Spam report for a specified Exchange Online user

# Define a variable that store all spam mail event of E-mail that sent to the specified recipient

$ReceiveEvents = Get-MailDetailSpamReport -RecipientAddress $ID2 -StartDate $StartDate -EndDate $EndDate

# Count the number of - all spam mail event of E-mail that sent to the specified recipient

$ReceiveEventsCount = @($ReceiveEvents).count

# Verify if the specified Exchange Online user RECEIVE any spam mail

IF (!$ReceiveEventsCount)

{

}

Else

{

# Define variables that contain the folders name for the dedicated Exchange Online user spam report folder

$A40 = "$A32\$ID1"

# Dynamically create a dedicated folder that will store spam mail report

# <User name>

IF (!(Test-Path -path $A40))

{

New-Item $A40 -type directory | Out-Null

}

# Define the variable for the exported Filename

$File1 = "Spam emails RECEIVED"

# Export information about - Received Spam emails by specific Exchange Online recipient

$ReceiveEvents | Export-CSV $A40\"$File1.CSV" –NoTypeInformation -Encoding utf8

}

}

Export Spam events Mail Report | SENT Spam Mail | For Each Exchange mailbox user recipient

The current scenario, is similar to the former scenario which we review in the former section.

The main variance from the former scenario is that now, our main focus is about the “entities” that send spam mail.

In this case, we want to create a dedicated spam mail report for each Exchange Online User E-mail address, that appears in the Exchange Online spam log file as – E-mail address that sends spam mail.

The PowerShell script – Export Dedicated Spam Mail events Report | SENT Spam Mail

# Define variables for a start date and End date

$EndDate = Get-Date

$StartDate = $EndDate.Adddays(-30)

# All Exchange Online USER Mailboxes

$GetMBXUser = Get-MailBox -Filter '(RecipientTypeDetails -eq "UserMailbox")' | Where-Object {$_.name -notlike '*DiscoverySearchMailbox*'} | Sort-Object -Property Displayname

# Define variables that contain the folders names

$A30 = "$A10\C. Dedicated Spam mail Report For Each E-mail Address"

$A31 = "$A30\1. Exchange Online users"

$A33 = "$A31\1.2 - SENT Spam mail report"

# Create folders Structure that contains the exported information

# C:\INFO\Spam mail Reports

# C. Dedicated Spam Mail Report For Each E-mail Address

IF (!(Test-Path -path $A30))

{New-Item $A30 -type directory | Out-Null}

# 1. Exchange Online users

IF (!(Test-Path -path $A31))

{New-Item $A31 -type directory | Out-Null}

# 1.2 - SENT Spam mail report

IF (!(Test-Path -path $A33))

{New-Item $A33 -type directory | Out-Null}

# Loop via the list of existing Exchange Online mailbox users | locate information about spam mail event for each E-mail address

ForEach ($Mailbox in $GetMBXUser)

{

# Specific Exchange Online mailbox identity | Specific member from mailboxes Array

$ID1 = $Mailbox.Displayname

$ID2 = $Mailbox.PrimarySmtpAddress

#----------------------------------------------------------------------------------

#  Define variable - Spam report for a specified Exchange Online user

#----------------------------------------------------------------------------------

# Display progress bar information on the PowerShell console

Write-Progress -Activity "Export to Log Files – SPAM mail Report for $ID1 E-mail address - last 30 days"

# Define a variable that store ALL spam mail events of emails that where SENT by specified recipient

$SENTEvents = Get-MailDetailSpamReport -SenderAddress $ID2 -StartDate $StartDate -EndDate $EndDate

# Count the number of - Spam emails that was sent by (Sent from) a specific E-mail Address

$SENTEventsCount = @($SENTEvents).count

# Verify if the specified Exchange Online user SENT any spam mail

IF (!$SENTEventsCount)

{

}

Else

{

# Define variables that contain the folders name for the dedicated Exchange Online user spam report folder

$A40 = "$A33\$ID1"


# Dynamically create a dedicated folder that will store spam mail report


# <User name>

IF (!(Test-Path -path $A40))

{

New-Item $A40 -type directory | Out-Null

}

# Define the variable for the exported Filename

$File1 = "Spam emails SENT"

# Export information about - SENT Spam emails by specific Exchange Online recipient

$SENTEvents | Export-CSV $A40\"$File1.CSV" –NoTypeInformation -Encoding utf8

}

}

Export Spam Mail Summary | Count (sum) Sent Spam emails | All E-mail Addresses | only if sent item value is Greater than X

In the current scenario, we would like to count spam mail events of “spam mail senders” (spam mail that was sent from a specific E-mail address).

The difference from the former scenarios in which we count the spam mail that was sent by a specific E-mail address is that this time we want to view information only when the number of the sent spam mail items passes a certain threshold.

In our specific example, we define the number “10” as the threshold.

The basic PowerShell command syntax

The basic PowerShell syntax structure that we need to use in this scenario is:

$ReceiveEvents = Get-MailDetailSpamReport -SenderAddress <E-mail address> -

$SENTEvents = Get-MailDetailSpamReport -SenderAddress Angelina@o365info.com   -StartDate $StartDate -EndDate $EndDate

$SENTEventsCount =  @($SENTEvents).count

IF ($SENTEventsCount -lt 10)

{

write-host "The Number of Sent spam emails is: $SENTEventsCount"

write-host “This is less than required number :-( “

}

Else

{

write-host "The Number of Sent spam emails is: $SENTEventsCount"

write-host “This is a dangerous sender !!!!”

}

xxx

# Define variables for start date and End date

$EndDate = Get-Date

$StartDate = $EndDate.Adddays(-30)

$ThresHold   = Read-Host "Type the Number of threshold "

$A20 =  "C:\INFO\Spam mail Reports - $Datef"

$A21 =  "$A20\C. E-mail addreses that Pass a certain spam mail threshold"

$A22 =  "$A21\1.1 RECEIVED spam mail - ThresHold"

$A23 =  "$A21\1.2 SENT spam mail - ThresHold"

#  Create folders Structure that contains the exported information to TXT, CSV and HTML files

#---------------------------------------------------------------------------------------------------

# C:\INFO\Spam mail Reports - <Date>

IF (!(Test-Path -path $A20))

{New-Item $A20 -type directory | Out-Null}

# C. E-mail addresses that Pass a certain spam mail threshold

IF (!(Test-Path -path $A21))

{New-Item $A21 -type directory | Out-Null}

# 1.1 RECEIVED spam mail - ThresHold

IF (!(Test-Path -path $A22))

{New-Item $A22 -type directory | Out-Null}

# 1.2 SENT spam mail - ThresHold

IF (!(Test-Path -path $A23))

{New-Item $A23 -type directory | Out-Null}

$SpamMailLogFileContent  =

for($c=1;$c -lt 1001; $c++)

{

if((Get-MailDetailSpamReport -StartDate $global:StartDate -EndDate $global:EndDate -PageSize 5000 -Page $c).count -gt 0)

{

Get-MailDetailSpamReport -StartDate $global:StartDate -EndDate $global:EndDate -PageSize 5000 -Page $c

}

else

{break;}

}

# Define variables that will store the list of Exchange Online users (mailbox users) + all E-mail addresses that appear in the spam mail log file

# Create a list of unique E-mail address that appear in the spam mail report | Spam Mail Sender (E-mail address that sent spam mail)

$ALLSpamMailSenders       = $SpamMailLogFileContent |  Group-Object -Property SenderAddress     | Sort-Object name -descending | Select-Object name,count

# Define an array (hash) that will store information about spam mail events that fetched from the mail spam mail report

$Results = @()

# Loop via the list of All existing E-mail addresses | locate information about spam mail event for each E-mail address

ForEach ($SpamEvent in $ALLSpamMailSenders)

{

# Specific Unique identity (E-mail address)

$ID1 = $SpamEvent.name

#  Define variable - Spam report for a specified Exchange Online user

# Define a variable that store all spam mail event of E-mail that sent to the specified recipient

$SENTEvents = $LogFileContent | Where-Object {$_.SenderAddress -eq "$ID1"}

# Count the number of - Spam emails that was sent by (Sent from) a specific E-mail Address

$SENTEventsCount =  @($SENTEvents).count

# Verify if the specific E-mail address passes the specified spam mail threshold

IF ($SENTEventsCount-lt $ThresHold)

{

}

Else

{

write-host "The number of spam emails that was sent by : " -nonewline; write-host $ID1 -ForegroundColor Yellow -BackgroundColor blue -nonewline; write-host

write-host "is - " -ForegroundColor white  -nonewline; write-host $SENTEventsCount -ForegroundColor white -BackgroundColor Darkred -nonewline; write-host " spam emails" -ForegroundColor white

# Define that array of -properties, that appears in the spam mail report

$Properties = @{

"E-mail address"  = $ID1

"Spam mail Sent"  = $SENTEventsCount

}

# Define a variable that store the information about each identity

$Results += New-Object psobject -Property $properties

$ResultsExport = $Results | Select-Object "E-mail address","Spam mail Sent"

}

# Define the variable for the exported Filename

$File1 = "Recipients that Send more then $ThresHold spam emails"

# Export information to the following file formats:  TXT + CSV + HTML files

$ResultsExport | Export-CSV $A23\"$File1.CSV" –NoTypeInformation -Encoding utf8

}


Export SPAM mail reports – Office 365

PowerShell menu based script, that will help you to display and export information (to various file formats -TXT, CSV, and HTML) about – spam mail events in an Office 365 based environment. The spam mail report includes – summary spam mail report, which counts the sent and received spam mails for specific recipients or detailed spam mail report, that includes a description of each spam mail event.

The next article in the current article series

Now it’s Your Turn!
It is important for us to know your opinion on this article

The post Using Get-MailDetailSpamReport PowerShell cmdlet | View and export spam mail report | Part 2#3  appeared first on o365info.com.

How to use the spam mail report PowerShell script | Part 3#3

$
0
0
In the current article, we review the PowerShell menu script that I created for exporting and viewing information stored in Exchange Online spam mail log file.

The purpose of the PowerShell script

The current PowerShell script is based on the PowerShell cmdlet –  Get-MailDetailSpamReport

The PowerShell cmdlet – Get-MailDetailSpamReport, (available only in an Exchange Online environment), enables us to view (display on the PowerShell console), and export to file information about “spam mail events.”

The main purpose of the current PowerShell script is, to simplify and optimize the use of this useful PowerShell cmdlet.
The PowerShell script menu options, enable you to export various types of “spam mail reports” using various file type formats (TXT, CSV, and HTML), that will help you to get a deeper understanding of spam mail events in your Office 365 (Exchange Online) environment.

For example:

  • Internal spam – identify and deal with, events in which the spam mail is “generated” by a legitimate organization user\s.
  • Spoof events – identify and deal with, events in which hostile element tries to spoof the identity of a legitimate organization user (send spam mail using his identity).
  • Spam mail attacks – identify and deal with, events in which hostile element targets a specific recipient or recipients by flooding them with spam mail.

The logic and the concepts of the Office 365 spam mail reports PowerShell script

The following PowerShell script is configured to automatically export many different spam mail reports, based on a predefined “search queries” and filters (that will be explained later on).

The purpose of the different type of spam mail reports is, to provide the ability to get insight and draw conclusions, about “spam mail events” that occur in our organization environment.

The concept of “E-mail addresses entities”

The spam mail report relates to the identity of the “entity” that sends spam mail or receives the spam mail, by specifying the E-mail address of this entity.

The “E-mail address” can be classified as the E-mail address of organization recipient, meaning E-mail address that includes our organization domain name suffix or E-mail address of non-organization recipients, meaning any E-mail address that includes a domain name suffix that doesn’t include our organization domain name.

When we use the term “organization E-mail address,” the meaning can be translated into many types of Exchange Online recipients such as – Distribution Group, contact, Public Folder, Shared mailbox, Room mailbox, User mailbox and so on.

Most of the times, our main concern is to analyze information that relates to our organization recipients (E-mail addresses that their suffix includes our organization domain name).

Although that we want to get information about each spam mail event that involved E-mail address of our organization recipients, in many cases, we want to use additional “classification,” in which our main target is to review and investigate spam mail events, that are related to specific types of Exchange Online recipient – Exchange user (the technical term is User Mailbox).

To enable you to get more “closer views” about spam mail events that relate to – Exchange Online users, each type of the spam mail report (summary spam mail report and spam mail events reports), include a dedicated section that “reveal” spam mail events that relate only to E-mail address that “belong” to Exchange Online users.

The PowerShell script will “fetch” from Exchange Online a list of Exchange Online Users and their E-mail addresses, and in the next step, “scan” the Exchange Online spam mail log file, looking for any type of spam mail events that include the “E-mail address” that appears on this list.

Organization E-mail address of non-existing recipients

Many times, when we look at the results of the spam mail reports, we will find information about E-mail address that includes “our domain name suffix” which allegedly “look like” organization E-mail address but in reality, there are no such E-mail addresses!

Most of the times, this phenomenon is realized when hostile elements try to “guess” E-mail addresses of our organization recipients, and try to send mail to “non-existing” recipients (non- existing E-mail addresses).

E-mail addresses entities1

Summary spam mail report Versus spam mail events reports  

The current PowerShell script will generate two types of spam mail reports:

“Summary spam mail report,” and “spam mail events reports.”

These terms are not formal terms, but instead, terms that I use for describing the different type of spam mail reports that are automatically generated by the PowerShell script.

Summary spam mail report

Summary spam mail reports are created by using a manipulation of the data that appears in the “original” Exchange Online spam mail log file. The Summary spam mail report is created by using a formula that counts the spam mail events, that relate to a specific E-mail address in a specific time period (30 days is the default time period used in the current PowerShell script).

The purpose of the “Summary spam mail report” is, to provide a quick insight about the “volume” of spam mail events that are related to a specific E-mail address.

For example, in case that we find in the report that there are many spam mail events that relate to emails that were sent from E-mail address of one of our organization users, this could be a sign to a scenario, in which the user account was comprised, and it used by hostile elements for distributing spam mail using the legitimate identity of the organization recipient.

Spam mail events reports

The report which I described as – “spam mail events reports,” are reports that include a detailed description of each specific “spam mail event.”

For example, a “spam mail event” will include information such as – the E-mail address of the sender, the E-mail address of the recipient, the specific date, the E-mail message subject, the direction (inbound or outbound) and so on.

 Summary spam mail report Versus spam mail events reports

Generate spam mail report automatically using menu 2

The current PowerShell script includes two types of menus:

  • Fully automated menu (menu 2).
  • Generate spam mail report by using as a specific search query

Menu number 2 was created for implementing automation of the following tasks:

  1. Fetch the content of the Exchange Online spam mail log
  2. Automatically generate various types of spam mail reports. Each of these reports will help you to get a different “angle” of the information in the spam mail log.

Spam mail report PowerShell script menu11

When you “hit” the menu option number “2,” the PowerShell script will start an automatic process that includes the following sequence of steps:

1.  Create folder hierarchy

The PowerShell script starts by creating a custom folder hierarchy, that will be used to store the various spam mail reports.

For example, the folder that stores the primary spam mail report will be created in C: drive, using the following folder path: C:\INFO\Spam mail Reports – <Date>

2.  Fetch information from Exchange Online spam mail log file

Next, the PowerShell script connects Exchange Online and fetches all the information that is stored in Exchange Online spam mail log file for a period of 30 days.

The information that was fetched, will be saved in the “Primary spam mail report.”

We can define this spam mail report as-  a “row” data because, the information appears as it is, without any customization or search query that “filter” specific type of data.

3.  Create the various types of spam mail reports.

The “foundation stone” for the various spam mail reports is – the “main spam mail report.”
This primary spam mail report, include all the available information about – every spam event that appears in the Exchange Online spam mail Log file, for the last 30 days period.

The PowerShell script uses the information that is stored in the “Primary spam mail report file” for – creating additional custom spam mail reports. We can relate to the additional spam mail reports, as a derivative of the primary spam mail report.

Spam mail reports structure and hierarchy -01

Spam mail reports structure and folder hierarchy.

The Spam mail reports folder hierarchy is built using a structure that is similar to the concept of Matryoshka doll.

Spam mail reports structure and hierarchy -02

First-level folder hierarchy

In the following diagram, we can see the “first level” of the folder hierarchy that will be automatically created by the spam mail PowerShell script:

Spam mail reports structure and hierarchy -03

A. ALL Spam mail events – Last 30 days

This folder will store the “Primary spam mail report file.”

B. Summary Spam Report – Count (Sum) RECEIVED & SENT spam emails

This folder will store the spam mail reports, which I describe as “Summary Spam Report.”
This term is not a formal technical term, but instead, a term that is used for describing a custom type of spam mail reports that count (sum) the spam events that related to a specific E-mail address.

C. Dedicated Spam Mail Report For Each e-mailed address.

This folder will store the spam mail reports, which I describe as “Dedicated Spam Report.”
The PowerShell script will automatically create a dedicated folder, for each E-mail address that appears in the spam mail report.

Second level folder hierarchy

Each of the “first-level level folders,” include an additional subfolder (Second level folder) that used for storing the spam mail reports, that are based on a specific classification (filtered view) of the “row” spam mail data.

To demonstrate the Second-level folder hierarchy, let’s review the hierarchy of “first level” folder named – “B. Summary Spam Report – Count RECEIVED & SENT spam emails

Inside this folder, we will find the “Second level folder hierarchy” that includes the following two folders:

1.  Exchange Online users

This folder includes a spam mail report that relates only to specific types of E-mail addresses: The E-mail addresses of Exchange Online recipients who describe as “Mailbox user.”
The purpose of this classification is, to enable us to focus on “spam mail events” that relate to our organization users (technically speaking, Exchange Online includes many types of recipients besides the “user recipient”).

2.  All E-mail Addresses

This folder includes a spam mail report, that relates to – ALL the E-mail addresses that appear in the spam mail report.
In this case, the report will not relate to a specific type of E-mail addresses, but instead, relate to each of the E-mail addresses that appear in the spam log (organization recipients E-mail addresses and non-organization E-mail addresses).

Spam mail reports structure and hierarchy -04

Third-level folder hierarchy

This is the “last folder hierarchy.” For example, the “1. Exchange Online users” folder, will include additional two folders:

1.1 Count RECEIVED spam mail

This folder includes a spam mail report that filters the information from the primary spam mail report, by using the following two criteria:

  • Spam mail events that related to the E-mail address of Exchange Online users.
  • Spam mail events which described as – RECEIVED spam mail. The meaning is – spam mail that was sent to (received by) Exchange Online user.

1.2 Count SENT spam mail

This folder includes a spam mail report that filters the information from the primary spam mail report, by using the following two criteria:

  • Spam mail events that related to the E-mail address of Exchange Online users.
  • Spam mail events which described as – SENT spam mail. The meaning is – spam mail that was sent from (sent by) E-mail address of the Exchange Online user.

 Spam mail reports structure and hierarchy -05

Spam mail reports type.

The current PowerShell script is configured to export the various spam mail reports to three different file formats: text file, SCV (Comma Separated Values) file, and HTML file.

Spam mail reports – CSV file format -01

Each file format has his strengths and weaknesses.
For example, the HTML spam mail report is very “friendlily” and easy to read. The “weakness” of the HTML file format is that there is no option for “manipulating” or editing the data.

Regarding the CSV file format, most of the times we use an application such as Microsoft Excel to view and edit the content of the CSV file.

This is an example of the CSV spam mail summary report that was created.

Spam mail reports – CSV file format -02

Quick tip – to optimize the way we view the “data,” we can use the option of – Table view.

  • Select one of the cells that include data (number 1)
  • Select the menu Insert and the submenu – Table (number 2)

Spam mail reports – CSV file format -03

In the following screenshot, we can see that Excel format that data in a “Table style.”

In addition, Excel adds to each column header, a “small arrow,” that enables us to manipulate the data. For example, filter specific values, sort the information and so on.

Spam mail reports – CSV file format -04

The Excel “issue” with long path and file names

In some scenario, when you try to open a CSV file, the following error appears:

Sorry we couldn’t find XYZ file. It is possible it was moved, renamed or deleted? “.
This error is related to Excel “issue” that relates to file that stored in a deep folder hierarchy or have a very long file name.

The solution, in this case, will be to shorten the CSV file name or move the file to “top folder”

Brief review – the two types of spam mail reports

As mentioned, the spam mail reports PowerShell script, will generate two types of reports:

The summary spam mail reports

In the following screenshot, we can see an example of summary spam mail reports.
The information table includes only two columns:

The E-mail address that appears in the spam mail log file + sum of the spam events that are “related” to the specific E-mail address.

In the current example, the report includes information only about the Exchange Online user recipient who received spam mail.

Using this “received spam mail summary report”, could help us to identify a scenario in which hostile element try to “flood” specific Exchange Online user\user, identify who are the organization user who suffers most from spam mail attack and so on.

Exchange Online users - Count RECEIVED spam mail - HTML

The “Dedicated Spam Mail Report”

I use the term “Dedicated Spam Mail Report” to highlight the special way that the current PowerShell script use for generating spam mail reports.

The spam mail reports PowerShell script, is configured to create a list of Exchange Online User E-mail address.
in the next step, the PowerShell script will scan the “primary spam mail report,” looking for information about each of the E-mail addresses in the list (spam events that are related to each of these E-mail addresses).

Given that there were spam mail events that relate to the specific E-mail address, the PowerShell script will automatically create a dedicated folder for each Exchange Online user, that will be named by using the Exchange Online user display name.

In the following screenshot, we can see an example of the results from the “Dedicated Spam Mail Report.” A Dedicated folder will be created for each Exchange Online user who (in this scenario) received spam emails.

Dedicated Spam mail Report -01

The “Dedicated user folder,” will contain the three-spam mail reports using the following file formats – Text, CSV, and HTML.

Dedicated Spam mail Report -02
In the following screenshot, we can see an example of a “Dedicated spam mail report” that includes all the spam mail events that are related to Exchange user named – Angelina.

Dedicated Spam mail Report -03

2.2 – PowerShell script menus | Description

PowerShell script includes the following sections:

Connect to Exchange Online using Remote PowerShell

General information – to be able to manage Exchange Online infrastructure, you must first create a Remote PowerShell session.

Menu 1 – Login to Exchange Online using Remote PowerShell

To create the required Remote PowerShell session, select the menu “1”.
A user credential’s window will appear.
You will need to provide your Office 365 Global Administrator credentials.

SECTION A: Export Various type of spam mail reports

Menu 2 – Export Spam Mail Reports | Last 30 days

This is the main menu option.
To be able to generate all the various spam mail reports that were described in the former sections, all you need to do is just hit the number “2”, and the PowerShell script will do all to work for you.

The spam mail reports will be stored by using the following folder hierarchy:

  1. ALL Spam mail events – Last 30 days
  2. Summary Spam Report – Count RECEIVED & SENT spam emails
  3. Exchange Online users

1.1 Count RECEIVED spam mail

1.2 Count SENT spam mail

  1. All E-mail Addresses

2.1 Count RECEIVED spam mail – ALL E-mail Address

2.2 Count SENT spam mail – ALL E-mail Address

  1. Dedicated Spam Mail Report For Each E-mail Address
  2. Exchange Online users

1.1 – RECEIVED Spam mail report

1.2 – SENT Spam mail report

  1. All E-mail Addresses

2.1 – RECEIVED Spam mail report

2.2 – SENT Spam mail report


SECTION B: Display + Export about spam mail senders or receivers that passes a certain threshold

Menu 3 – Display + Export Spam Mail Reports | E-mail addresses that pass a certain spam mail threshold

The purpose of the following menu is, enable you to locate “E-mail addresses” that involved in spam mail activity that passes a certain threshold.
Based on the specified threshold that you provide, the PowerShell script will scan all the events that appear in the Exchange Online spam mail (using date range of a 30-day period) looking for the following E-mail addresses:

  • E-mail address that RECEIVED number of spam emails, that are equal or higher from the specified threshold value.
  • E-mail address that SENT number of spam emails, that are equal or higher from the specified threshold value.

SECTION C: Spam mail report | Top 10 spam mail Receiver and Senders

Menu 4 – Export Spam Mail Reports | Dedicated spam events report for Top 10 spam mail Receiver and Senders

The purpose of the following menu is, to automatically create a dedicated spam mail events report, for each E-mail address in the spam mail log file, that answers the following criteria:

  • The Top 10 spam mail SENDERS.
  • The Top 10 spam mail RECEIVER.


Export SPAM mail reports – Office 365

PowerShell menu based script, that will help you to display and export information (to various file formats -TXT, CSV, and HTML) about – spam mail events in an Office 365 based environment. The spam mail report includes – summary spam mail report, which counts the sent and received spam mails for specific recipients or detailed spam mail report, that includes a description of each spam mail event.


Now it’s Your Turn!
It is important for us to know your opinion on this article

The post How to use the spam mail report PowerShell script | Part 3#3 appeared first on o365info.com.

Import PST files to Office 365 using Microsoft Azure Storage Explorer tool | 1#2

$
0
0
The current article is the first article in a series of two articles, which describe the process of importing PST files to Office 365 (or if we want to be more accurate Exchange Online mailboxes) by using the “Azure Storage Explorer” graphic utility.

Article series

The current article provides a high-level review description of the components and the concepts that involved throughout the process of importing PST files to Office 365 (Exchange Online mailboxes).

The next article, serve as a step by step guide who includes a detailed description of each step required for implementing the task of importing PST files to Exchange Online mailboxes.

Two methods of importing PST files to Office 365

Technically speaking, there are two methods which we can use to import PST files to Office 365:

Method A – drive shipping

The drive shipping method, is based upon a concept in which we save the required PST files to a hard disk drive, send the hard disk to Microsoft with the required instructions, and Microsoft Office 365 IT will complete the task of importing the required PST files for each of the Exchange Online mailboxes respectively. This “service” is a paid service, and we will not review this option in the current article.

Method B – upload PST file to Office 365 using tools | Self-services

In this option, the task of uploading PST file to Office 365 is implemented by using free Microsoft tools, that enable us to upload the PST files to a Free Azure store.
The Azure store serves as a temporary container for the PST files that we upload to the “cloud,” and in the second phase, we import each of the PST files (by fetching them from the Azure store) to the specific Exchange Online mailboxes respectively. This is the method which we review in the current article.

The Two major phases of importing PST files to Office 365 (Exchange Online)

One of the most confusing things about the process of importing PST files to Office 365 is, that for most of us, it is not clear what we are exactly doing.

The process of importing PST files to Office 365 consists of 2 main steps:

The Two major phases of importing PST files to Office 365 - Exchange Online -01-min

Phase A – Upload the PST files to Azure store

The process of importing a PST file to Exchange Online mailboxes, is not implemented “directly. Instead, the first step is to store the PST file in a free temporary store that can be used by every Office 365 customers. The physical store is hosted by the Azure infrastructure, and I describe this store is “temporary” because, from my experience, the PST files that are uploaded to the Azure store will be kept for a period of 60 days and then will be automatically deleted.

Phase A - Upload the PST files to Azure store -02-min

Phase B – Import to PST files to Exchange Online Mailboxes respectively

Given that we were successfully complete phase 1, in which we upload all the required PST files to Azure store, we can move on to the next phase, in which we “fetch” the PST files stored in the Azure store and “deliver” each of the PST files to his “Home Exchange Online mailbox.”

In other words, import the PST file into a specific Exchange Online mailbox.

Phase B - Import PST files stored in Azure store to Exchange Online Mailboxes respectively -03-min

Another angel who can be used for describing the migration process of PST files to Office 365 is described in the following diagram.

The first phase in which we need to upload our PST files to the Azure store is implemented via the following free Microsoft utilities:

  1. Azure Storage Explorer graphic utility
  2. AzCopy command line utility

After the “upload phase” is successfully completed, we will use the Office 365 Security & compliance admin interface for performing the task of “merging” (importing) each of the PST files to the required Exchange Online mailboxes.

Importing PST files to Office 365 Exchange Online - Two phases and the tools that we use-min

Import PST file step Office 365 | Additional steps that need to be implemented

In the former section, we describe the big picture that includes two main phases that we need to implement for completing the task of importing PST files to Exchange Online mailboxes.

In this section, I would like to briefly highlight the “additional steps” that we need to execute as part of the “main two steps” (copy the PST files to Azure store and import from Azure store the PST files to Exchange Online).

In the following diagram, we can see that there are additional “steps” that we need to implement (painted in yellow) before and after each of the “main two steps”.

Importing PST files to Exchange Online- Additional steps that need to be implemented -04-min

Phase A – Upload the PST files to Azure store

1. Prepare the PST files

In this step, we need to prepare all the PST files that we are going to import to Office 365. In this section, I would like to emphasize the subject of the PST file names. Technically speaking, I don’t think that is a formal information about the PST file naming convention.
But, my recommendation is to use the concept of “KIS- keep it simple.”

Instead of using a complicated PST name with spaces, special characters and so on, the best practice is to try to use PST File names are as simple as possible.

PST file names - KIS - Keep it simple-min

2. Get the URL address of the Azure store

As mentioned, the PST files that we are uploading to the “cloud,” stored in a free Azure store that is allocated to each Office 365 tenant. The access to the dedicated Azure store is implemented by using a URL address, that will be created especially for our Office 365 tenant.

At the first time that we use the process of “PST import,” we will need to use the Office 365 admin interface (Security & compliance portal) for generating the dedicated Azure URL address for our tenant.

This URL address will be the address that we use for each PST file import task. In other words, the Azure store URL address is a permanent address that will be used for all the future PST file migration tasks.

The Azure store URL address defined as – SAS – (Shared Access Signatures).

3. Using the Microsoft Azure Storage Explorer tool for uploading the PST files

The upload process to the Azure store can be implemented by free tools that provided by Microsoft. The available options are – AzCopy command line utility and the Microsoft Azure Storage Explorer utility.

In the current article, we review how to use the “Graphic utility,” the Microsoft Azure Storage Explorer.

Note – In case that you want to get more details about how to use the AzCopy command line utility, you can read more information in the article – Office 365 Import Service – Import PST into Office 365 user mailbox | Part 1#2

Import PST files to Azure Active Directory Store ?- The Two available options -06-min

After we download + install the “Azure Active Directory store” utility, we need to “instruct” the Microsoft Azure Storage Explorer tool, how to connect to our dedicated Azure store (the store that will contain our PST files).

4. Upload the PST files to Azure Active Directory store

The Microsoft Azure Storage Explorer utility will help us to locate the PST file stored in our local desktop (or any other organization host who include the PST files and share the Folder which contains the PST files), and then uploads the PST files to the Azure sore.

Phase B – Import to PST files to Exchange Online Mailboxes respectively

General information – the steps that described in this section, are relevant to the second phase, which is implemented by using the Office 365 Security & compliance Web admin interface. This is the phase in which we fetch the PST files from the Azure store and import the PST files to a specific Exchange Online mailbox.

1. Preparing the CSV file

After we finish uploading the PST files to the Azure store, we will need to create a CSV (Comma Separated Value) file that serves as a “mapping file.”

The CSV file is required by the Import PST file batch for, “understanding” how to associate the specific PST file to a specific Exchange Online mailbox.

The CSV file described as “mapping file” because the purpose of the CSV (as the name imply) is to serve as a logic map, that describes the connection between a specific PST file name to the specific Exchange Online mailbox which will “host” the PST file.

In other words, our responsibility is to know which PST file “belong” to which Exchange Online mailbox and to provide this information by updating the CSV file respectively.

The purpose of the CSV file - Map between the PST file name and the Exchange Online mailbox name-min

2. Create NEW import Job

The creation of the “NEW import Job,” is implemented by using the Office 365 Security & compliance admin interface. This is the part in which we tell Office 365, that we want to “fetch” some PST files from Azure store, and “Merage” these files to specific Exchange Online mailboxes.

3. Validate the CSV file

The Office 365 PST migration batch job will need to check the content of the CSV file and verify that there is not a logical failure in the syntax that we use, the structure of the CSV file, the PST file names and so on. In case that the validation check finds errors, the information about the errors will be displayed.

4. Start the PST import process

The PST import wizard enables us to choose between two options:

  • Option1 – immediately start the PST file import process.
  • Option2 – apply a filter to the information stored in the PST file and only then start the PST file import process. For example, exclude specific folders from the import process of the PST file.

In our example, we will immediately start the PST file import process.

Now it’s Your Turn!
We really want to know what you think about the article

The post Import PST files to Office 365 using Microsoft Azure Storage Explorer tool | 1#2 appeared first on o365info.com.

Import PST files to Office 365 using Microsoft Azure Storage Explorer tool | 2#2

$
0
0
This current article is the second article in a series of two articles. In the former article, we review in high level the components and the concepts that involved throughout the process of importing PST files to Exchange Online mailboxes.The current article, serve as a step by step guide which includes a detailed description of each step that is required for implementing the task of importing PST files to Exchange Online mailboxes.

Phase A – Upload the PST files to Azure store

In the following section, we review the “step by step” process of the scenario in which we want to import 2 PST files to a specific Exchange Online mailbox of a user named – Bob.

1. Prepare the PST files

Technically speaking, we can store the organization users PST file on every host whom we would like as long as the Microsoft Azure Storage Explorer utility, will be able to access this host.

If we store the PST files on a specific Network server, we need to share the folder which contains the PST files.

Regarding the folder name who stores the PST file and regarding the PST file names, I recommended using a simple naming convention. The purpose is to prevent in advance any “import issues,” that related to a problematic PST file name.

In our example, I create a folder named PSTimport on drive C:, and copy all the PST files to the specified folder.

Login to Office 365 security and compliance portal -01-min

2. Get the URL address of the Azure store (SAS)

Before we can start to run the PST file import job, we need to get the URL address of the Azure store which will “host” the PST files that we will upload to the cloud.

To be to get the required URL address value, we will start a NEW PST file import job, only for getting the value of the SAS URL address (we will not complete this specific PST import job).

After we get the required SAS URL value, and later, we will use this address as part of the configuration settings that we need to set when using the Azure Storage Explorer utility.
1. Login to Office 365 security and compliance portal

We can access the Office 365 Security & Compliance portal by using the URL address (https://protection.office.com/#/homepage ) or, from the Office 365 admin portal.

  • On the main page of the Office 365 admin portal, select the menu Admin centers
  • Select the sub menu – Security & Compliance

Login to Office 365 security and compliance portal -02-min

  • On the left menu bar, select the menu – Data governance

Login to Office 365 security and compliance portal -03-min

In the next step, we will start the import PST wizard, just for getting the value of the SAS URL address.

  • Under the Data governance menu, select the submenu – Import
  • Click on the + New import job button

Get the URL address of the Azure store -SAS --01-min

  • Type a name for the NEW import PST job.
  • Click Next

Quick reminder, keep it simple, select a simple name without capital letters, spaces, special characters and so on.

Get the URL address of the Azure store -SAS --02-min

The default option is – Upload your data

  • Click Next

Get the URL address of the Azure store -SAS --03-min

Under section “2” (Copy the SAS URL for network upload. You’ll use this in the Dest parameter), click on the link named – Show network upload SAS URL

Get the URL address of the Azure store -SAS --04-min

After a couple of seconds, the SAS URL address is generated.

  • Copy the SAS URL address by clicking on the button – Copy to clipboard

Get the URL address of the Azure store -SAS --05-min

My advice is to save the value of the SAS URL in a file so, in the future, we will be able to easily get this value.

Get the URL address of the Azure store -SAS --06-min

3. Using the Microsoft Azure Storage Explorer tool for uploading the PST files

In this step, we need to complete two tasks:

  • Task 1 – download + install the “Azure Storage Explorer” utility.
  • Task 2 – set the address of our “Azure Active Directory store” that defined as “Storage Accounts.”

Task 1 – Download + install the “Azure Storage Explorer” utility.

Download and install the Microsoft Azure Storage Explorer tool.

Azure Storage Explorer -a

To locate the Microsoft Azure Storage Explorer tool, you can use the search menu,
Typing “azure s

Azure Storage Explorer -b

Task 2 – set the address of the “Azure Active Directory store” (Storage Accounts)

In this step, we will need to use the value of the SAS URL that we got in the former step.

  • Right-click on the Storage Accounts
  • Select the menu option Connect to Azure storage…

Azure Storage Explorer – configure the Azure store SAS URL address --01-min

  • Select the option named – Use a connection string or shared access signature URI

Azure Storage Explorer – configure the Azure store SAS URL address --02-min

In the text box (URI) past the value of the SAS URL that you got in the former step

Azure Storage Explorer – configure the Azure store SAS URL address --03-min

To start the process in which the “Azure Active Directory store” utility connects our Azure dedicated store, click – Connect

Azure Storage Explorer – configure the Azure store SAS URL address --04-min

In the following screenshot, we can see that the “Azure Active Directory store” utility successfully manages to connect to my Azure dedicated store.

The “Azure Storage Explorer” utility will help us to upload the required PST files to the Azure store + serve as a “viewer” that enables us to view the content of our Azure store.

Azure Storage Explorer – configure the Azure store SAS URL address --05-min

4. Upload the PST files to Azure Active Directory store

In this section, we review how to upload the PST files to Azure store

  • Select the Upload menu
  • Select the sub menu – Upload Files…

Import the PST files using Azure Storage Explorer -07-min

  • In the section –Files, click on the three dots icon

Import the PST files using Azure Storage Explorer -08-min

  • Navigate to the folder which contains the PST files

Import the PST files using Azure Storage Explorer -09-min

  • Click open

Import the PST files using Azure Storage Explorer -10-min

  • Click upload

In the following screenshot, we can see the PST files that were uploaded to the Azure store.

Import the PST files using Azure Storage Explorer -11-min

Phase B – Import to PST files to Exchange Online Mailboxes respectively

In this phase, we assume that you already finish uploading all the required PST files to Azure store.

Now, we are going to create a new PST import job, using the Office 365 Security & Compliance admin.

The New import job includes the following steps:

  1. Upload the CSV file – the import PST job will use the CSV file that we provide as a “map file.” The CSV file includes information about the PST files that we uploaded to the Azure store + the name of the Exchange Online mailboxes. The PST import job will “pull” each of the PST files that mentioned in the CSV file, and import this PST files to a specific Exchange Online mailbox.
  2. Verify the content of the CSV file – the import PST job will scan the content of the CSV file, and verify that the information structure of the CSV file is “legal” and created using the “right syntax.”
  3. Import the PST files from the Azure store to the appropriate Exchange Online mailbox.

1. Preparing the CSV file

In the following screenshot, we can see an example to a CSV file that we use for “instructing” the Office 365 import PST job about the specific PST files that we want to import to a specific Exchange Online mailbox.

Generally speaking, the CSV file can include a couple of “column headers” that we can use for various scenarios.

Note – you can read more information about the various CSV options in the article – Use network upload to import your organization’s PST files to Office 365

In our scenario, I would like to emphasize only the most important columns.
1. Workload (mandatory value)
The “Exchange” value, is the default value for a scenario in which we import PST files to Exchange Online mailbox. In other words, add this value for each row and don’t “mess” with this value.
2. Name (mandatory value)
This is the name of the PST file that the Office 365 PST import job except to find in our Azure store (the PST files that were uploaded in the former steps).
3. Mailbox (mandatory value)
This is the name of the Exchange Online mailbox for which the PST file will be imported.
4. TargetRootFolder
This is the name of the folder that will be created in the “destination Exchange Online mailbox,” which will contain the imported PST file (mail items).

In case that we don’t provide any name, the Office 365 PST import batch will automatically create a folder named – “Imported” in the destination Exchange Online mailbox, which will store the content of the PST file.

In our scenario, Office 365 PST import batch will execute the following sequence of tasks:

  • A PST file named pst will be imported to the Exchange Online mailbox of a recipient named – Bob@o365info.com. Because we didn’t provide any folder name, the PST file will be imported into the default folder that will be created – the – “Imported” folder.
  • A PST file named pst will be imported to the Exchange Online mailbox of a recipient named – Bob@o365info.com. Because we provide a folder name (PST_import-Test), the Office 365 PST import batch will create this folder that will store the content of the imported PST file.

Preparer the CSV file -01-min

Note – you can download a sample CSV file from the following link

2. Create NEW import Job

In this step, we use the Office 365 security & compliance admin interface for creating a NEW import PST batch, that will import the PST files located in the Azure store to Exchange Online mailboxes based on the “instructions” in the CSV file.

  • Office 365 Security & Compliance admin interface, select the menu Data governance
  • Select the sub menu – Import
  • Click on the blow button named + New import job

Create NEW import Job -01-min

  • In the Name* text box provide the batch name (quick reminder, keep the name simple, no special characters, etc.).

Create NEW import Job -02-min

The default option is – Upload your data

  • Click Next

Create NEW import Job -03-min
Check the two option boxes

  • I’m done uploading my files
  • I have access to the mapping file

Create NEW import Job -04-min

  • Click on the blow button named “+ Select mapping file

Create NEW import Job -05-min

Locate the required CSV file that was created in the former step.

Just a quick reminder, the CSV file will need to be prepared by you and contain the list of PST files that were already uploaded to the Azure store + the name of the Exchange Online mailboxes which will “host” a specific PST file from the list.

  • Select the appropriate CSV file and click Open

Create NEW import Job -06-min

3. Validate the CSV file

In this step, the Office 365 import PST batch will need to verify if the CSV file syntax and structure are valid.

  • Select the option – Validate

Validate the CSV file -07-min

In the following screenshot, we can see that the Office 365 import PST batch “inform” us that the CSV file is proper and valid.

  • Click Save

Validate the CSV file -08-min

The last wizard window informs us that the “import request” was successfully “registered.” Notice that at the current time, the PST import process will not start!

  • Click Close

Create NEW import Job -09-min

  • Click Close

Create NEW import Job -10-min

4. Start the PST import process.

In this step, we actually start the PST import process.

In the following screenshot, we can see that the status of our batch is “Analysis in progress.

Office 365 import PST batch, will need to verify if he can locate the PST file in the Azure store and perform additional background checks.

Start the PST file import process-01-min

After the Analysis process was completed, the status of the PST import batch appears as “Analysis completed

Start the PST file import process-02-min

  • Select the PST import batch
  • Click on the blow button – Import to Office 365

Start the PST file import process-03-min

  • Select the option – No, I want to import everything

Quick reminder, in our scenario we don’t want to filter folders from the PST file\s.

Start the PST file import process-04-min

  • Click on the blow button – Import data

Start the PST file import process-05-min

  • Click – close

Start the PST file import process-06-min

In the following screenshot, we can see that the PST import batch status is “In progress

Start the PST file import process-07-min

After the PST import batch completed, the status is “Success

Start the PST file import process-08-min

Verify that the import PST file to Exchange Online mailbox was successfully completed.

In this section, we want to verify that the “PST import batch” manage to successfully import the two PST files to Bob’s mailbox.

In the following screenshot, we can see Bob’s mailbox.

Verify that the PST import was successfully completed -01-min

The mailbox includes two “NEW” folders:

1. Imported folder
As mentioned, the “PST import batch” is configured to automatically create this folder in the Exchange Online mailbox. The import folder will serve as a container for all the PST files that we import to the specific Exchange Online mailbox.

2. PST_import-TEST
This is a folder that also created by the “PST import batch.” However, this time, the folder name was defined within the CSV file that we use as instructions for the “PST import batch.”

In the following screenshot, we can see the content of the imported folder. We can see that the PST file that includes mail folders, and mail items were successfully imported.

Verify that the PST import was successfully completed -03-min

Now it’s Your Turn!
We really want to know what you think about the article

The post Import PST files to Office 365 using Microsoft Azure Storage Explorer tool | 2#2 appeared first on o365info.com.


Restoring Exchange Online mailbox content to another mailbox using PowerShell command New-MailboxRestoreRequest | Part 22#23

$
0
0
The current article we review the second solution that we can use for – dealing with a common Exchange Online mailbox restore mistake that occurs in Office 365 Directory synchronization environment or Exchange Hybrid environment.

Restore Exchange mailbox | Article Series table of content | Click to expand

Restore Exchange Online deleted mailbox | Article Series

Exchange Online mailbox restore | Articles series table of content
Introduction to the subject of Exchange and deleted mailboxes
01 Restore deleted Exchange Online mailbox in Office 365 environment | Prefix | Part 01#23
02 Directory Object Deletion and the restore “domino effect + little bit about the concept of the Active Directory Recycle bin | Part 2#23
03 What are the possible causes for an Exchange Online mailbox deletion? | Part 3#23
04 What are the possible options for recovering Exchange Online mailbox? | Part 4#23
05 The Index of the different Exchange Online mailbox restores methods| Part 5#23
Restoring Exchange Online mailbox – cloud only environment
06 Restore Exchange Online Room mailbox | Cloud only (Fully Hosted) environment | Part 6#23
07 Restore Exchange Online Shared mailbox | Cloud only (Fully Hosted) environment | Part 7#23
08 Restore Exchange Online user mailbox | Cloud only (Fully Hosted) environment | Article 1#3 | Part 8#23
09 Restore Exchange Online user mailbox | Cloud only (Fully Hosted) environment | Article 2#3 | Part 9#23
10 Restore Exchange Online user mailbox | Cloud only (Fully Hosted) environment | Article 3#3 | Part 10#23
Restoring Exchange Online mailbox in Directory synchronization environment
11 The special characters of Directory synchronization in an Office 365 environment | Article 1#2 | Part 11#23
12 The special characters of Directory synchronization in an Office 365 environment | Article 2#2 | Part 12#23
Restoring user account – On-Premise Active Directory environment
13 Deleted Active Directory User account and the Deleted object store | Basic introduction | Article 1#4 | Part 13#23
14 How to restore Active Directory deleted user account (Active Directory recycle bin is not enabled) using LDP.EXE | Article 2#4 | Part 14#23
15 How to restore Active Directory deleted user account (Active Directory recycle bin is not enabled) using AdRestore, AdRestore.net and LEX – the LDAP explorer | Article 3#4 | Part 15#23
16 How to restore Active Directory deleted user account by using Active Directory recycle bin | Article 4#4 | Part 16#23
Restoring Exchange Online mailbox in Directory synchronization environment
17 Restore Exchange Online USER mailbox | Directory synchronization environment | The “right way” | Part 17#23
18 Prefix – the “Problematic” Exchange Online mailbox restores scenarios in Directory synchronization environment | Part 18#23
19 Reviewing the characters of Exchange Online mailbox recovery mistake – New On-Premise Active Directory User Account was created | Part 19#23
20 Reviewing the characters of Exchange Online mailbox recovery mistake – Soft Deleted Office 365 was restored | Part 20#23
21 Solving an Exchange Online mailbox restore mistake by Restoring the original Soft Deleted Active Directory user | Part 21#23
22 Restoring Exchange Online mailbox content to another mailbox using PowerShell command New-MailboxRestoreRequest | Part 22#23
23 Solving an Exchange Online mailbox restore mistake Office 365 user was restored – removing the ImmutableID value | Part 23#23

In our scenario Exchange, Online mailbox deleted because of the event in which an On-Premise Active Directory user account deleted.

  • The On-Premise Active Directory user “bound” to his Office 365 user account “replica.”
  • The Office 365 user account had Exchange Online license and Exchange Online mailbox assigned to him.

The common restores mistake is that – instead of restoring the original On-Premise Active Directory user account that deleted, a NEW On-Premise Active Directory user account with seemingly identical details as the deleted user account created, and the information is synchronized to the Office 365 Directory.

The proposed solution is – recovering the content of the Soft Deleted Exchange Online mailbox to the NEW Exchange Online mailbox that created.

This process implemented by using a very useful PowerShell command named –
New-MailboxRestoreRequest, that designed to “Transport” data (mailbox mail items) from a specific Exchange Online mailbox to another Exchange Online mailbox.

Note – in the former article, we review another type of solution that can be used for dealing with the Exchange Online mailbox restore mistake in which a NEW Active Directory user created.

The characters of Exchange Online restore mistake – creating a NEW Active Directory user account – Scenario description

To be able to understand better,

  1. What are the characters of the “Wrong Exchange Online Mailbox Recovery Operation” in which a NEW Active Directory user account created?
  2. What are the results of this “Wrong Exchange Online Mailbox Recovery Operation?”
  3. What is the offered solution that we will implement in dealing with the “Wrong Exchange Online Mailbox Recovery Operation?”

Let’s use the following scenario:

Organization mail infrastructure

  • An organization uses Office 365 services, and Exchange Online as his mail infrastructure.

Directory infrastructure

  • Directory management is implemented via the On-Premise Active Directory, and Directory synchronization server (Azure AD Connect).
  • The Directory synchronization server is responsible for synchronizing information from the local On-Premise Active Directory to the Office 365 Directory (Azure Active Directory).

The deletion event

  1. On-Premise Active Directory user account named James deleted (number 1).
  2. The information about the “On-Premise Active Directory user deletion,” synchronized by the Directory synchronization server (Azure AD Connect) to the Office 365 Directory (Azure Active Directory) (number 2).
  3. The result is that the James Office 365 user account that “bound” to the James deleted On-Premise Active Directory user account,” also deleted (number 3).
  4. When James Office 365 user account deleted, the Exchange Online license that assigned to James Office 365 user account, removed (deleted) (number 3).
  5. Azure Active Directory synchronizes the information to the Exchange Online infrastructure.
  6. When Exchange Online gets the information about the fact that the James Exchange Online license removed, Exchange Online deletes the James Exchange Online mailbox (number 4).

Active Directory user deletion -flow of the events in Directory synchronization-01

The restore request

The Administrator, got a request to – recover James Exchange Online deleted mailbox, and enable James to access his restored Exchange Online mailbox.

The “right” process of recovering Exchange Online in Directory synchronization environment

The “right” restore process supposed to start with – recovering James Soft Deleted On-Premise Active Directory user account, and the rest of the Exchange Online mailbox recovery steps were supposed to “roll along” automatically.

Note – you can read more information about the “right procedure” of recovering Exchange Online in Directory synchronization environment in the article –
The special characters of Directory synchronization in an Office 365 environment | Article 2#2 | Part 12#23

The main characters of the Exchange Online restore mailbox mistake

The Exchange Online mailbox recovery mistake

The Administrator who responsible for performing the task of – restoring James Exchange Online mailbox restore, thought that the solution would implement in the following way:

  • Creating a NEW On-Premise Active Directory user account, with seemingly identical details as the “deleted James’s user account” (the same login name and the same E-mail address).
  • Activating the Directory synchronization process, and synchronize the information about the “recovered” James On-Premise Active Directory user account to – Office 365 Directory (Azure Active Directory).

The Problem -New On-Premise Active Directory User was created -02

The Administrator underlying assumption was, that when the Directory synchronization process runs, the mechanism of Soft Match will be automatically executed.

The Directory Synchronization Soft Match mechanism which supposed to “bind together” the NEW James On-Premise Active Directory user account, with the Azure Active Directory – Soft Deleted James’s user account, because they have the same user login name and the same E-mail address).

The “binding process” will lead to:

  • The automatic restore process of the Office 365 Soft Deleted James’s user account.
  • The automatic process of restoring the Exchange Online license that assigned to the Office 365 user account.
  • The automatic restore process of – James Soft Deleted Exchange Online mailbox.

When the Administrator Login to the Office 365 management portal, he sees that the James Office 365 user account “restored” (the Office 365 user account seemingly restored, the truth is that the Office 365 account that the Administrator sees is a NEW Office 365 user account), and notice that “for some reason,” the Exchange Online license that assigned to James Office 365 user account, was not restored.

To fix this “license issue,” the Administrator assigns the required Exchange Online license to James Office 365 user accounts.

Note that the real reason that the Office 365 license not being assigned is, that in this scenario, the original Office 365 not restored, and instead, a NEW Office 365 user account created! (Exchange Online license in not assigned automatically to NEW Office 365 users).

The result

The Directory Synchronization Soft match did not occur.

The process of the Directory Synchronization Soft match will not occur!

The Directory synchronization will not “bind” the NEW James Active Directory user to the Soft Deleted James Office 365 user account because the Soft Deleted Office 365 user account ImmutableID value already populated with some value (the value of the original James deleted Active Directory user).

The NEW James Active Directory user account has a NEW GUID (Globally Unique Identifier) value that is different from the Soft Deleted Office 365 user account ImmutableID value.

For this reason, Directory synchronization, cannot execute the expected “binding” (Soft Match) between the two user accounts and instead, create NEW Office 365 user account, that will be “bind” to the – NEW On-Premise Active Directory James user account.

Two “sets” of user account and Exchange Online mailboxes

The outcome is a “mess.”

Instead of the expected result, the “real result” is that now, we will have “two sets” of user accounts and two sets of Exchange Online mailboxes.

The outcome- New On-Premise Active Directory User was created -03

Set A – The NEW objects

  • The creation of a NEW On-Premise Active Directory user account, will lead to a scenario, in which a NEW Office 365 user account will be created.
  • When Exchange Online license is assigned to the NEW Office 365 user account, a NEW empty Exchange Online mailbox will be created.

The result is:

  • A NEW Active Directory user account.
  • A NEW Office 365 user account.
  • A NEW Exchange Online mailbox.

Set B – The “former” Soft Deleted objects

The addition “layer” of objects, is the layer of the Soft Deleted objects, that will continue to exist in the various recycle bins:

  • The original James Soft Deleted Active Directory user will continue to be stored in the Active Directory recycle bin.
  • The Soft Deleted James Office 365 user account that “bound” to the Active Directory user, will continue to be stored in the Azure Active Directory recycle bin.
  • Soft Deleted James Exchange Online mailbox will continue to be stored in the Exchange Online recycle bin.
Note – in an Office 365 based environment, the Soft Deleted user account, and the Soft Deleted Exchange Online mailbox will be kept in the Office 365 recycle bin for a period of 30 days.
At the end of this period, the Soft Deleted object will be will be permanently deleted.

New On-Premise Active Directory User Account was created and synchronized to the cloud -04

The outcome

The NEW James On-Premise Active Directory user can access his Exchange Online mailbox, but he reports that the Exchange Online mailbox restore failed because the mailbox is empty!

Notice that the Exchange Online mailbox data that supposed to “appear,” is stored in the Soft Deleted Exchange Online mailbox (that is in the Exchange Online recycle bin).

The Problem -New On-Premise Active Directory User was created -01

Description of the proposed solution – importing the content of the Soft Deleted mailbox to – the NEW empty mailbox using the PowerShell command New-MailboxRestoreRequest.

The Solution

The offered solution is implemented by importing the content of the James Soft Deleted mailbox to – James NEW empty Exchange mailbox, using the PowerShell command
New-MailboxRestoreRequest.

Copy the content of the Soft Deleted Exchange Online mailbox -New-MailboxRestoreRequest-02

The PowerShell command – New-MailboxRestoreRequest, created for enabling Exchange Online Administrator, to “Ship” mailbox content from a “source Exchange Online mailbox” to a “destination Exchange Online mailbox.”

In this type of solution, we don’t try to “revert” the Exchange Online restores mistake, but instead, we will use the existing NEW set of users (On-Premise Active Directory and Office 365), and the NEW Exchange Online mailbox that created.

Copy and Paste Exchange Online mailbox content-03

In our scenario, we have two Exchange Online mailboxes: the original Exchange Online mailbox that considers as Soft Deleted mailbox and the NEW empty Exchange Online mailbox that created.

In the following diagram, we can see the description of all the components that involved throughout the process.

Import the content- Soft Deleted Exchange mailbox -Empty Exchange mailbox-04

General Note
Another possible solution that can be implemented (“Revert the restore mistake.”) described in the article- Solving an Exchange Online mailbox restore mistake by Restoring the original Soft Deleted Active Directory user | Part 21#23The other solution - Revert the restore mistake-05

The Challenge
To be able to “copy and paste” the mailbox content, we will need to address the required Exchange Online mailboxes. Most of the time, we address Exchange Online mailbox by using standard identifiers such as – the mailbox Alias or the mailbox E-mail address.

In our scenario, we will not be able to reference the “source Exchange Online mailbox” or the “detonation Exchange Online” by using a standard “identifier” such as the Alias name. The reason is that because, the Soft Deleted Exchange Online mailbox and the NEW empty Exchange Online mailbox that created, have the same Alias name and the same E-mail address.

To be able to bypass this obstacle, and to address the required Exchange Online mailboxes, we will use the GUID value as an identifier (the GUID value is a unique identifier).

  1. In step one, we will use a PowerShell command that will “reveal” the GUID value of each of the involved Exchange Online mailboxes.
  2. In the next phase, we will address the Exchange Online mailbox by using the GUID value as the “identity value.”

How to use the right identity unique identity of each of the mailboxes-06

Implementing the solution of – importing the content of the Soft Deleted mailbox to – the NEW empty mailbox using the PowerShell command New-MailboxRestoreRequest.

In the following sections, we will demonstrate a scenario that includes the following parts:

  • Step 1#3 – Simulating the event in which On-Premise Active Directory user account is deleted.
  • Step 2#3 – Simulating the Exchange Online mailbox restore mistake.
  • Step 3#3 – Fixing the Exchange Online mailbox restore mistake – importing Soft Deleted mailbox content to the NEW empty mailbox using New-MailboxRestoreRequest

Before we start, let’s look at the James Exchange Online mailbox.

We can see that James got an E-mail message from Brad and that the E-mail message subject is – “This is an E-mail message from Brad before the mailbox deleted.”

In the last step in which we “merge” the data from the Exchange Online Soft Deleted to the NEW Exchange Online mailbox; I will show you how the “old content” merged with the NEW Exchange Online mailbox content (in the next section 2#3, the James Exchange Online mailbox will be deleted).

Original user mailbox content before the deletion -01

Step 1#3 – Simulating the event in which On-Premise Active Directory user account is deleted.

In our example, we will simulate the scenario, by deleting the James On-Premise Active Directory user account.

Simulating the event in which the original Active Directory user account is deleted -01

  • The information about the “On-Premise Active Directory user deletion,” synchronized by the Directory synchronization server (Azure AD Connect) to the Office 365 Directory (Azure Active Directory).
  • The result is, that the James Office 365 user account that was “bound” to the deleted On-Premise Active Directory user account” is also deleted.
  • When the Office 365 user account was deleted, the Exchange Online license that was assigned to James Office 365 user account, was removed (deleted).

Office 365 | Exchange Online infrastructure | Exchange Online Admin Center

  • Azure Active Directory synchronizes the information to the Exchange Online infrastructure.
  • When Exchange Online gets the information about the fact that the Exchange Online license was removed, James Exchange Online mailbox that was associated with Office 365 user account deleted.

To be able to view the Soft Deleted James Exchange Online mailbox, we will use Exchange Online admin center.

Exchange Online, provides a graphic interface for viewing the content of the Exchange Online recycle bin – recipient => mailboxes => three dots => Deleted mailboxes.

View the Soft Deleted Exchange Online mailbox -01

In the following screenshot, we can see the content of the Exchange Online recycle bin.
We can see that the Exchange Online recycle bin includes James Soft Deleted mailbox.

View the Soft Deleted Exchange Online mailbox -02

Step 2#3 – Simulating the Exchange Online mailbox restore mistake

In this section, we will simulate the Exchange Online “recovery mistakes,” in which a NEW Active Directory user account was created.

The “right restore action” was supposed to be – restoring the On-Premise Active Directory Soft Deleted Jame’s user account.

Note – you can read more information about the “right procedure” of recovering Exchange Online mailbox in Directory synchronization environment in the article – Restore Exchange Online USER mailbox | Directory synchronization environment | The “right way” | Part 17#23

On-Premise | Active Directory

The Administrator, create a NEW On-Premise Active Directory user account for James, that is seemingly identical to the James user account that was deleted.

The NEW James On-Premise Active Directory user account configured with the same login name and the same E-mail as the “former James user account” (the Soft Deleted Active Directory user account).

Simulating the event in which a NEW Active Directory user account is created -01

In our example, I use the user account description field, to emphasize the fact that the particular user account is a NEW account.

Simulating the event in which a NEW Active Directory user account is created -02

Office 365 | Azure Active Directory | Office 365 Admin center interface

In this step, we want to view the information about the “Office 365 user account” that was supposed to be “restored,” after the Directory synchronization process completed.

When looking at the active user list in the Office 365 admin center portal, we can see that a James Office 365 user account “appears.”

Note – notice that this is not the restored James user account, but instead, a NEW Office 365 user account that was created!

When we look at the James Office 365 account properties, we can notice two important parameters:

  • In the Sync Type column, we can see that the user account defined as “Synced with Active Directory” (number 1). The meaning is, that the James Office 365 user account, is “bound” to On-Premise Active Directory user account.
  • In the Status column (number 2), we can see that the Office 365 user account doesn’t have a license. This is a “clue” to the fact, that the James Office 365 user account is not the “original user account” because, the original James Office 365 user had an Exchange Online license.

The NEW Office 365 user account that was created – 01

In our example, the Administrator notices that the James Office 365 account, doesn’t have Office 365 licenses,. To be able to “activate” the Office 365 user accounts, he assigns the required Exchange Online license to James Office 365 account.

The NEW Office 365 user account that was created – 02

Exchange Online | The NEW empty Exchange Online mailbox

As mentioned, the James Office 365 user account didn’t have Exchange Online license.
When the Administrator assigns Exchange Online license to the NEW James Office 365 user account, a NEW empty Exchange Online mailbox was created.

View the content of the NEW empty Exchange Online mailbox -01

In our scenario, James connects to his Exchange Online mailbox and starts to send and
receive E-mail messages.

In the following screenshot, we can see that James got an E-mail message from Angelina.

Notice the James mailbox include the “NEW mail” that sent by Angelina but the original Exchange Online mailbox content doesn’t appear!

The Exchange Online mailbox that we “see” is not the original Exchange Online mailbox that was associated with the Soft Deleted Jame’s user account but instead of a NEW empty Exchange Online mailbox.

Later, when we finish the process of merging the data from the “old Soft Deleted Exchange Online mailbox” to the NEW empty Exchange Online mailbox, it will help me to “proof” that the old mail items merged with the NEW mail items.

View the content of the NEW empty Exchange Online mailbox -02

Step 3#3 – fixing the Exchange Online mailbox restore mistake – importing Soft Deleted mailbox content to the NEW empty mailbox using New-MailboxRestoreRequest

In this step, we will use the Exchange Online PowerShell command-
New-MailboxRestoreRequest, for importing (copy) the data that is stored in James Exchange Online Soft Deleted and “paste” the mailbox content to the NEW James Exchange Online mailbox.

PowerShell command syntax that we need to use is:

New-MailboxRestoreRequest -SourceMailbox <Soft Deleted Exchange Online mailbox> -TargetMailbox <Existing Exchange Online mailbox> -AllowLegacyDNMismatch

In our example, we will use New-MailboxRestoreRequest PowerShell command by addressing the James@o365info.com Exchange mailbox.

Notice the “issue” that we need to deal with –

  • The identifier that we use for addressing the source Exchange Online Soft Deleted mailbox is James@o365info.com
  • The identifier that we use for addressing the destination NEW empty Exchange Online mailbox is James@o365info.com
New-MailboxRestoreRequest -SourceMailbox James@o365info.com -TargetMailbox James@o365info.com -AllowLegacyDNMismatch
Using the PowerShell command New-MailboxRestoreRequest – the problem -03

The result is the following error:

The operation couldn’t be performed because ‘james@o365info.com’ matches multiple entries.

Our challenge is – how to differentiate between the two different Exchange Online mailboxes? Both of Soft Deleted Exchange Online mailboxes “identities” is represented by the E-mail address James@o365info.com.

The problem – how to uniquely identify the specific Exchange mailbox

The solution is, to address each of the Exchange Online mailbox by using a
Unique identifier – the GUID (Globally Unique Identifier) value.

We will need to get the GUID value of:

  1. The source Exchange Online mailbox meaning, the Soft Deleted James’s
  2. The Destination James Exchange Online mailbox (the NEW empty Exchange Online mailbox).

The Solution - Referencing the specific Exchange Online mailbox using the GUID value-02

1#2 – Getting the GUID value of the source Exchange Online mailbox

In the following example, we demonstrate how to get the GUID value of the Soft Deleted Exchange Online mailbox

We will use the following PowerShell command:

Get-Mailbox -SoftDeletedMailbox James | FL Alias,ExchangeGuid

Notice that we ask from Exchange Online, to “fetch” the information about the Exchange Online from the Exchange Online recycle bin, by using the parameter – SoftDeletedMailbox

Using the PowerShell command New-MailboxRestoreRequest – the solution -01

  • In our example, the GUID value of the source Exchange Online mailbox is –
    4f664109-65b8-4958-89c7-cf9f01f29c31

2#2 – Getting the GUID value of the destination Exchange Online mailbox

We will use the following PowerShell command:

Get-Mailbox James | FL Alias,ExchangeGuid

Notice that this time, we ask from Exchange Online, to “fetch information” about “active” Exchange Online mailbox of a user named – James.

Using the PowerShell command New-MailboxRestoreRequest – the solution -03

  • In our example, the GUID value of the destination Exchange Online mailbox is –
    4357604d-341a-4f99-bfbd-9b04edef8273

Running the New-MailboxRestoreRequest PowerShell command.

Now, we can complete the last step, in which we execute the New-MailboxRestoreRequest PowerShell command, that will restore all the mailbox content that is included in a James Soft Deleted mailbox, to the NEW empty James Exchange Online mailbox that was created.

The PowerShell command that we use in our examples is-

New-MailboxRestoreRequest -SourceMailbox 4f664109-65b8-4958-89c7-cf9f01f29c31 -TargetMailbox 4357604d-341a-4f99-bfbd-9b04edef8273 -AllowLegacyDNMismatch

Using the PowerShell command New-MailboxRestoreRequest – the solution -04

In the following screenshot, we can see the results.

Notice the interesting thing, the NEW James Exchange Online mailbox, include already some mail items, such as the E-mail that was sent by Angelina.

The New-MailboxRestoreRequest PowerShell command didn’t run over the existing mail items, but instead, “merge” the mail items from the source Exchange Online mailbox with the existing mail items in the destination Exchange Online mailbox.

The NEW Exchange Online mailbox include the resorted E-mails from the Soft Deleted Exchange

Restore Exchange Online mailbox | Article series index

Now it’s Your Turn!
It is important for us to know your opinion on this article

The post Restoring Exchange Online mailbox content to another mailbox using PowerShell command New-MailboxRestoreRequest | Part 22#23 appeared first on o365info.com.

Import PST file that was exported by Office 365 Content Search to Outlook | View “Recoverable items” folder | 3#3

$
0
0
In this article, we review the process of importing a PST file to an Outlook mail profile + how to review the information that is stored in the “Recoverable items” folder.

Quick reminder, in the former article, we review the process of using Office 365 Content Search tool for – exporting the content of Exchange Online mailbox (Angelina mailbox) to a PST file.

Now, our wish is to browse through the content of the Angelina mailbox “Recoverable items” folder, trying to locate mail items that may have been deleted.

And If we found such mail items, recover these mail items by sending a copy of these mail items to Angelina.

Office 365 Content Search | The exported file

In the former article, we review the process of exporting the Office 365 Content Search results to a PST file that was saved on the Desktop.

Exported information - Office 365 security & Compliance – export PST -01-min

Looking at the content of the folder that was created, we can see that there are a couple of files beside the request PST file.

We will not get into a detailed description of each of these files, but instead, briefly mentioned that the Search Content export process, provides a detailed documentation of the export process such as information about the items (mail items, document, etc.) that appear in the search results and so on.

Exported information - Office 365 security & Compliance – export PST -02-min

In the following screenshot, we can see the content of the CSV (Export Summary…).
The CSV file includes a detailed information for each of the mail items that the Search Content found and export to the PST file.

Exported information - Office 365 security & Compliance – export PST -03-min

In our scenario, the file that we need is the PST file. The Office 365 Content Search, export process, creates a dedicated folder that stores the PST file (the folder name is the name who was defined in the Content Search job via the Office 365 security & compliance portal).

Exported information - Office 365 security & Compliance – export PST -04-min

Step 4#4 – View the content of the PST file | Import the PST file to Outlook mail profile

This is the last step on our journey.

In this phase, we will import the PST file that includes the content of Angelina Exchange Online mailboxes, into an existing Outlook mail profile, so we will be able to easily view the information (mail items) that is stored in the “Recoverable items” folder.

In our scenario, we use Adele Outlook mail profile for importing the PST file (in our scenario; Adele is the Office 365 Global Administrator who performs the Content Search)

  • Open Outlook
  • Click on the File menu

View the content a PST file – add PST to Outlook profile -01-min

  • Select the option – Account setting and the submenu option Account setting

View the content a PST file – add PST to Outlook profile -02-min

  • Select the Data Files tab
  • Click on the Add… option

View the content a PST file – add PST to Outlook profile -03-min

  • Locate + select the PST file that you like to add to the existing Outlook mail profile
  • Click – OK

View the content a PST file – add PST to Outlook profile -04-min

In the following screenshot, we can see that the requested PST file (Angelina PST file) was successfully added to the existing Outlook mail profile.

View the content a PST file – add PST to Outlook profile -05-min

The PST file structure

Just a quick reminder, our task has been – to verify if specific E-mail items that were reported as mail items that “disappeared,”were indeed deleted. To verify if the mail items were deleted, we will need to view the content of “Recoverable items” folder.

In the following diagram, we can see the result from the import PST process to Adele Outlook mail profile.

Notice that the imported PST file that included the content of Angelina Exchange Online mailbox is not a “single folder” but instead multiple folders.

In the following screenshot, we can see that the PST file includes four folders:

  1. Deleted items – I have no idea why this folder appears as a separated folder because of the Deleted item’s folder, appear under the Primary mailbox folder and the Archive mailbox folder.
  2. Angelina@o365info.com(Primary) – (number 2) this is the folder that contains all of the content Angelina Exchange Online mailbox. The mailbox described as Primary because in case that the recipient has Archive mailbox; the archive is the “secondary mailbox.”
  3. Angelina@o365info.com(MainArchive) – (number 1) this is the folder that contains all the content Angelina Exchange Online Archive mailbox. Notice that not all the Exchange Online recipients have Archive mailbox. In our specific scenario, Angelina has also an additional mailbox, the Archive mailbox.
  4. Search folder

View the content a PST file – exported mailbox structure -01-min

Primary mailbox | Folders structure

In the following screenshot, we can see the structure of the Primary mailbox folders. It is important to emphasize that the folder naming convention and the folder structure are a little bit different from the structure and naming convection which we are familiar with when using Outlook mail client.

Top of information store

The “Top of information stores” folder (number 2) serves as a “logical container” for the whole Exchange mailbox content. The Top of information store contains all the default folders such as – Inbox, Sent Items, Deleted Items, etc. and folders that the user manually created.

Recoverable items

The “Recoverable items” folder (number 1) is logically defined as a – “separated entity” from the “standard user mailbox.” The “Recoverable items” folder as the name implies, store all the mail items that can be recovered or in other words, serve as a container for all the mail items that define as – Soft deleted or Hard deleted mail items.
Notice an important detail – the “Recoverable items” folder is a system hidden folder, that the user (mailbox owner) cannot see!

One of the few ways that we can use for viewing the content of the “Recoverable items” folder is by using the Office 365 Content Search option and export the information to a PST file.

View the content a PST file – exported mailbox structure -02-min

In the following diagram, we can see the content of the Top of the information store folder or in other words, the content of the Angelina standard mailbox.

View the content a PST file – exported mailbox structure -03-min

In the following diagram, we can see the content of the “Recovery items” folder.

  • The Deletions folder (number 1) contains all the mail items that define as “Soft deleted mail items.”
  • The Purges folder (number 2) contains all the mail items that define as “Hard deleted mail items.”

View the content a PST file – exported mailbox structure -04-min

Archive mailbox | Folders structure

The Archive mailbox includes a folder structure that based on the same concepts that we review in the former section which describes the Primary mailbox folder structure.

In the following screenshot, we can see that under the folder – Angelina@o365info.com(MainArchive), we can see two subfolders:

The Top of information store folder (number 2) and the Recoverable items (number 1).

View the content a PST file – exported mailbox structure -05-min

Notice that the Archive mailbox also includes – “Recoverable items” folder. In a scenario in which we look for mail items that we suspect, that were deleted, the mail items can also be located in the user Archive mailbox “Recoverable items” folder.

View the content a PST file – exported mailbox structure -06-min


Now it’s Your Turn!
It is important for us to know your opinion on this article

The post Import PST file that was exported by Office 365 Content Search to Outlook | View “Recoverable items” folder | 3#3 appeared first on o365info.com.

Export the content of Exchange mailbox “Recoverable items” folder to PST using the Office 365 content search | Step by step guide | 2#3

$
0
0
In this article, we review in detailed step by step description of the process of – exporting the content of Exchange Online mailbox to a PST file.

A quick reminder for our scenario, Adele (Office 365 Global administrator) needs to check what happened to specific mail items, that were reported as mail items that “disappeared” by an organization’s user named Angelina.

Adele needs to export the content of Angelina Exchange Online mailbox to a PST file, and later, import the PST file to an Outlook mail profile, so she will be able to view and browse through the content of the “Recoverable items” folder.

Step 1#4 – Add the user account to the eDiscovery Manager group

The first task that we need to complete is, assign the required permissions to the user who will perform the Content Search (membership within the eDiscovery Manager group).

Most of the times, the access to Office 365 Security & Compliance is implemented by a user who has Office 365 Global Administrator permissions, but it is important to emphasize that by default, the Office 365 Global Administrator role doesn’t have the required permissions for performing a search via the “Content Search” service.

To be able to perform the mailbox search + to export the search results to PST file, the user who performs the operations must be a member of a special Office 365 group named – eDiscovery Manager.

Search & investigation - Content Search - Required permissions -01-min

In the following section, we review how to add an Office 365 user as a member of
the eDiscovery Manager group.

Note – you can access the Security & compliance portal by using the following https://protection.office.com

Login to Office 365 security & Compliance portal -01-min

  • Select the permissions menu

Login to Office 365 security & Compliance portal -02-min

In the following section, we will add Adele as a member of the eDiscovery Manager group.

  • Select the eDiscovery Manager group

Assign the required permissions for viewing + exporting the results of the content search -01-min

  • In the section, eDiscovery Administrator clickEdit

Assign the required permissions for viewing + exporting the results of the content search -02-min

  • In the section, select eDiscovery Administrators clickEdit

Assign the required permissions for viewing + exporting the results of the content search -03-min

  • Click Add

Assign the required permissions for viewing + exporting the results of the content search -04-min

  • Form the user list, select the user who will be added to the eDiscovery Manager In our scenario, this user is – Adele
  • Click – Add

Assign the required permissions for viewing + exporting the results of the content search -05-min

In the following screenshot, we can see that now Adele is a member of the eDiscovery Manager group

  • Click – Done

Assign the required permissions for viewing + exporting the results of the content search -06-min

  • Click – Close

Assign the required permissions for viewing + exporting the results of the content search -07-min

Note – from my experience, it takes 30-60 minutes until the permissions are updated. For this reason, it’s recommended to wait for a little before starting the Search Content and export process.

Step 2#4 – Perform the Content Search – Define the search query

In this step, we define the search query parameters for the Content Search process. A quick reminder, we are going to define a search query that will locate all the information that is stored in a specific Exchange Online mailbox named – Angelina. As mentioned, although our main purpose is to get only the mail items stored in the Recoverable items” folder, the Office 365 Content Search doesn’t include a built-in filter (condition) that enabled us to define a search query (condition) that will restrict the search only for a specific mailbox folder.

For this reason, we ask from the Office 365 Content Search to get us All the Exchange Online mailbox content and export this content to a PST file. Later, when browsing through the PST file, we will access only folders that are relevant to us (the Recoverable items” folder).

Perform Exchange mailbox content search using Security & compliance -01-min

  • Click on the plus icon for creating the required content search query

Perform Exchange mailbox content search using Security & compliance -02-min

  • In the *Name box, type the name of the search query

Under the section named – Where do you want us to look? Select the following two options:

  • Custom location selection
  • Choose specific mailboxes to search

Perform Exchange mailbox content search using Security & compliance -03-min

In the next step, we will need to specify the name of the Exchange Online Mailbox for which we wish to perform the search.

Important notes about the Web interface:

Compared to other Office 365 admin interfaces, which will automatically display a list of all existing users or mailbox accounts, the Content Search interface, does not automatically populate the Exchange Online mailbox list. In other words, the list of users is empty!

To be able to locate the specific Exchange Online mailbox that we want to add to the search, we will need to manually type the name of the mailbox and then, “run” the search process in which the Content Search fetches the required mailbox name.

Perform Exchange mailbox content search using Security & compliance -04-min

  • To be able to locate the specific Exchange Online mailbox, we need to manually type the mailbox name. In our scenario, the mailbox name is – Angelina.
  • Click on the search icon

Perform Exchange mailbox content search using Security & compliance -05-min

  • After the required mailbox name was located, click on the Add-> button

Perform Exchange mailbox content search using Security & compliance -06-min

  • Click OK

Perform Exchange mailbox content search using Security & compliance -07-min

  • Click Next

Perform Exchange mailbox content search using Security & compliance -08-min

In the following screenshot, we need to decide if we want to create search filters (defined as “conditions”) that will narrow and focus the search results.

A quick reminder, in our scenario, we don’t wish to define any filter because we want to get the “Full content” of Angelina’s mailbox.

Perform Exchange mailbox content search using Security & compliance -09-min

Although that in our scenario, we don’t define any condition, I would like to briefly display the option of “conditions.”

In the following screenshot, we can see an example of the various conditions (filters) that can be defined such as – specific date range, specific text string and so on.

Perform Exchange mailbox content search using Security & compliance -10-min

  • Click Search

Perform Exchange mailbox content search using Security & compliance -11-min

In the following screenshot, we can see that the Content Search “Job” was successfully created.

Notice that when we select the specific Content Search job, in the right side on the screen, we can see a detailed information about the job status, and the various tasks that can be executed.

Perform Exchange mailbox content search using Security & compliance -12-min

In the following screenshot, we can see the various “parts” of the search job.

Perform Exchange mailbox content search using Security & compliance -13-min

  • The top part (section A in the screenshot) is the part that includes information about the Search Content
  • The rest of the options (section B in the screenshot) include the specific action that we can apply to the search results.
  1. Content search job information – the first part (number 1) is the “information part” which displays information about the specific search job such as – the number of mail items that were found, the size of all mail items, the number of mailboxes that were searched and so on.

Notice an interesting detail, in our scenario, the number of mailboxes that were searched is “2” because Angelina has one primary Exchange mailbox + Exchange Archive mailbox.

The following section enables us to execute as specific “action” on the search results.

  1. Preview search results (number 2) – instead of exporting the data to a PST file; we can use the content search web interface for “looking at the search results”. For example, looking at the content of a specific mail item. From my experience, this option is relevant only in a scenario in which the search results include few mail items.

In most of the scenarios, the search result includes a large amount of “findings,” and because the search interface can display only a limited amount of mail items, most of the times, we will need to use the “export to PST file option.”

  1. Export results to a computer (number 3) – this is the option that we review in the current article. When selecting this option, the next step will be – installing a small application on our local desktop that will enable us to download the PST file.
  2. Generate a report (number 4) – this option will enable us to export a detailed report (in a CSV file format), that includes a description of each mail item that appears in the search results. Notice that this is not the actual mail item but instead, “Metadata” (data about data).

Step 3#4 – Export the search results ?(mailbox content in our scenario) to a PST file

In our scenario, we select the option – Export results to a computer, Start export

Perform Exchange mailbox content search using Security & compliance -14-min

In this step, we instruct the Content Search how to perform the process of exporting the search results to a PST file.

  • Under the section – Include these items from the search: select the option – All items, excluding the ones that have unrecognized format, are encrypted, or weren’t indexed for other reasons
  • Under the section – Export Exchange content as – select the option One PST file for each mailbox
  • Click – Start export

Exporting Exchange mailbox content search results -01-min

The “response” of the Content Search wizard is a little confusing because associatively we assume that the export to PST will need to start.

After we click on the “Start Export” button, the export process will not start and instead, the main admin screen appears again.

The “catch” is that when we click on the option of “Start export,” we are telling the Office 365 Content Search to start to prepare all the required setting in the background, but the actual process of exporting the information to PST file is not automatically started.

In the following screenshot, we can see that the status of the “export option” was updated and now its configured as “Download exported results.

Download the PST file to the local Host - using Security & Compliance -01-min

  • Under the section, Export results to a computer, click on the option – Download exported results

Download the PST file to the local Host - using Security & Compliance -02-min

To be able to download the private data in PST file that will be saved on our local drive, Office 365 needs to verify our identity (trust the entity the perform the download file process).

This “trust” is implemented by using a “secret key” (the Export key).

  • In the windows that appear, select the option – copy to clipboard

We will need this “key” at a later stage, as part of the information that we need to provide to the eDiscovery PST Export Tool.

Download the PST file to the local Host - using Security & Compliance -03-min

Although we don’t have to save the export key to a file, my recommendation is to save the Secret Key value in a file (such as text file) so, it will be easy for us to get this value Down the road.

Download the PST file to the local Host - using Security & Compliance -04-min

  • Click on the option – Download results

Download the PST file to the local Host - using Security & Compliance -05-min

In this step, we will download + install the Office 365 application that is required for implementing the process of download the search result to a PST file that will be saved on the local Hard drive.

Note – there are preliminary requirements that need for completing the process of downloading and using the eDiscovery PST Export Tool.

You can read more information about these pre-requirements for the eDiscovery PST Export Tool in the following article.

  • Click – Open

Installing the PST export application on the local host -01-min

  • Click – Install

Installing the PST export application on the local host -02-min

The installation process begins.

Installing the PST export application on the local host -03-min

Now we will need to provide to eDiscovery PST Export Tool two details – the secret key that we got from the former step + the location on our local Hard drive which will use to store the PST file.

Saving the exported PST file to local folder -01

  • In the section – Paste the export key that will be used to connect to the source, paste the Export Key value

Saving the exported PST file to local folder -02

In this section, we need to define the local folder which will be used to store the PST file.

  • Click on the Browse button

Saving the exported PST file to local folder -03

In our scenario, we will create a NEW folder on the desktop

  • Click – Make New Folder

Saving the exported PST file to local folder -04

  • We will call the new folder – Exported PST

Saving the exported PST file to local folder -05

  • Click – Start

Saving the exported PST file to local folder -06

In the following screenshot, we can see that the process of exporting the Exchange mailbox content to PST file start

Saving the exported PST file to local folder -07

  • Click – Close

Saving the exported PST file to local folder -08

Summary and recap

In the current article, we review how to use the Office 365 Content Search tool for performing a search query that gets the whole content of a specific Exchange Online mailbox + Export the information (the search results) to a PST file.

In the next article, we review how to import the PST file to the Outlook mail profile, so we will be able to browse view the content of the “Recoverable items” folder.


Now it’s Your Turn!
It is important for us to know your opinion on this article

The post Export the content of Exchange mailbox “Recoverable items” folder to PST using the Office 365 content search | Step by step guide | 2#3 appeared first on o365info.com.

Using Office 365 content search for exporting deleted mail items to a PST file – prefix | 1#3

$
0
0
In the current article series, we review how to use the Office 365 Search Content feature, as a tool, that we can use for exporting the content of Exchange Online mailbox to a PST file.

One of the most popular scenarios in which we need to export the content the Exchange Online mailbox to a PST file is, for backup purpose. However, in this article series, I would like to review a different type of scenario, in which we use to Office 365 Search Content feature for exporting a special Exchange Online mailbox folder – the “Recoverable items” folder.

For example, organization user report that some email items were “disappeared” from his mailbox. In such scenario, a sensible option is that someone or something deletes these mail items (Intentionally or unintentionally).

Every mail item that was Soft Deleted or Hard deleted will automatically be saved in the Exchange Online mailbox special folder – the “Recoverable items” folder.

To be able to display the content of the “Recoverable items” folder, or save a copy of mail items stored in the “Recoverable items” folder (export to PST), we need a tool that will help us to accomplish this task.

And the tool that we can use in such as scenario is – the Office 365 Search Content feature.

Office 365 Search Content option

Generally speaking, the Office 365 Search Content option is a very powerful and useful tool, that was created for enabling Office 365 Administrator (or user with the required permissions) to search information that is located in:

  • Exchange Online infrastructure (All Exchange Online existing mailboxes) or
  • SharePoint Online infrastructure (All existing SharePoint Online sites).

The interesting thing about the Office 365 Search Content option is that the term “search results,” is that we ask from Office 365 Search Content, to export the actual files and mail items that were found (the search results).

In our specific scenario, we would like to export to a PST file the content of Exchange Online mailbox “Recoverable items” folder. To be able to fulfill this requirement, we will use the Office 365 Search Content feature as a tool that will search and export the search results of the whole content of a specific Exchange Online mailbox.

A question that can appear in your mind is, why do we have to export ALL of Exchange Online mailbox content, instead just the content of this special folder that was mentioned, the “Recovery items” folder?

The answer is that unfortunately, at the current time, the Office 365 Search Content option doesn’t include an option to restrict the search only for this specified folder.

Using the Office 365 Search Content report option

In addition, it is important to mention that in a case in which we want to investigate a scenario in which mail items were “disappeared,” we don’t have to export the data itself.

Instead, we can use the 365 Search Content search to perform a search query that will create a list (report) of all the existing data (mail items) in a specific Exchange Online mailbox, including the mail items stored in the “Recoverable items” folder.

Then, we can get the report that includes the name of each mail item, location and so on.

From my experience, the option of using a “report,” is not so not adequately suited for our specific scenario because most of the times, we (or the user) will need to have the ability to manually browse and “dig” inside the search results that will be exported to PST file.

The need of digging in the content of the mailbox Recovery mail items folder-min

Soft Delete, Hard Delete, “Recoverable items” folder and deleted mail item retention policy

In our scenario, we want to check of specific mail items were deleted meaning located in the “Recoverable items” folder.

Before we dive into the specific instruction of – how to use the Office 365 Search Content option, let’s briefly review the concept of – how Exchange based environment relates to a “deleted mail items”.

Standard mail deletion.

When a user deletes a mail item, the mail items are moved to the mailbox folder – “Deleted items” (the recycle bin). The mail items will stay forever in the “Deleted items” folder.

Soft Deleted mail items

If the user deletes mail items that were stored in the “Deleted items” folder, the deletion described as “Soft Delete” (Shift + Delete).

Mail items that defined as “Soft Deleted,” are not actually deleted, but instead, sent to the special hidden mailbox folder named – “Recoverable items” folder.

Although we use the term “Recoverable items” folder (Single and not plural) in reality, the “Recoverable items” folder is implemented through a set of system folders.

In a scenario of Soft Deleted mail items, the mail item will be stored in the “Recoverable items” folder, in a dedicated sub folder named – Deletion.

Although the user cannot see the Deletion folder, the user has the ability to restore mail items that stored in the Deletion folder (Soft Deleted mail items).

The restore procedure can be implemented by the user himself, by using the GUI interface of Outlook or OWA mail clients.

Hard Deleted mail items

The term “Hard Deleted,” describe a deletion of Soft deleted mail items. For example, a scenario in which Exchange user deletes a specific mail item, then delete the mail from the “Deleted items” folder (Soft Delete) and in addition, delete the mail item from the “Recovery store.”

The result is that the specific mail items will be considered as “Hard Deleted mail items.” In this case, the Hard-deleted mail items will be moved from the subfolder named – Deletion to an additional subfolder named “Purges.”

In other words, the Exchange mailbox owner does not have access permissions for the Purges folder which store the Hard-Deleted mail items.

Deleted mail items retention policy

Mail items that were Soft deleted or Hard Deleted, will be kept by default in the “Recoverable items” folder for a period of 14 days. This time limitation is determined by the deleted mail retention policy.

After the end of the “14-day period,” the mail will be will be permanently deleted, without the ability to restore the specific mail items.

Only in case that the option of – Litigation Hold or the option of – in-place eDiscovery & hold was used, mail items stored in the “Recoverable items” folder, will be kept for longer time periods (the time period that was defined when using one of this option).

Additional reading

In case that you want to get more information about the concepts of Soft Deleted mail items versus Hard Deleted mail items and the concept of “Recoverable items” folder, you can read the following articles:

The method that we can use to view the content of the Recovery mail items” folder

Technically speaking, there are a couple of methods that we can use for viewing and access information stored in the “Recoverable items” folder of a specific Exchange mailbox.

For example,
1. The Search-Mailbox PowerShell command
We can use the PowerShell command – Search-Mailbox for search and export the content of the “Recoverable items” folder.

You can read more information in the article – Recover mail items from Recovery mail folder (the Dumpster) using PowerShell | Part 3#5

2. Recover Soft deleted mail items | Mailbox owner

The mailbox owner (the user himself) can recover Soft deleted mail items by using OWA and Outlook client interface

3. Using MFCMAPI utility
We can use System utilities such as MFCMAPI to access the content of specific Exchange mailbox and browse through the content of the systems hidden folder “Recoverable items.”

You can read more information in the article – Recover deleted mail items – Office 365 | 4#7

4. Office 365 Security and Compliance portal – Content Search

The additional method that we will review in this article is the Office 365 technologies, which describes as “Content Search.”

Office 365 “Content Search”

The technology or the feature which describes as “Content Search,” is a very powerful option, that enables us to look for a specific information that is located in Exchange Online infrastructure or SharePoint Online infrastructure and in addition, export this data to a file.

Office 365 content search - Search Scope - Office 365 infrastructures -01-min

In our scenario, our main focus is looking for information that is stored in an Exchange Online mailbox and if to be more specific, we are interested in information that is stored in a special Exchange Online mailbox folder – the “Recoverable items” folder.

Office 365 content search - Exchange Online infrastructure - Our main focus -02-min

The advantages of Office 365 – Content Search.

The use of Office 365 Content Search, is implemented very easily by using the Office 365 Security and Compliance portal web-based interface.

All we need to do is just “point” the specific Exchange mailbox name, and the Content Search service will do for us all to hard work of – searching the data and optionally export the data of PST file.

When we search for information that is stored in an Exchange Online mailbox, the Content Search process is able to “see” all the different parts of an Exchange Online mailbox.

For example, in case that the Exchange Online mailbox has Exchange Online Archive mailbox that is “attached” to the primary Exchange Online mailbox, the Content Search will fetch for us the information that is located in the primary Exchange mailbox and in addition, information stored in the Archive mailbox.

Another advantage of the Content Search is that the search can “view” and export information that is located in a special system mailbox folder such as the – “Recoverable items” folder.

Office 365 content search - Advantages -03-min

The disadvantages of Office 365 – Content Search.

Office 365 Content Search includes the ability to define “search conditions” (filters) for the search query such as – specific date range, specific text string, a specific type of mail items and so on.

Regarding our specific scenario, one of the main conditions (search filter) which is missing is, the ability to define Exchange mailbox Folder scope. The term “folder scope” translates into our ability to define a search query that will look for data only in a specific Exchange mailbox folder.

The need to define a specific folder scope is realized in a scenario in which we want to use Office 365 Content Search as a tool that will help us to “scan” a specific Exchange Online mailbox, and search or export only mail items that stored in “Recoverable items” folder.

Because this lack of ability, in a scenario in which we want to export the content of “Recoverable items” folder, we will need to perform a “full search” that will scan and export ALL the Exchange Online mailbox content to a PST. After the PST file was successfully created, we will need to “dig” from the PST file that contains all the Exchange Online mailbox content, the information that is located in the “Recoverable items” folder.

Office 365 content search- Disadvantages -04-min

Office 365 Security and Compliance portal and the Content Search option

The use of Office 365 Content Search can be implemented via PowerShell, but the simplest and easy access is implemented via the Office 365 Security & Compliance admin portal.

365 Security & Compliance portal, serve as a focal point for many different services for Office 365 customers.

One of these services defined as “Search & Investigation,” and under this category, one of the options is the – “Content Search.”

The need of locating specific data stored in Exchange Online mailboxes + exporting the data to PST file -01-min

The Content Search feature enables us to “view” the content all the data that is stored in our SharePoint Online infrastructure and Exchange Online infrastructure (Exchange Online mailbox).

After the Content Search tool to locate the specific data that we look for, we can decide what to “do” with the results (the search results).

For example, we can ask to get a report that includes detailed information about each item that was found; we can use the Content Search tool web interface, to view the result, or we can ask from the Content Search tool to export the search results to a PST file.

In our scenario, our wish is to perform a complete mailbox search that will include all the data stored in a specific Exchange Online mailbox + export the search result (the mailbox content) to a PST file.

Search & investigation - Content Search - What are the tasks that we can accomplish -02-min

Our scenario description

The characters of our scenario are as follows:

  • Adele is an Office 365 Global Administrator.
  • Adele got a request to help Office 365 user named – Angelina to locate mail items that were “disappeared.” Adele suspects that these mail items were Hard Deleted.
  • To be able to view the content of the special system folder: “Recoverable items” folder, Adele needs to restore the “whole” Angelina Exchange Online mailbox, and then, try to find this mail item in the “Recoverable items” folder.
  • Angelina has also an archive mailbox in addition to the primary mailbox.

Scenario Description - Performing Exchange Online mailbox content search -04-min

Export PST file and save the file on a local Hard disk The client desktop | Pre-requirements.

To be able to export the Content Search results to a PST file and saved into the local Hard disk, we will need to download + install a small software component, that serves as a “Download manager” (the eDiscovery PST Export Tool).

The thing that we need to know is that to be able to install the eDiscovery PST Export Tool, we need to fulfill the following requirements:

Scenario 1: You’re using Internet Explorer 9.0 or later, and you don’t have the .NET Framework 4.5 or later installed

In case that your OS doesn’t include installation of .NET Framework 4.5 you will need to download and install the required software.

Scenario 2: You’re using a third-party (non-Microsoft) browser, and you don’t have the ClickOnce browser extension installed

Install the ClickOnce extension. The extension can be found on the add-on webpage for that browser.

The task list of actions that we need to perform.

In the next article, provide a detailed step by step guide for all the steps that we need to perform for accomplishing the task of exporting Exchange Online mailbox to a PST file.

In this section, I would like to provide a brief review of the major steps that involved throughout the process, so you will be able to get the big picture.

Step 1#4 – Assign the required permissions to the user who will perform the Office 365 Content Search (membership within the eDiscovery Manager group)

The ability to view the content of Exchange mailbox + export the data stored in the mailbox to a PST file requires a special permission. The important thing that I would like to emphasize is, that even the user who has the rule of the Office 365 Global Administrator, doesn’t have these permissions by default.

To be able to use the Office 365 Content Search option, we need to assign the required permissions to the user that will perform the search. This user will need to be added as a member of the eDiscovery Manager group.

You can read more information about how to assign these permissions in the next article.

Step 2#4 – Perform the Content Search – Define the search query

The Office 365 Content Search, perform the search based on a search query we need to define. The search scope can be implemented by searching information in Exchange Online + SharePoint Online infrastructures.

In addition, we can define very specific search parameters such as specific date range, a specific type of document and so on.

In our case, we are interested in information stored in Exchange Online infrastructure in a specific Exchange Online mailbox. The search query that we define will be considered as a simple search query because we will not define any condition. Instead, we will just need to provide the name of the required Exchange Online mailbox.

You can read more information about how to Define the search query in the next article.

Step 3#4 – Export the search results (mailbox content in our scenario) to a PST file

After the Office 365 Content Search finds the required information, we can decide what to do with the search results. In our scenario, we would like to get a copy of mail items that were found by the Office 365 Content Search (the search results).

The “export to file” scenario includes a couple of substeps:

      • “Activate” the export option – we will need to “inform” Office 365 Content Search that we would like to export the search results (Office 365 Content Search needs to prepare the data and makes the required arguments).
      • Get the Export Key – we will need to copy the value of the exported key for the next step, in which the Export to PST application will request from us the value of the export key.
      • Download and install the “PST Export application” – the export process to a PST file is implemented by installing a small application on our desktop, that serves as a “Download manager.” manager”.
      • Provide the Export Key – we will need to provide to the “PST Export application” the Export Key.
      • Provide the path to the exported PST file – we will need to provide the “PST Export application” the path to the folder which will be used for storing the exported PST file.

You can read more information about how to start the Export the search results in the article.

Step 4#4 – View the content of the PST file – Import the PST file to Outlook mail profile

After the PST file was successfully exported, the last phase begins. In this phase, we will need to import the PST file to an existing Outlook mail profile. We can relate to Outlook mail client as a “browser” that will help us to view the content of the PST file.

You can read more information about how to import PST file to Outlook mail profile in the following article.

Exporting Exchange Online mailbox search results - Task list ?- The major 4 phases -05-min


Now it’s Your Turn!
It is important for us to know your opinion on this article

The post Using Office 365 content search for exporting deleted mail items to a PST file – prefix | 1#3 appeared first on o365info.com.

Restore deleted mail items to their original folder using PowerShell – introduction | 1#3

$
0
0
The current article series is dedicated to the subject of – Viewing + Restoring deleted mail items from an Exchange Online mailbox, to their original folder, using two new PowerShell
cmdlets – Get-RecoverableItems and Restore-RecoverableItems.

Restore deleted mail items to their original folder using PowerShell| The article series

The article series includes the following articles:

The magic of using Get-RecoverableItems and Restore-RecoverableItems cmdlets

Exchange mail clients such as Outlook and OWA, include a built-in option that enables the user (mailbox owner) to recover by himself “standard deleted mail items” (mail items stored in the “Deleted mail” folder), and Soft Deleted items” (mail items stored in the “Deletion” folder).

So, the obvious question could be – what is the advantage of using the set of the PowerShell cmdlets – Get-RecoverableItems and Restore-RecoverableItems?

The answer is using this set of PowerShell cmdlets, have three major advantages:

1. Manage the event of – viewing and restore deleted mail items | Server side.

The interesting thing is, that up until now, Exchange didn’t provide a dedicated method for the Exchange Administrator to view and restore deleted mail items. I use the term “dedicated” because Exchange online includes an option to search and export the content of a mailbox to a PST file, but this “ability” is not dedicated to deleted mail items.

You can read more information about the procedure in the article – Using Office 365 content search for exporting deleted mail items to a PST file – prefix | 1#3

2. Manage the event of – viewing and restore deleted mail items | Remotely.

The set of the PowerShell cmdlets – Get-RecoverableItems and Restore-RecoverableItems, enable Exchange Administrator to manage the task of restoring deleted mail items remotely without user intervention.

In the past, the available methods of Exchange Administrator to manage an event of restore deleted mail items was to physically reach the user’s desktop or assign to himself the Full Access permissions on the user mailbox.

Using the PowerShell cmdlet – Get-RecoverableItems, provide us the ability to remotely view and display a detailed information about the deleted mail items of a specific Exchange mailbox, and based upon this information, decide how and what mail items to recover.

3. Restore deleted mail items to their original folder

Regarding the PowerShell cmdlet – Restore-RecoverableItems, the outstanding and interesting advantage of this cmdlet is, the ability to restore the deleted mail items to their original mail folder.

Until the present time, before the PowerShell cmdlet – Restore-RecoverableItems “appear,” we didn’t have the option to restore deleted mail items to their original mail folder.

In many scenarios, although we and the user are happy that we were able to restore deleted mail items, what saddened the happiness was the fact that the user needs to implement a tedious and arduous process of locating the “original mail folder” that hosts the deleted mail items, and manually “scatter” the mail items that were recovered between this mail folder.

The magic of using Get-RecoverableItems and Restore-RecoverableItems cmdlets

Exchange environment and the subject of “Deleted mail items”

If we ask to be honest, for most of us, the subject of “restoring deleted mail items” in the Exchange-based environment, could be considered as a complicated and confusing subject.

For example, to be able to manage well the process of – restoring deleted mail items in an Exchange environment, we need to be familiar with the architecture of Exchange mailbox (Single item recovery, Recovery mail items system folders and the Dumpster), the “life cycle” of deleted mail items, the various types of mail deletion classification such as – standard deletion, Soft deleted mail item and Hard deleted mail item.
In the current article, we provide a brief review of the basic terms and concepts that relate to the subject of – deleted mail item in Exchange environment.

In case that you want to read more detailed information about Exchange Online recovery mail items folder structure and concepts, you can read the articles – Recover deleted mail items – Office 365 | 4#7 and Recover deleted mail items in the Exchange Online environment | Deleted mail flow | 3#7

Although we cannot get into a detailed description of how Exchange infrastructure handles an event of deletion of mail items, it is necessary to mention some basic terms and concept that relate to “deleted mail items.

When a user deletes a mail item, the mail items are “sent” to the “Deleted items” mailbox folder. It is important to emphasize that although the mail items are stored in the “Deleted items” folder. It is important to empathize that technically; the mail items are not deleted.
For example, the apparently deleted mail items can stay forever in the “Deleted items” folder (number 1).

Soft Deleted mail items

In case that the user decides to empty the “Deleted items” folder or to delete a specific mail item stored in the “Deleted items” folder, the operation described as “Soft Deleted.”

When the user deletes a mail item that is stored in the “Deleted items” folder, the mail items are sent to a specially hidden mailbox store, that described as – “Recoverable item folder” (a parallel term is the “Dumpster” folder).
An important thing that I would like to mention is that even though we use the term “Recoverable item folder”, which allegedly refers to a singular folder, in reality, the “Recoverable item folder” is implemented as “array of system folders” that each of them has a unique function.
When the mail item is Soft deleted, the mail item is sent to the “Recoverable item folder space” to a folder named “Deletions” (number 2).

Deleted mail items policy

The important thing that we need to know is, that Exchange applies a special policy named – “Deleted mail items policy” on the “Recoverable item folder space.”

By default, the “Deleted mail items policy” define a time window of 14 days for the mail item that is stored in the “Recoverable item folder space.” After this period has elapsed, the mail item will permanently be deleted without being able to recover.

Note – in Exchange Online based environment the default “14 days” policy can be extended to a maximum of 30 days. In case that you need a longer time period of defining a policy that will keep forever deleted mail items that are stored in the “Recoverable item folder space,” you can use the option of Litigation Hold or In-Place Hold that required an E3 or Exchange plan 2 licenses.

The “Deletions” folder doesn’t appear as a standard mailbox folder which the user can access, but, the user has the ability to view the content of the “Deletions” folder + delete or restore mail items from the “Deletions” folder by using the option of – “Recover Deleted items.”

Hard Deleted mail items

In case that for some reason the user decides to access the “Deletions” folder, and delete the mail items that stored in the “Deletions” folder the action defined as – Hard Delete.

In this case, the mail item\s will be moved from the “Deletions” folder to an additional special system folder named – “Purges” (number 3).
The user (mailbox owner) is not able to view the content of the “Purges” folder!
Only Exchange administrator has the ability to view or restore mail items that stored in the “Purges” folder. In other words, only the Exchange Administrator can recover Hard deleted mail items.

Note – we cannot use the set of the PowerShell cmdlets – Get-RecoverableItems and Restore-RecoverableItems for recovering Hard Deleted mail items.

The deleted mail item Flow - Exchange based environment

Restoring deleted mail items | The user himself versus Restore implemented via PowerShell

The current article series is dedicated to the new PowerShell cmdlets – Get-RecoverableItems and Restore-RecoverableItems, that we can use for restoring deleted mail items from Exchange mailbox.

But before we continue to the “technical part” in which we review the syntax of this PowerShell cmdlets, it is important that we answer a couple of questions.
Q1: Can a user (mailbox owner) has the ability to restore Deleted mail items?
A1: The answer is “Yes.”
Deleted mail items, sent to the mailbox Recycle bin (“Deleted items” folder). The user can easily view the content of the mailbox recycle bin (“Deleted items” folder) and “move” the mail items to any folder he chooses (notice that there is no option to recover the mail items to their original folder).
Regarding deleted mail items that considered as – Soft Deleted mail items, Outlook mail client, and OWA mail client includes a built-in interface that enables a user to perform a restore process of Soft Deleted mail items.
Q2: Is there a scenario where a user cannot perform a restoration of deleted mail by himself?
A2: The answer is “Yes.” In case that the Deleted mail items considered as – Hard Deleted mail items, the user (mailbox owner) cannot recover these mail items by himself. Only Exchange administrator with will be able to perform the procedure of restoring – Hard Deleted mail items meaning, mail items that are stored in the “Recoverable item folder space” in the “Purges” folder.

You can read more detailed information about how to perform Hard Deleted mail items recovery in the following articles:

Q3: Given that a user can restore deleted mail items by himself, what are the advantage of using the PowerShell cmdlets – Get-RecoverableItems and Restore-RecoverableItems?

A3:

Case 1 – Restoring Hard Deleted mail items

Using the set of the PowerShell cmdlets – Get-RecoverableItems and Restore-RecoverableItems don’t include the option of performing the procedure of restoring – Hard Deleted mail items. Referring to the above point the PowerShell cmdlets – Get-RecoverableItems and Restore-RecoverableItems don’t have any advantage versus the ability of the user (mailbox owner) to recover deleted mail items.

Case 2 – Restoring Deleted mail items + Soft Deleted mail items
The main advantage of using the PowerShell cmdlets – Get-RecoverableItems and Restore-RecoverableItems is that these cmdlets know how to use a special property of a mail item, that includes information about the mail folder that stores the mail item before the mail items were deleted.
Using the information stored in this property (named – LastParentFolderID), we have the ability to help users not only to recover Deleted mail items but, also restore the deleted mail items to the original location.

Restoring Deleted mail items - Restore-RecoverableItems versus the User restore

Recap and takeaways

The type of deleting mail items scenario

Regarding the term “deletion of mail items”, in the Exchange-based environment, there are 3 types of mail deletion scenarios:

  1. Standard mail item deletion
  2. Soft deleted mail item
  3. Hard deleted mail item

The procedure of restoring deleted mail items by the user himself or by using the PowerShell cmdlets (Get-RecoverableItems and Restore-RecoverableItems), is relevant only to the following types of mail depletion scenarios:

  1. Standard mail deletion – a scenario in which user delete a mail item, and the mail item is sent to the mailbox recycle bin meaning – the “Deleted items” folder.
  2. Soft deleted mail – a scenario in which the user deletes mail items that stored in the Deleted items folder (and the mail items sent to the “Deletions” folder).
  3. Hard deleted mail item

The set of PowerShell cmdlets (Get-RecoverableItems cmdlet and the Restore-RecoverableItems cmdlet) cannot be used in a scenario of Hard Deleted mail items and cannot be used to view and recover mail items that are stored in the “Purges” folder.

Get-RecoverableItems and Restore-RecoverableItems Folder Scope

Restore deleted mail items and Soft Deleted mail to their original mail folder

To be able to understand better what is the big advantage of using the Restore-RecoverableItems cmdlet that “know” how to restore deleted mail items to their original folder,” let’s briefly review the process of restoring a mail item by the user himself using the Outlook or OWA graphic interface.

Scenario 1 – Restore “standard” deleted mail

In the following diagram, we can see an example of such as scenario. When the user accesses his mailbox recycle bin (“Deleted items” folder), he can see all the mail items that stored in the recycle bin but notice an important fact – the user doesn’t have any “recover” menu option.

The meaning is that the “recovery process” is implemented by dragging the mail items from the recycle bin store the “destination mail folder.” The basic assumption is that the user knows what the “original mail folder” that stores the mail items before they were deleted, but the reality is a little more complicated.
In many scenarios, the user doesn’t remember the what was the original folder, and he will need to guess what was the original folder or just drop the mail items in any folder that he randomly chooses.

Preform Restore process - User level - Simple Standard deletion scenario -01

Another version of the “deleted mail item” scenario, is a scenario in which the deleted mail items consider as Soft Deleted mail items (mail items stored in the “Deletions” folder in the “Recoverable item folder space”).

In this case, when the user views the content to the “recovery mail items” folder, he has a menu option that enables him to restore the mail items.
But the important thing that we should Know is that the “restore procedure” is not implemented by restoring the Soft Deleted a mail item to his original mail folder but instead, to the “last folder” that host the mail item before he was deleted.
In this scenario, the “last folder” is the – “Deleted items” folder (mailbox recycle bin).
All tough the user has the ability to restore the Soft Deleted mail item, the user is facing the same problem of – how to locate to restore the mail item to the “real folder” that host the mail item.
In the following diagram, we can see an example of such as scenario.
Mail item that was stored in a folder named – “Customers 2018” was deleted and moved to the mailbox recycle bin (the “Deleted items” folder).
If the user decides to empty the recycle bin, the mail items considered as – Soft Deleted mail items (moved to the “Deletions” folder in the “Recoverable item folder space”).
When the user decides to recover the Soft Deleted a mail item, the restore process “move” the mail item back to the last folder which hosts the file, the “Deleted items” folder (mailbox recycle bin).

Preform Restore process - User level - Soft Deleted deletion scenario -02

How does the Restore-RecoverableItems cmdlet know “how to restore deleted mail items to their original folder”?

The “magic” of restoring the Soft Deleted mail items to their original folder is implemented by using two properties of the Soft Deleted a mail item:

  • LastParentFolderID – this property includes the GUID value of the “original folder” that hosts the mail items before they were deleted.
  • OriginalFolderExists – this property uses the values of “True” or “False” for defining the status of the original folder. For example, if the original folder that hosts the mail items before they were deleted still exists, the value is “True.”

When we perform deleted mail restore procedure using the Restore-RecoverableItems cmdlet, the Restore-RecoverableItems cmdlet knows how to read the information stored in the LastParentFolderID mail item property, and based upon this information, how to restore the deleted mail items to the folder that hosts the mail items before he was deleted.

It is important to mention that these special properties exist only in Exchange mailboxes that hosted by Exchange 2016 server and above. In Office 365 based environment, the basic assumption is that the Exchange Online infrastructure is implemented by using Exchange 2016 server infrastructure.

Soft Deleted mail item properties (Exchange 2016 and above)

The Get-RecoverableItems and Restore-RecoverableItems couple

Restoring deleted mail items via PowerShell is implemented by using a set of two PowerShell cmdlets:

Get-RecoverableItems cmdlet

This is the PowerShell cmdlet that we use for viewing (displaying) information about the deleted mail items of a specific user (specific Exchange Online mailbox). It is important to mention that
the Get-RecoverableItems cmdlet will be able to display deleted mail items that store in the mailbox recycle bin (Deleted items folder) and in the “Purges” folder that store Soft Deleted mail items.

For example-

View the content of the user mailbox recycle bin (Deleted items folder)

Get-RecoverableItems <Mailbox Name> -SourceFolder DeletedItems

View the content of a user mailbox – Deletions folder (Soft Deleted mail items)

Get-RecoverableItems <Mailbox Name> -SourceFolder Recoverableitems

Restore-RecoverableItems cmdlet

This is the “other half” of the two-cmdlets set that is used to recover (restore) the deleted mail items.

The most basic use of the Restore-RecoverableItems can be implemented by using the following syntax:

Restore-RecoverableItems <Mailbox Name>

In this scenario, the Restore-RecoverableItems cmdlet will access the user mailbox and start an automatic recovery process of the following type of deleted mail items:

  1. All the mail items stored in the mailbox recycle bin meaning, the “Deleted items” folder.
  2. All the mail items that defined as – Soft deleted mail item meaning, the mail items that are stored in the “Deletions” folder in the “Recoverable item folder space”).

The Get-RecoverableItems and Restore-RecoverableItems couple

Permissions to use the Get-RecoverableItems and Restore-RecoverableItems cmdlets

To be able to use the Get-RecoverableItems and Restore-RecoverableItems cmdlets, the user needs to have the rule – “Mailbox Import Export role.”

What are the non-supported scenarios (what recovery scenario cannot be implemented)?

Up until now, what review the deleted mail recovery scenarios that can be implemented by using the PowerShell cmdlets – Get-RecoverableItems and Restore-RecoverableItems.

At the same time, it is important that we know about the limitation of this PowerShell cmdlets or in other words, what are the recovery mail scenarios, which are not supported when using the above PowerShell cmdlets.

  • At the current time, the Get-RecoverableItems and Restore-RecoverableItems cmdlets are only supported in the Office 365 cloud environment (Exchange Online).
  • We cannot use the Get-RecoverableItems and Restore-RecoverableItems cmdlets
    for – view the content of the “Purges ” folder or restore mail items stored in the “Purges“. In other words, at the current time, this set of PowerShell cmdlet cannot be used for recovering Hard deleted mail items.
  • We cannot use the Restore-RecoverableItems cmdlet for restoring deleted mail items based on Retention tags.
  • We cannot use the Restore-RecoverableItems cmdlet for restoring deleted mail items to a “destination folder” which we choose. The Restore-RecoverableItems cmdlet will automatically restore the deleted mail items to their original folder (the mailbox folder that hosts the deleted mail items before they were deleted). In case that the original folder doesn’t exist, the mail items will be restored to the “Root mailbox folder.”
  • We cannot use Restore-RecoverableItems cmdlet for – restoring a deleted “mail folder” (this command can restore “mail items” but not a “Mail Folder” object).
  • We cannot use the Get-RecoverableItems and Restore-RecoverableItems cmdlets
    for – restoring deleted mail items stored in an Archive mailbox.
  • In case that the original folder that host the deleted mail was deleted, we cannot solve this issue by creating a new folder with identical name because the information about the “original folder” is saved using the original folder GUID identity


Now it’s Your Turn!
It is important for us to know your opinion on this article

The post Restore deleted mail items to their original folder using PowerShell – introduction | 1#3 appeared first on o365info.com.

Viewing all 370 articles
Browse latest View live