So the main question is – what is the Exchange Online “Extended Message Trace” and what are the advantage of this “Extended Message Trace”?
The basic assumption is that you are familiar with the Exchange Online message trace option that serves as a very useful tool that enables the Exchange Online administrator to display information about each of the incoming and outgoing mail that was sent to Exchange Online and sent by Exchange Online.
The disadvantages of the standard Exchange message trace are:
- The information is displayed in an “HTML window” and there is no option to save the data.
- The log data that is presented is quite basic and doesn’t include a detailed information.
The good news is that the option of Exchange Online “Extended Message Trace” provides a good solution for this disadvantage.
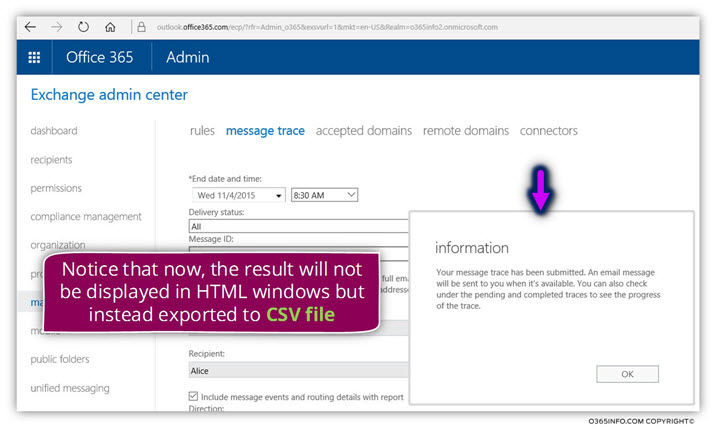
- When using the option of “Extended Message Trace“, the information is exported to a CSV file. The Notable advantage of using a CSV file is that we can keep the information and have the ability to use tools such as Microsoft excel for analyzing the data stored in the CSV file.
- When we use the option if “Extended Message Trace“, the “amount” of data that is exported to the CSV file is more comprehensive and details. In simple words, we can see an additional information that doesn’t appear in the “standard message trace”.
Performing an Extended Message Trace | Step 1#2
- Log into Exchange Online admin management
- On the left menu bar choose – mail flow
- On the top menu bar, choose message trace

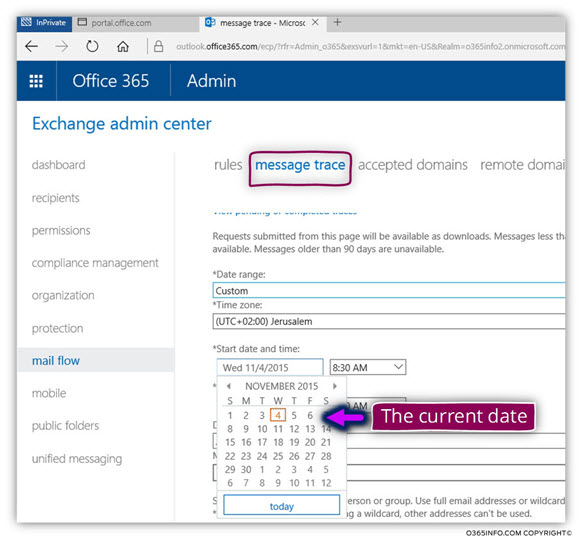
To be able to “activates” the Extended Message Trace option we will need to define a custom date range.
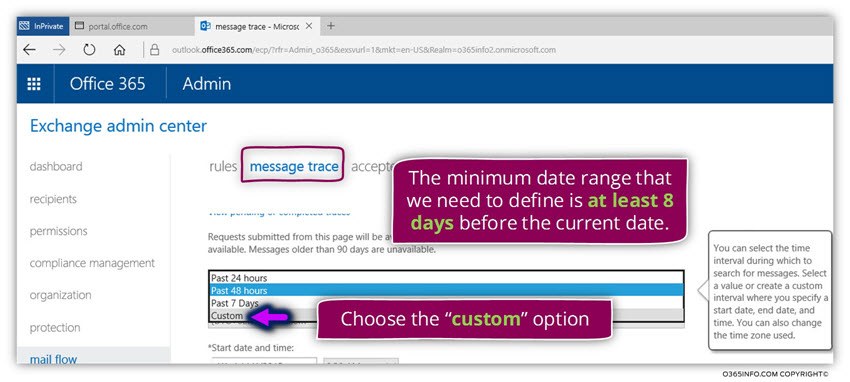
In our specific scenario, the current date is 04/11/205
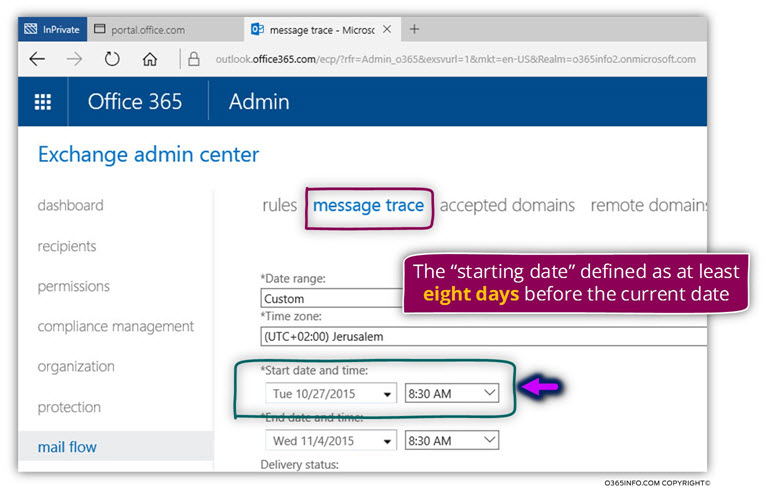
The required date range depending on your specific scenario requirements, but it’s important to emphasize that the minimum date range that we need to define is at least 8 days before the current date.
At the current time, the Exchange “Extended Message Trace” doesn’t provide an option to perform a query based only on a date range.
To be able to use the Exchange “Extended Message Trace” we will need to use at least one additional filter.
In our specific scenario, we would like to trace E-mail message that was sent to an organization recipient named – Alice.
Select specific recipient choose the option add recipient…

In the following screenshot, we can see the window that enables us to choose the required recipient.
Choose the required recipient name (alice@o365pilot.com in our scenario) and then click on the add -> button and OK

After we have defined the custom date range, we can see a ” new section” that was addressed to the Exchange Online message trace.
The “new section” is actually the “Extended Message Trace”

To be able to get a detailed information from the “Extended Message Trace” choose the option box “Include message events and routing details with report”
Additional options are:
- Report title (the name of the report)
- Notification email address- you can provide an E-mail address of the recipient that will be notified when the task of creating the “Extended Message Trace“ report” will be completed

When we click on the search option to “activate” the “Extended Message Trace” the following message appear the message that inform us that our requests have been submitted.
In the following screenshot, we can see that a “new link” was added.
Later on, we will use this link for downloading the required CSV file.
The average estimated time that will be needed for creating the required CSV file is 1-2~ hours.

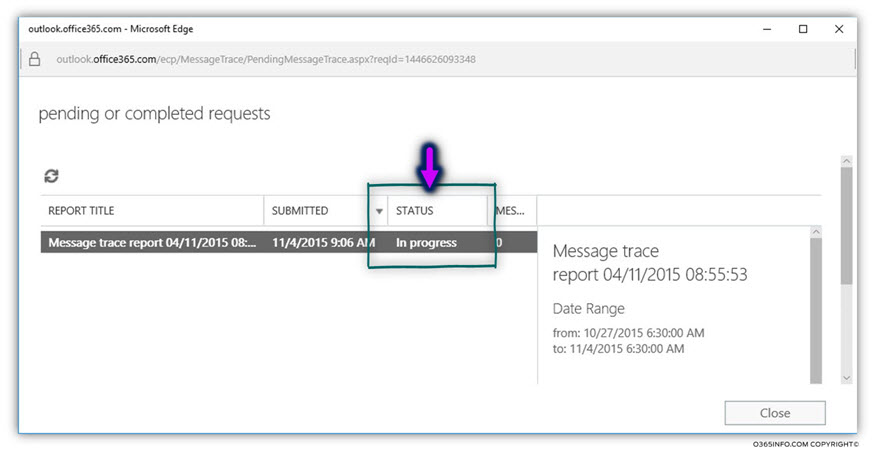
In the following screenshot, we can see that if we click on the link before the report was completed, we can see that the status is “in progress”
Analyzing the data from the Extended Message Trace results | Step 2#2
The following section includes two parts:
- Download the CSV File from the Extended Message Trace results – our basic assumption that we have already “activate” the requests for the Extended Message Trace and after some time (1-2~ hours) the log file is ready for us
- Analyzing the data from the Extended Message Trace results by using excel – in this section we will demonstrate how we can use the Microsoft excel abilities to display the data in a “readable” and convent presentation.
Download the CSV File from the Extended Message Trace results
To be able to download the CSV file that was created by the Extended Message Trace use the following instructions:
- Log into Exchange Online admin management
- On the left menu bar choose – mail flow
- On the top menu bar, choose message trace
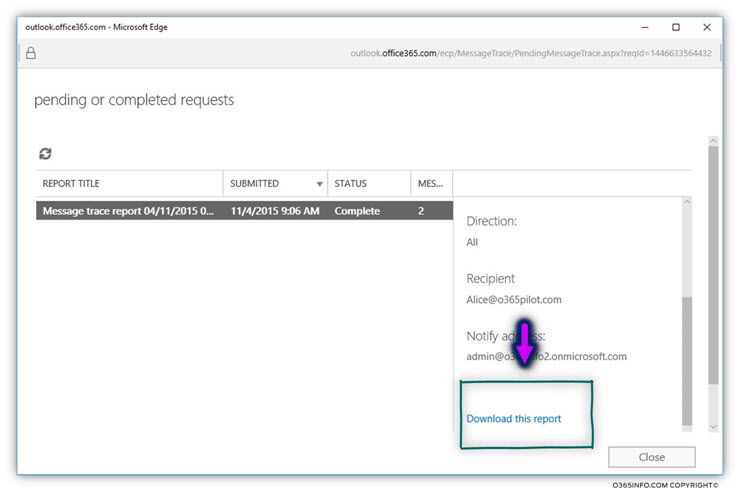
Click on the link named – View pending or completed traces
In the following screenshot, we can see the link that will enable us to download the CSV file.
Another option to download the Log file is in a scenario in which you add an E-mail message in the former step in which create the Extended Message Trace query.
In the former step, we have provided the E-mail address of the person for which a mail notification will be sent when the log file is ready.
In the following screenshot, we can see an example of the E-mail message that was sent by Exchange Online.
To be able to download the log file (CSV file) you click on the “here” link

Analyzing the data from the Extended Message Trace results by using excel
In the following section, we will demonstrate how we can use Microsoft excel as a tool that will enable us to display the information in the CSV file in a clear and “friendly” way.
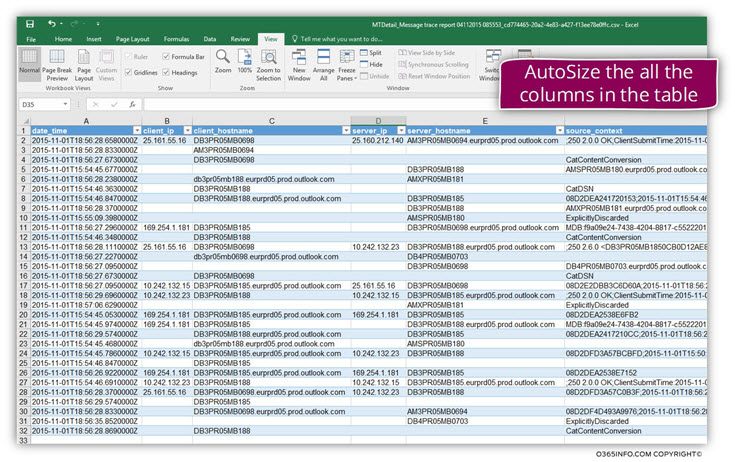
In the following screenshot, we can see the content of the CSV file that was created by the Extended Message Trace
To be able to display the information in a friendlier way, we will use the excel “table” design.
1. Select the A1 cell and use the key combination SHIFT + CTRL + END
This key combination will automatically select only the cells with data

In the following screenshot, we can see that only cells with data were selected.

2. Choose the Insert menu and click on the Table icon

In the following screenshot, we can see that excel “understand” what is the table scope \range.

In the following screenshot, we can see the results:
- Excel create a special design for the table row headers
- Assign filter option to the table row headers
- Apply table style for the table linens

3. To be able to scroll down the data and continue to view the row headers, we will “freeze” the row headers by choosing the View menu, Freeze Panes and then choose the option – Freeze Top Row

The last step that will enable us to display the information in a more convenient way, is the step in which we ask from excel to – automatic expand each of the row widths so we can see all of the information that appear in the excel cell.
Select the entire excel sheet (CTRL +A)
Double click on the line that “separate” column A from column B.

In the following screenshot, we can see the result: the excel row width is automatically expanded
Additional reading
We really want to know what you think about the article
The post Performing an Extended Message Trace in Office 365 appeared first on o365info.com.